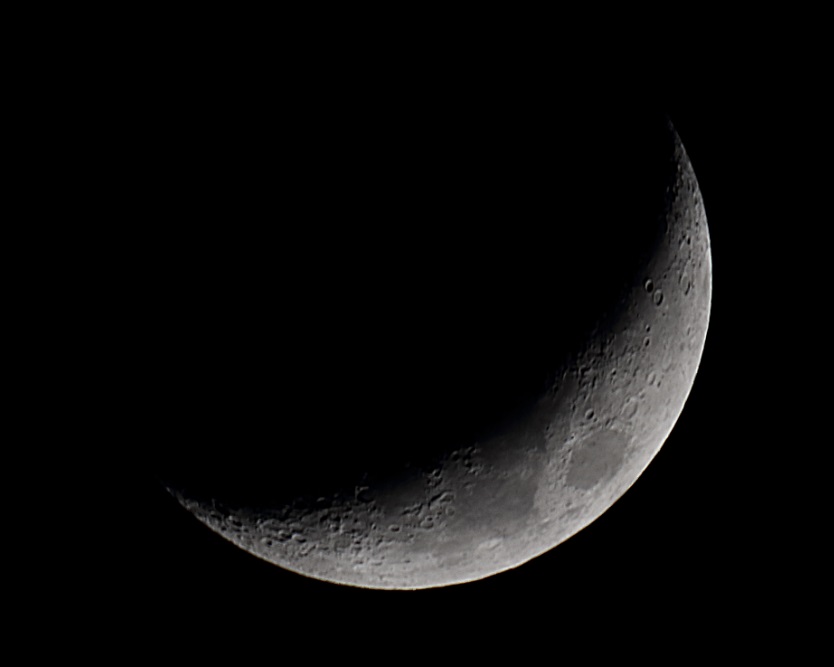
2021 Snow Moon
Reply
Looking back, the “Great comet of 2020″ C/2020 F3 NEOWISE was a fantastic sight and well worth the 3am alarm to snap some photos back in July. But comet images are notoriously difficult to work with. Should I also add that in older times, comets were often seen as a bad omen, the bearer of bad news? Cough, cough COVID-19 cough…
Anyways, back to astronomy… There are essentially two types of photo registration (alignment) software out there: 1) Deep Sky which uses pin-point stars to perform alignment; 2) Lunar/Planetary uses the large “disk” of a planet or Moon to align based on surface details.
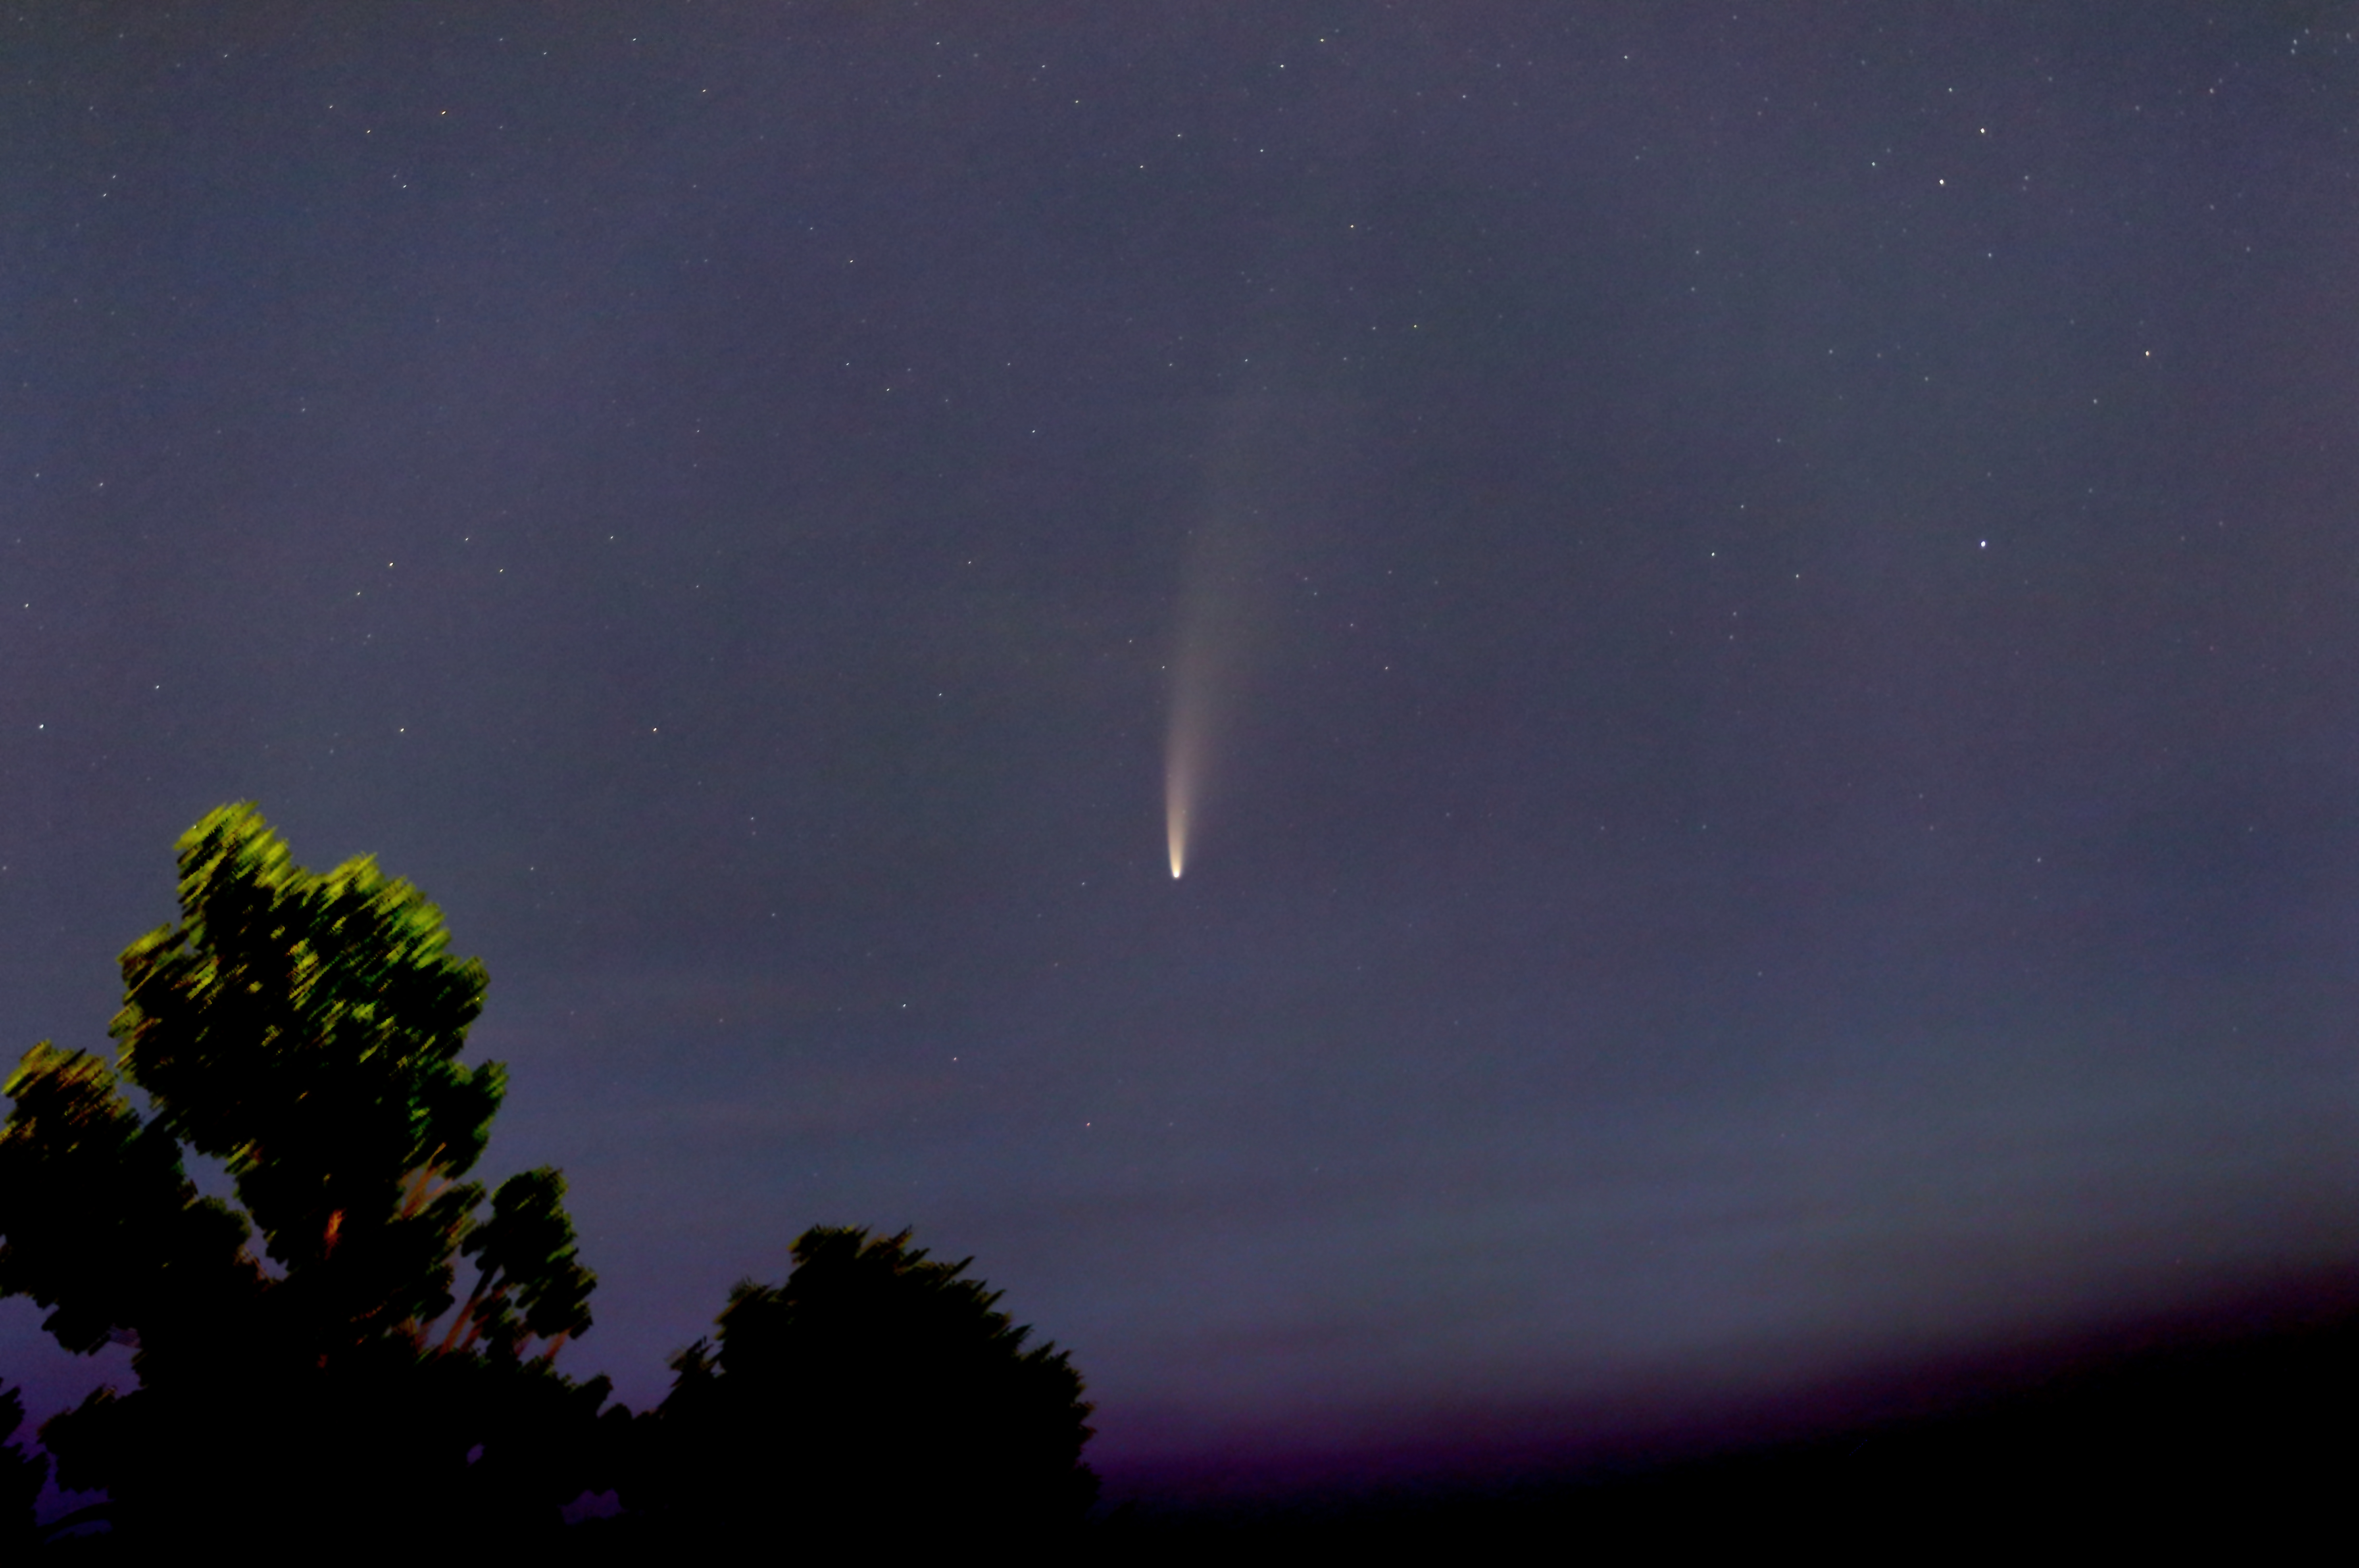
So when you capture long wispy comets like the RAW image below, software like DSS or Registax just can’t cope.
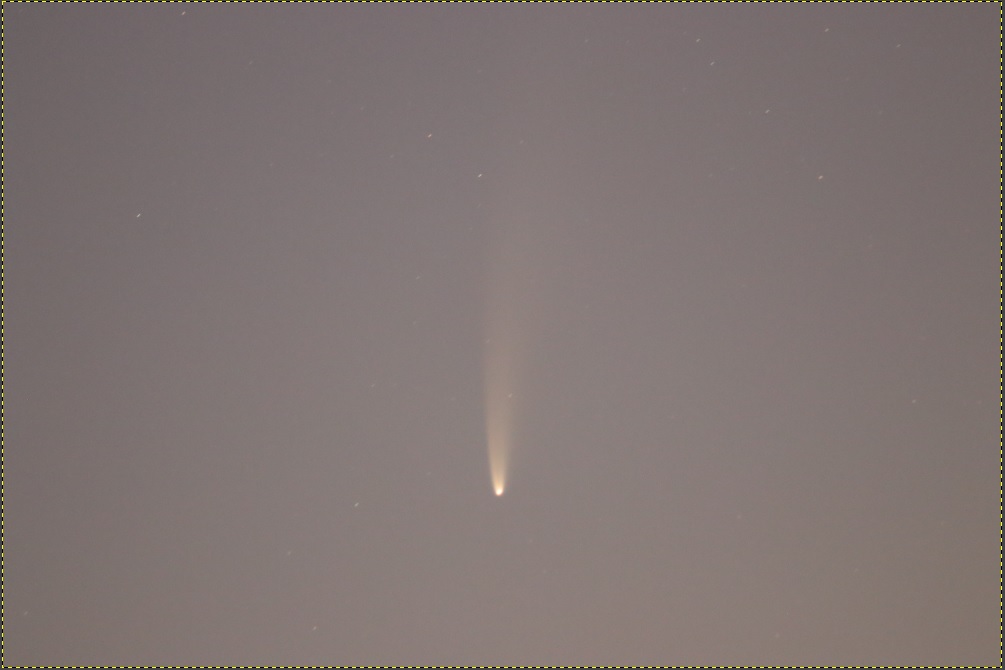
I turned to standard photo-editing software for a manual alignment and stacking. This is essentially opening one “base” image and then adding a 2nd image as a new layer. I change that 2nd layer to be overlaid as a “Difference” and manually align this 2nd layer to match the base layer. Once that is done I change the layer mode to Addition, and then hide this 2nd layer. Repeat the steps for a 3rd, 4th, 5th, etc. layers until you’ve added all your images. Always aligning with the “base” image to ensure no drift.
If you simply add all those layers up, you will get one very bright image because you are adding pixel intensities. You can do that and then work with the Levels and Curves to bring it back down, or if like me, working with GIMP, then use the Py-Astro plug-ins to do the merging and intensity scaling in a single step with a Merge all layers. Py-Astro can be downloaded here. I haven’t explored all that the plugins have to offer, that will hopefully be in another blog.
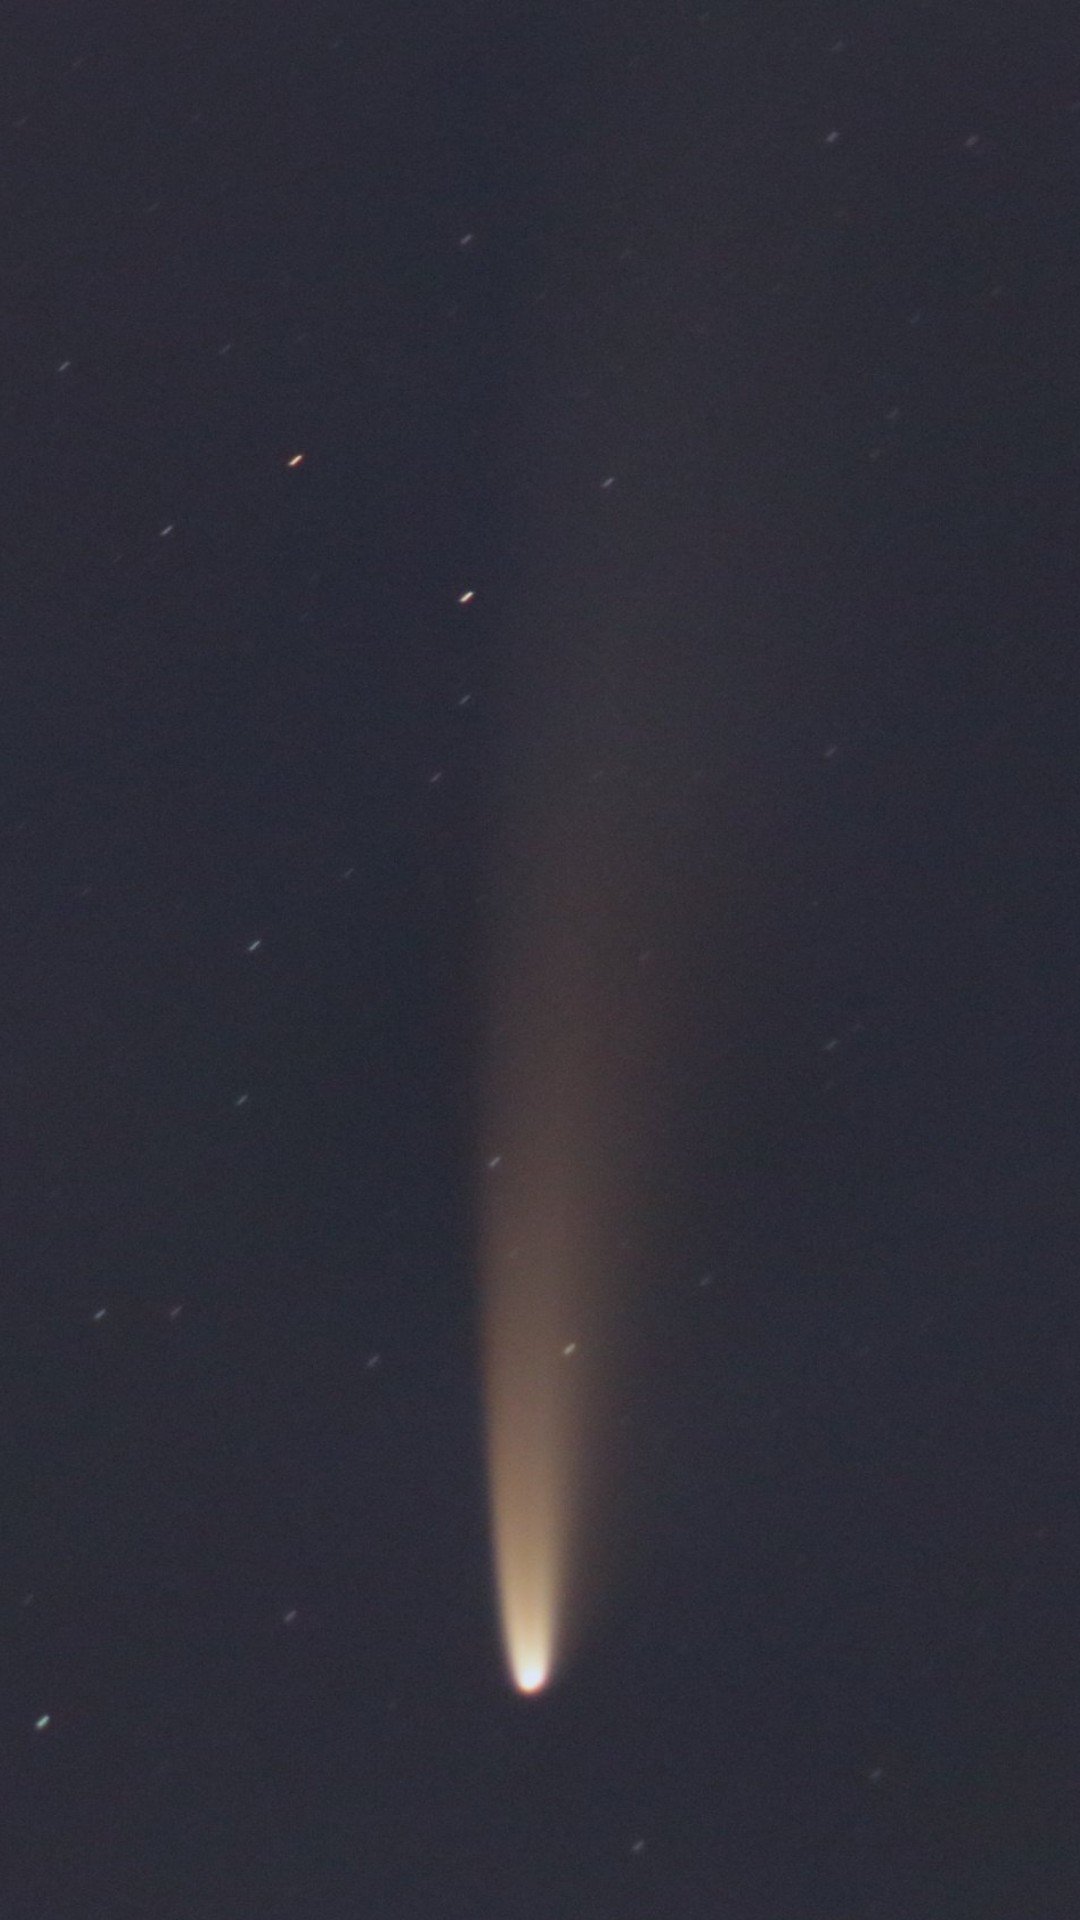
Stacking 11 individual frames results in an improvement over a single RAW image (image below). With the stacked image, I’m able to work with the intensities to darken the sky while keeping the comet tail bright.

However the sky gradient is pretty bad, due to the camera lens and because at 4am the sun is starting to shine on the horizon. So off to IRIS to correct the background gradient. From GIMP I save the files as a 16BIT FIT that I can use in IRIS. For steps on how to do this, see my blog about how to remove the sky gradient.
After a quick spin in IRIS, I’m back in GIMP for final color and intensity adjustments, I boosted the BLUE layer and adjusted the dark levels for a darker sky.

Ever since Photoshop (and other editing software) allowed user to manually manipulate pixels there has been edited pictures. And with the computing power available at our fingertips and some built-in tools it’s surprisingly simple to “stich” together two photos. So full disclosure, the image below is “Photoshopped”.

I decided as an exercise to see how to insert into a nighttime skyline a photo of the Moon photo taken with my telescope.
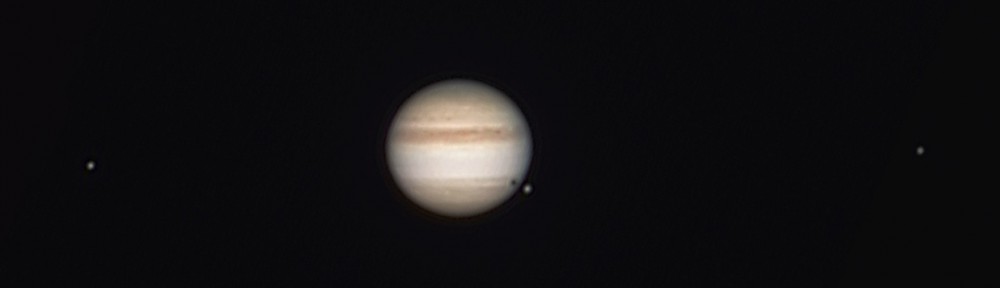
The New York city skyline was taken by me a visiti of the Empire State Building in October last year (pre-pandemic) with a Canon 80D, 17mm F4.0 lens at 1/50s ISO 6400. The Moon is with the same camera body, but paired to a Skywatcher 80ED and I had the settings at ISO 200 and 1/20s. There is no software scaling of either photos, they are stitched “as is”.
This image was done with GIMP, I also inserted 2 “blurred” layers to create a small amount of haze around the moon to make it look a little more natural. The Moon was purposely placed “behind” a skyscraper to give it an element of depth and lowered the color temperature.
So dig through some of your old photos and start experimenting…
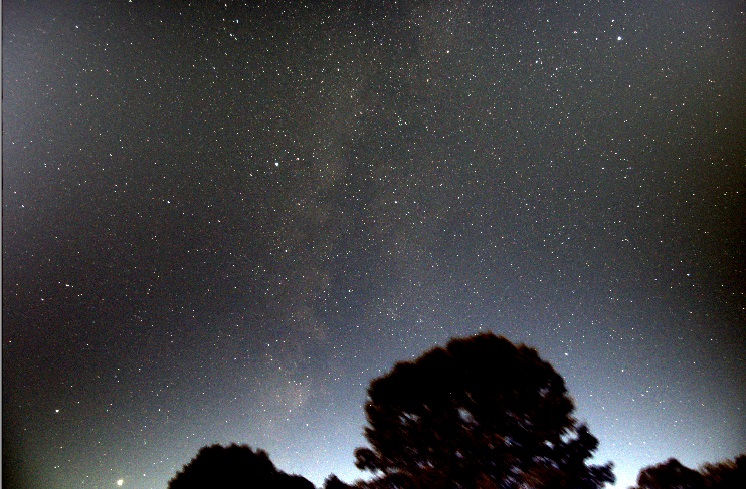
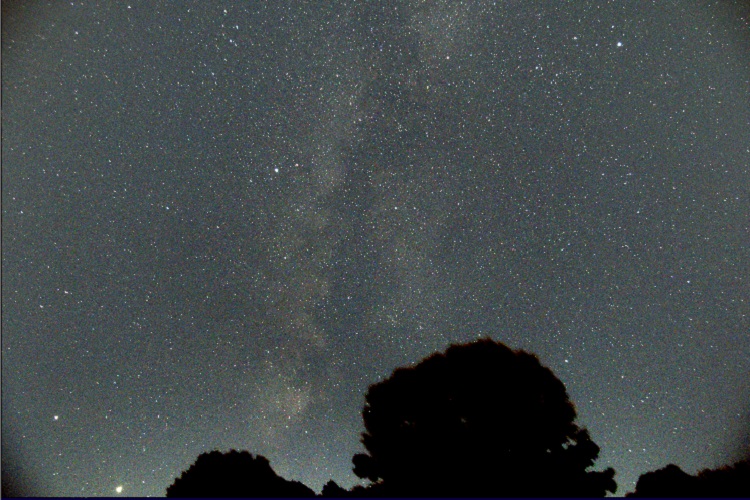
The simplest form of astrophotography is nothing more than a camera on a tripod shooting long exposures. However by the time you get around to stacking and stretching the levels of your photos to accentuate various elements, such as the Milky Way, the sky gradient will become more apparent. That gradient can come from city lights, the Moon up above and the thicker atmosphere causing light to disperse at low angles to horizon. Normally the wider the field of view, the greater the gradient.
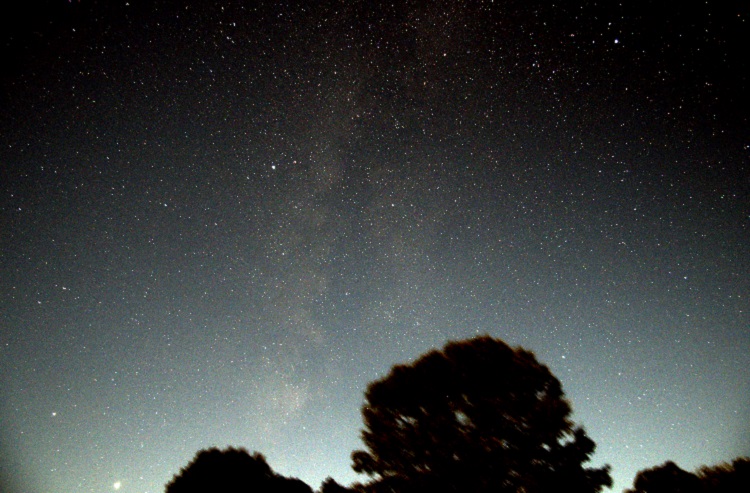
Below is a RAW 20-second exposure of the Milky Way near the horizon taken with a Canon 80D equipped with a 17mm F4.0 lens. The background has a slight gradient; brighter at the bottom. No all that bad.

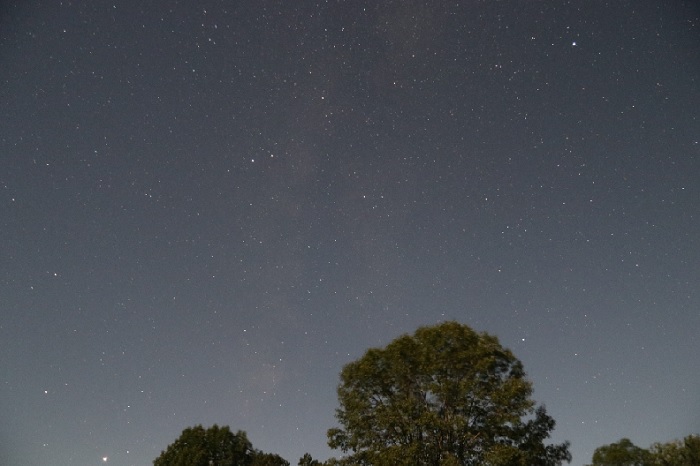
But once you stack multiple exposures and stretch the levels to get the Milky Way to pop out, the gradient only gets worse.
There are various astrophoto software that can remove the sky gradient. The one that I’m familiar with and have been using is IRIS. I know the software is old, but it does a great job. So after I’ve completed my registration and stacking of images with DeepSkyStacker (see my Astrophotography in the City article), the next step is to open the resulting image with IRIS.
Once the stacked image is loaded in IRIS, head over to the Processing menu and select Remove gradient (polynomial fit) … Actually to get the best results you need to have the background and color corrected as well as trimming the edge of your photo. Got that covered here.

The following menu will appear.
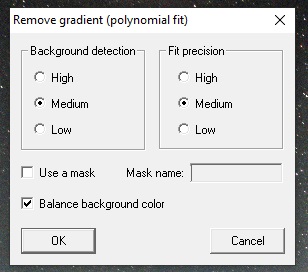
Normally the default settings (as above) will work well. But this image has some foreground content (trees) and that will cause the result to look a little odd. The algorithm is designed to avoid sampling stars, but not so good when there is foreground content like the trees at the bottom of the image.
To correct this you must use the gradient removal function with a mask. The quickest way to create a mask is using the bin_down <value> command. This will change to white all pixels with intensities below <value>, and make black all pixels above it. Areas in black will not be used for sampling, while those in the white areas will. A little trial-and-error is sometimes necessary to select the right value.
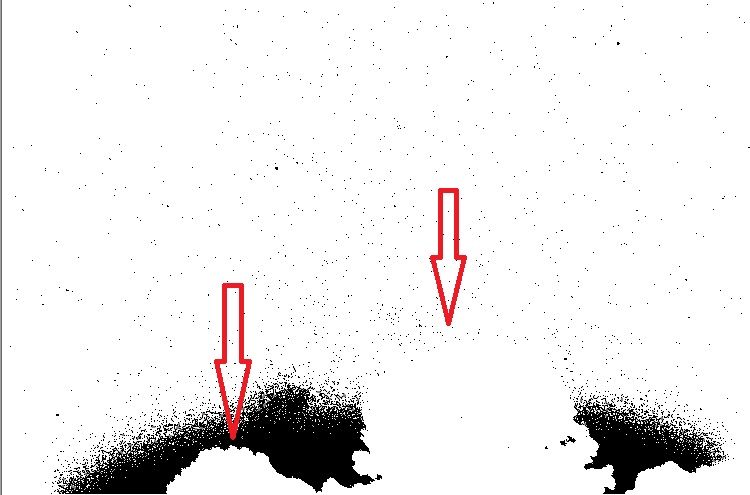
In this case, even with the right bin_down value, the trees that I want to mask are not black, hence I will use the fill2 0 command to create black boxes and roughly block out the trees.
Below is the result after using multiple fill rectangles to mask the trees. This does not need to be precise as the mask is simply used to exclude areas from sampling. It is not like a photo-editing mask.
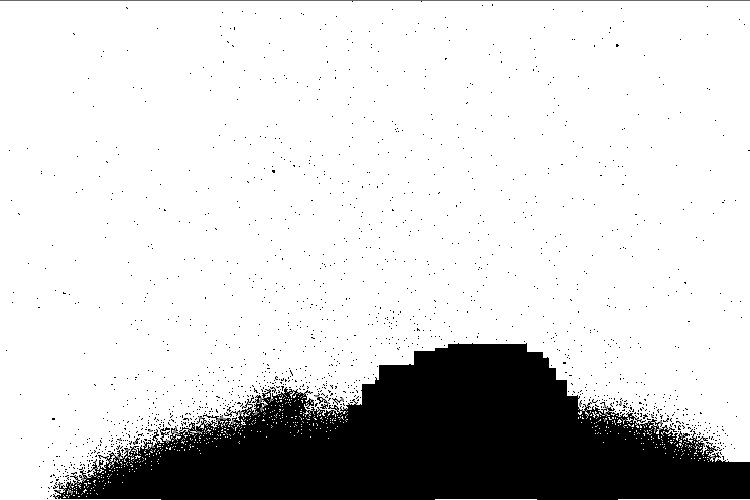
The resulting mask is saved (I called it mask), and I load back the original image, this time using the gradient removal with the mask option selected.

The program generates a synthetic background sky gradient, based on thousands of sample points and an order 3 polynomial. The image below lets you see the synthetic sky gradient the algorithm generated. This is what will be subtracted from the image.


The final image below is much better and more uniform. There are no strange dark and bright zones like the attempt without the mask.
If we compare the original raw images with the new stacked, stretched and sky gradient removed photo the results are pretty impressive.

When observing a comet, what we see is the outer coma; the dust and vapor outgassing from the nucleus as it gets heated from the Sun.
So I decided to take one of my photos taken with my Skywatcher 80ED telescope (600mm focal length) and see if I could process the image to spot where the nucleus is located.
This can be achieved by using the MODULO command in IRIS and viewing the result in false color. The results are better if you do a logarithmic stretch of the image before the MODULO command. It took some trial-and-error to get the right parameters, but the end results isn’t so bad.

For the fun of it I tried to see if I could calculate the size of the comet nucleus using the image. At the most narrow the nucleus on the photo spans 5 pixels. Based on a previous plate-solve result I know that my setup (Canon 80D and Skywatcher 80ED telescope) results in scale of 1.278 pixels per arc-second. Then I used Stellarium to get the Earth-coment distance on July 23rd (103.278 M km)
When I plugged in all the numbers I get a comet nucleus size of approximately 2000 km, which to me seamed a little on the BIG size.
Sure enough a little research revealed that measurements made by Hubble points to a 4.8 km ball of ice. So yeah, I’m quite far from that… but it was fun to give it a try.
I live in a heavily light polluted city, therefore unless it’s bright, I won’t see it. But boy was I ever happy with the outcome of this comet! In my books C/2020 F3 (NEOWISE) falls in the “Great Comet” category, and it’s by far the most photographed comet in history because it was visible for so long to folks on both sides of the globe.
My last encounter with a bright comet was in 2007 with periodic 17P/Holmes when it brightened by a factor half a million in 42 hours with this spectacular outburst to become visible to the naked eye. It was the largest outburst ever observed with the corona becoming temporarily the biggest visible object in the solar system. Even bigger than the Sun!.

So when the community was feverishly sharing pictures of the “NEOWISE” I had to try my luck; I wasn’t about to miss out on this chance of a lifetime.
I have to say that my first attempt was a complete failure. Reading up when it was the best time to try to photograph this comet most indicated one hour before sunrise was the right time. So I checked on Google Maps where I could setup for an un-obstructed view of the eastern horizon (my house was no good) and in the early morning with my gear ready at 4am I set off. To my disappointment and the “get-back-to-bed-you-idiot” voice in me, it didn’t work out. By the time I got to the spot and had the camera ready, the sky was already too bright. No comet in sight, and try as I might with the DSRL, nothing.
Two evenings later and another cloudless overnight sky I decided to try again, but this time I would make it happen by setting the alarm one hour earlier: 3am. That is all that it took! I was able to set-up before the sky could brighten, and then CLICK! I had this great comet recorded on my Canon SD memory card.
I didn’t need any specialized gear. All it took was a DSLR, a lens set to manual focus, a tripod and 5 seconds of exposure and there was the comet. I snapped a bunch of frames at different settings and then headed back home to catch the last hour of sleep before starting another day of work. Lying in bed I felt like I had accomplished something important.
As the comet swung around our Sun and flipped from a dawn to a dusk object I decided I should try to photograph it once again, but this time with the Skywatcher 80ED telescope. At that point, the comet was dimming so every day that passed would be more difficult. It was only visible in the North-West horizon at sunset, which meant setting up in the front the the house, fully exposed to street lights. Not ideal, but I had nothing to loose trying.
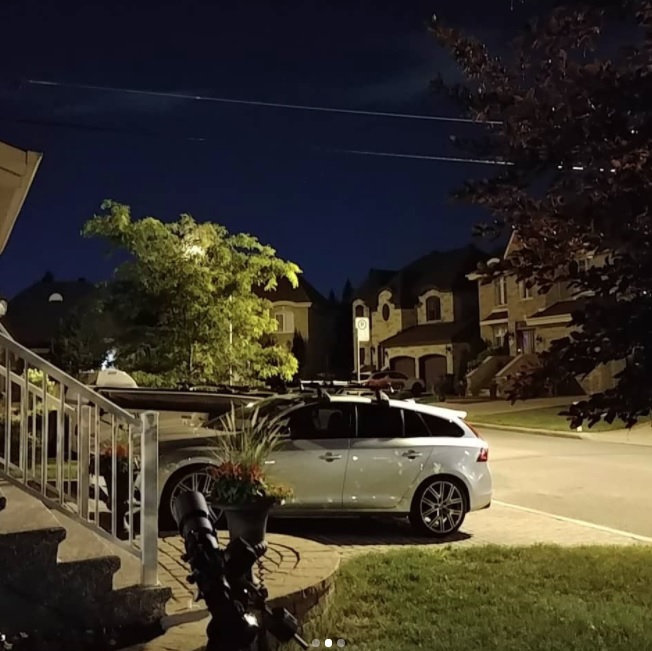
I used our tree in the front yard to act as a screen and was able to locate and photograph this great comet. Polar alignment wasn’t easy, and when I had the comet finally centered and focused with the camera, overhead power lines were in the field of view. I decided to wait out 30 minutes and let the sky rotate to the lines out of the view. Besides, it will get darker anyways which should help which the photo. But I also realized that my “window” of opportunity was small before houses would start obscuring the view as the comet would dip to a lower angle with the horizon.

I’m sure in the years to come people will debate if this was a “Great Comet”, but it my books it’s definitely one to remember. It cemented with me the concept that comets are chucks of “dirty ice” that swing around the sun. Flipping from a dawn to dusk observable object after a pass around the Sun is a great demonstration of the elliptical nature of objects moving in our solar system.
Now waiting for the next one…
When I first started astro-photography you had people like me who were just starting off and did it on the cheap with a webcam, a small newton telescope and basic mount, or you could fork out an astronomical amount of cash to get really specialized gear.
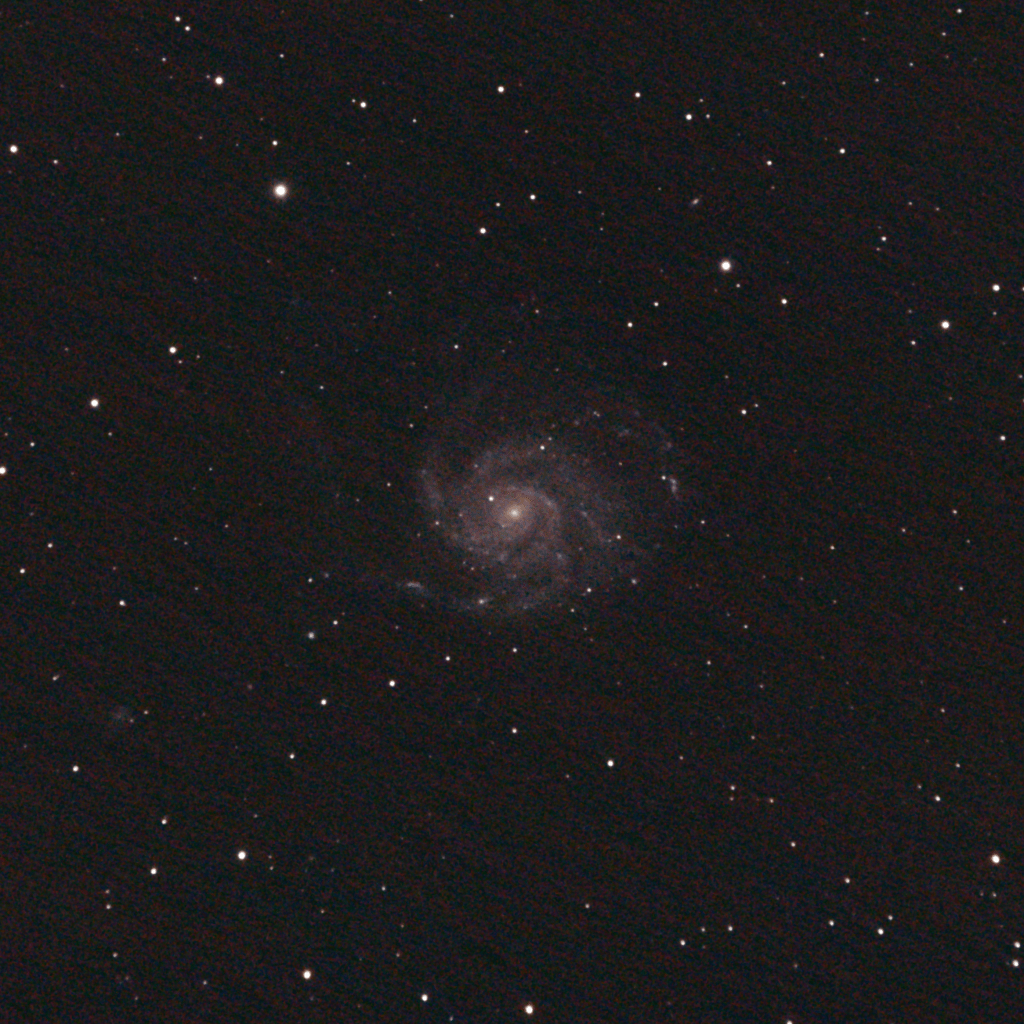
Below is a photo of Messier 101 the Pinwheel Galaxy taken last week with a $500 Skywatcher80ED telescope and Canon80D DSLR on an unguided mount.
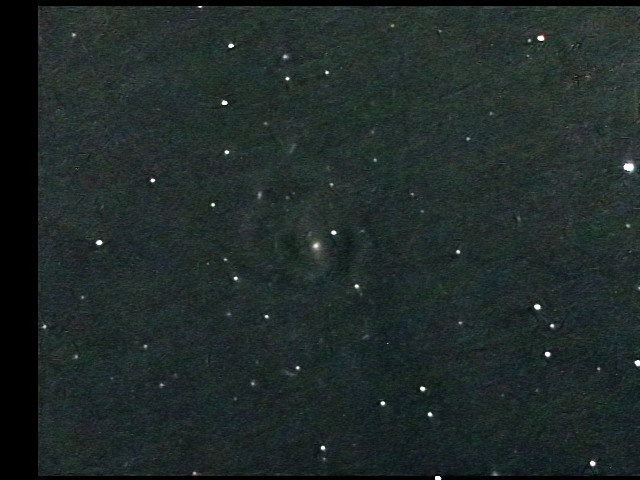
I agree that it’s not as fancy as some of the research grade setups or some other hobbyist out there, but it’s many times better than my first try in 2008 (below).
What has changed? Well for starters the optical quality of beginner and intermediate telescopes has dramatically improved, largely thanks to automated and computerized lens and mirror shaping and polishing. Yes they are made in China, but so are most carbon-fiber bikes and the latest smart-phones. As the process is automated, quality can be tightly controlled and the results are hard to beat. A quality image starts by being able to collect and focus light properly, and for $500 you can get some really descent optics.
Another great boost is improvements in camera sensors. DSLR became a go-to solution because it was a cheap way of getting a large sensor with low read noise and good sensitivity. Of course there are still monochrome specialized astro-gear available for backyard astronomers, but the one-shot color results of a DSLR are hard to match. DSLRs offer ease of use, compatibility with most software and are the biggest bang-for-your-dollar compared to specialized astro-cameras.
And the third major improvement in 10 years is computing power. A night imaging session can easily generate 1GB of RAW images that need to be processed. Transferring and storing data is now cheap, and software has followed in lock-step to handle the increase in image size and quantity. Registering and stacking software can easily handle at the pixel-level hundreds of images each with millions of pixels. Sure it might take 20 minutes to process 120 photos from the DSLR, but that is a far cry from the hours of computer crunching. If your parameters were wrong, you just wasted a hour….
So while light pollution is choking the stars out of the night sky, one easy way to gain access to the universe is through astro-photography. It’s now easier and cheaper than ever to get good results with a simple setup.
Most of the world is self-isolating to reduce the spread of COVID-19, and we can’t even keep ourselves busy with daytime sunspot observations. The sun is completely free of any spots. Below is an image taken on April 4th.

Skywatcher 80ED, Thousand Oaks Solarite filter, Canon 80D
So far this year we’ve had 70 days without sunspots, that is 74% of the days with no sunspots. We are at the lowest part of the sun cycle, however things should change soon.

Maybe by the fall we should have something a little more interesting to look at.
UPDATED 07-Apr-2020: Cropping instead of reducing image size
The Moon should be your first target when you start off in astro-photography. It’s easy to find, does not require dark skies and you don’t need specialized gear.
So now that you’ve found yourself will a bunch of RAW photos of the Moon you’re wondering what to do next. You took them with the RAW setting right? All astro-photo need to be taken in RAW to conserve as much information as possible because all the processing is done at the pixel-level and you want to retain as much detail as possible.
Registax is a great software for Moon and planetary stacking. Unfortunately I find it has two drawbacks:
Luckily there are ways around it… You must be wondering, why use Registax if it can’t deal with large RAW CANON files? It’s because it can align and stack images by sub-dividing your image to address atmospheric turbulence and it has one of the best wavelet analysis tool to sharpen images.
Here is what you must do: convert your RAW files to 16-bit .TIF and reduce the image size (not just the filesize, but the number of pixels in the image). I use Digital Photo Professional 4 that came with my CANON camera, it can be downloaded. For other camera brands or photo software should allow you to also convert RAW into TIF format.
There are two possible ways to reduce the image size:
Highlight the desired RAW files and select File – Batch Process
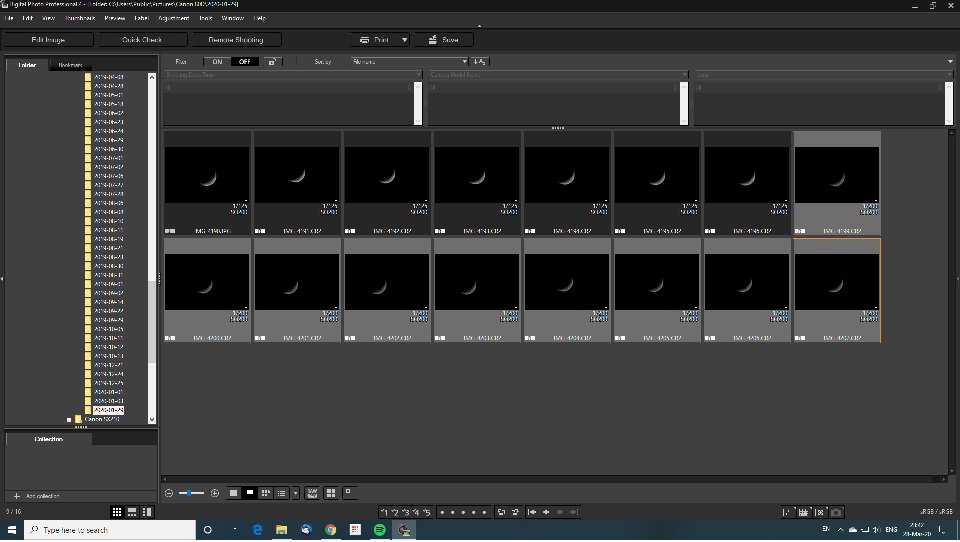
DDP4 – Main window. Selecting the desired files
In the Batch Process window select to save the files as 16-bit .TIF and ensure that you resize the images. Normally 50% reduction will do the trick. In my case a reduction to 3000 x 2000 was sufficient.

DPP4 – Batch process window : Saving as .TIF and Resizing the images
Resizing will reduce the size of the Moon, and Registax has a better chance of dealing with alignment. It’s also a simple way to reduce noise and improve a less-than-perfect focused image.
If you don’t want to shrink the image, an alternative is to crop the image. With DPP4 it’s possible to apply the same crop setting to all the images, however it must be done one at a time.
First select one of the images and open the Tool palette. Select the cropping tool and the area you wish to crop. Once that is done, use the Copy button in the Tool palette to record your crop setting.

DDP4 – Cropping with the Tool palette
You then need to open each file individually and Paste the crop setting using the Tool palette. Once you’ve done all of that, you can select all your images and run the Batch process to save them to 16-bit .TIF as explained above. No need to resize if you’ve cropped.
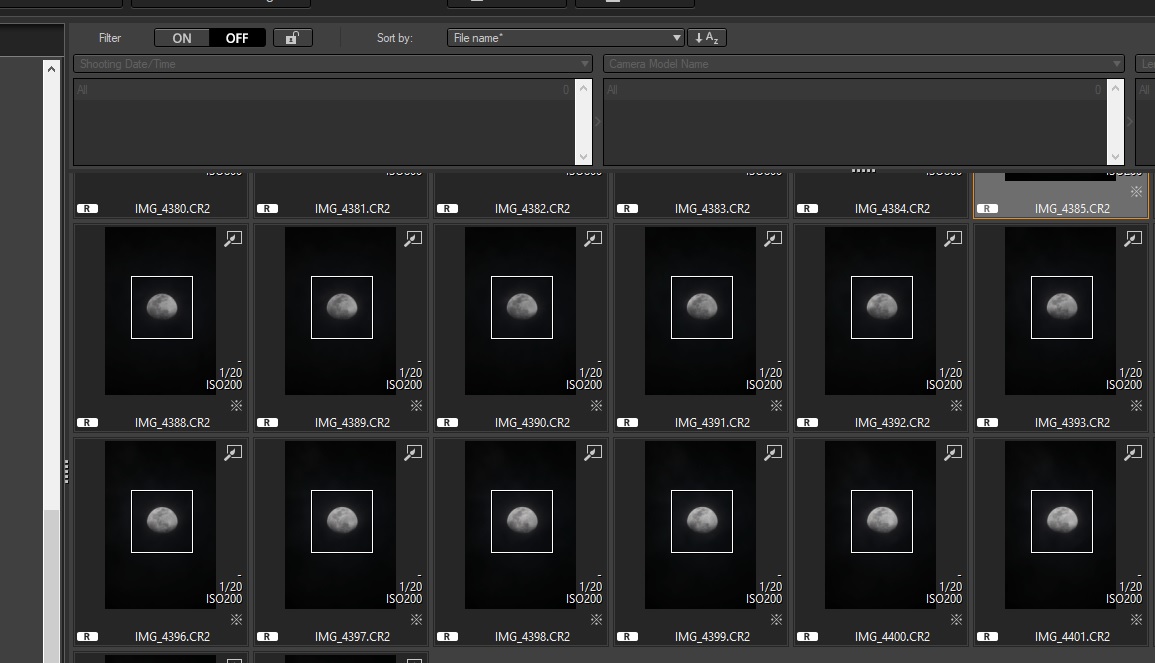
DDP4 – Image selection pane shows the crop box around each image.
Then it’s simply a matter of opening the resulting .TIF images in Registax as you would normally.

Once the alignment completed and the images stacked, your photo can be saved

But before you close the program, head over to the Wavelet panel and tweak the image to get as much detail out of the moon’s cratered surface.
If you compare both images it is clear that the 2nd one has sharper details.
As always, the best is to try different things and experiment with your setup to see what works best.
Equipment used for the above photos:
Canon 80D
Skywatch 80ED (600mm F7.5)
1/250sec ISO 200
Mark Bailey
Electronics plus software tips and tricks
Clear Skies and Clean Shutdowns
A site dedicated to learning Astronomy One Step at a Time
Charles Bracken
one post at a time
Astronomy, space and space travel for the non scientist
My adventures with amateur astronomy
Discoveries, Journeys & Milestones in Space Exploration
Welcome to a journey into our Universe with Dr Dave, amateur astronomer and astrophotographer for over 40 years. Astro-imaging, image processing, space science, solar astronomy and public outreach are some of the stops in this journey!
Observations, mostly astronomical from Limavady, UK (55N, 6.9W).
Photography Blog of James Silvester
Astronomy and Amateur Radio
The latest news on WordPress.com and the WordPress community.