Backyard Astrophoto – Improvements in the Last 10 Years

When I first started astro-photography you had people like me who were just starting off and did it on the cheap with a webcam, a small newton telescope and basic mount, or you could fork out an astronomical amount of cash to get really specialized gear.

Below is a photo of Messier 101 the Pinwheel Galaxy taken last week with a $500 Skywatcher80ED telescope and Canon80D DSLR on an unguided mount.

Messier 101 - Pinwheel Galaxy
Messier 101 – Pinwheel Galaxy (Skywatcher 80ED and Canon 80D)

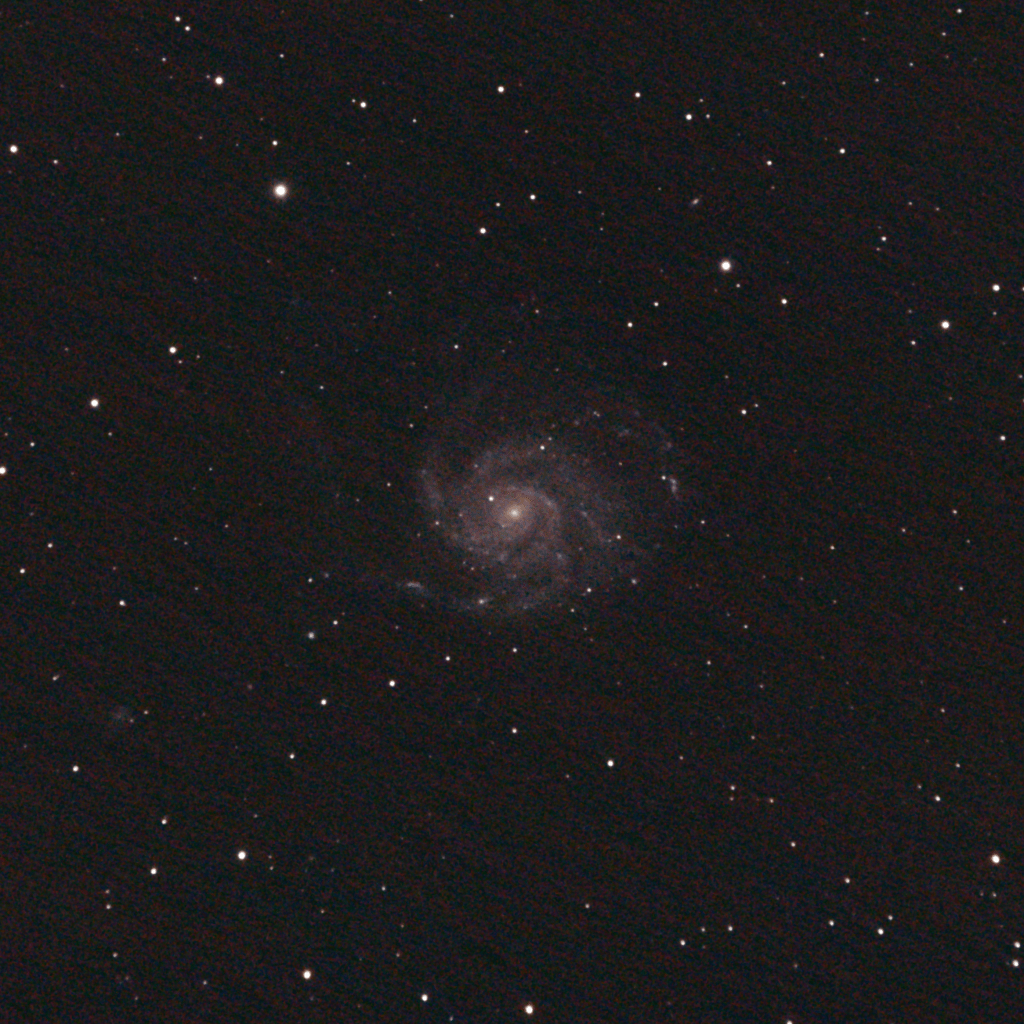
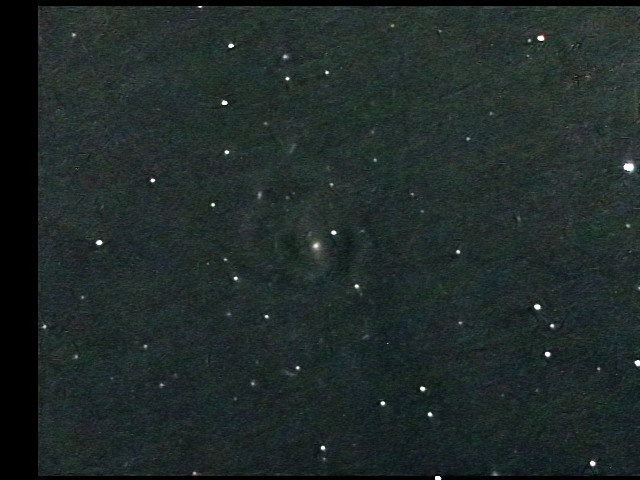
I agree that it’s not as fancy as some of the research grade setups or some other hobbyist out there, but it’s many times better than my first try in 2008 (below).

My results of Messier 101 in 2008

What has changed? Well for starters the optical quality of beginner and intermediate telescopes has dramatically improved, largely thanks to automated and computerized lens and mirror shaping and polishing. Yes they are made in China, but so are most carbon-fiber bikes and the latest smart-phones. As the process is automated, quality can be tightly controlled and the results are hard to beat. A quality image starts by being able to collect and focus light properly, and for $500 you can get some really descent optics.

Another great boost is improvements in camera sensors. DSLR became a go-to solution because it was a cheap way of getting a large sensor with low read noise and good sensitivity. Of course there are still monochrome specialized astro-gear available for backyard astronomers, but the one-shot color results of a DSLR are hard to match. DSLRs offer ease of use, compatibility with most software and are the biggest bang-for-your-dollar compared to specialized astro-cameras.

And the third major improvement in 10 years is computing power. A night imaging session can easily generate 1GB of RAW images that need to be processed. Transferring and storing data is now cheap, and software has followed in lock-step to handle the increase in image size and quantity. Registering and stacking software can easily handle at the pixel-level hundreds of images each with millions of pixels. Sure it might take 20 minutes to process 120 photos from the DSLR, but that is a far cry from the hours of computer crunching. If your parameters were wrong, you just wasted a hour….

So while light pollution is choking the stars out of the night sky, one easy way to gain access to the universe is through astro-photography. It’s now easier and cheaper than ever to get good results with a simple setup.

Messier 3 and a Fast Moving Star

A few weeks ago after taking some photos of Jupiter, I changed my setup to do some long exposures on an easy target: a globular cluster. Unfortunately I forgot to note down the name of what I had photographed!  So a few weeks later when I found the time to process the images I was at a loss to identify what Messier object it was. However, after an evening of matching up stars surrounding the cluster and I was able to correctly identify it as Messier 3.

Globular Cluster - Messier 3 (Benoit Guertin)

Globular Cluster – Messier 3 (Benoit Guertin)

The above was taken with my Skywatcher 80ED and Canon 80D. It is a stack of 27 x 10sec exposures at ISO3200 on an unguided and roughly aligned mount.

Looking at my archives I found that I had imaged M3 about 10 years ago with the same telescope, so I decided to align both old and new image and see if anything would stand out. And to my surprise, spotted one star that appeared to have shifted. To help identify the star I colorized one of the photos and subtracted from the other (done in GIMP).  All the stars within the field of view lined up except this one; the two colored spots are not aligned!

High PM Star BD+29 34256

High PM Star BD+29 34256

To be sure this wasn’t on an error on my part I did a bit of research and found it to be a know high proper-motion star BD+29 34256.

It’s not everyday someone with amateur backyard astronomy gear can show how a star has moved in 10 years.

M44 Beehive Cluster

Image

In one of my previous post I mentioned how Messier 44, the Beehive Cluster, would be an easy find the evening of April 22-23, so even if I took this photo on the 21st, the same evening that I took a photo of the Moon, all I needed was to moved a few degrees north after observing the Mooon to image this large open cluster.

Messier 44 - Beehive Cluster. Benoit Guertin - with Skywatcher 80ED and Canon 80D

Messier 44 – Beehive Cluster. Benoit Guertin – taken with Skywatcher 80ED and Canon 80D

Photos of open clusters with small refractors always lack the diffraction spikes that really make the stars stand out.  So a little photo editing did the trick to spice up the image.

Skywatcher 80ED
Canon 80D ISO 3200
Stacked 22 x 10sec

This Weekend – Beehive Cluster

The Beehive cluster, also known as Messier 44 (M44) is one of the nearest open clusters, and therefore one of the largest in the night sky. While open clusters are often too dim to be seen with the naked eye, all you need is a pair of binoculars or a camera with long exposure to see it.

What makes this weekend special is that in the night of the 22nd to 23rd of April, the Moon will pass within 1-1/2 degrees of this cluster.  So finding it will be child’s play.

Messier 44 - Open Cluster

Messier 44 – Open Cluster Benoit Guertin

On April 22nd, simply look for the Moon once the sky is dark, and just above it you will find the Beehive cluster with its 1000+ stars. OK, even with a telescope you won’t be able to see all the stars, but take some time to notice how this group of stars stands out with regards to background stars further away in our galaxy. And while you are at it, consider that nearly 410 years ago, Galileo made the first observation of these stars.

M44_Moon_22Apr2018

From there you can also hop over a to the west and observe the color difference in bright stars Castor and Pollux in the Constellation Gemini. And if you instead decide to go east, the smaller Messier 67 open cluster is also accessible with binoculars.

The Milky Way (Sagittarius to Aquila)

The summer is ideal time to view our galaxy.  Because of Earth’s position with respect to the Milky Way, it runs north-south across the sky.  Anyone with a camera and tripod can easily capture the Milky Way if you are located in a dark area, away for city lights.  We were up north in the Malbaie, Québec area for vacation, so I took some time in the early night to observe and photograph the sky.  Unfortunately, a full Moon was present in early August and the sky would actually brighten past midnight.  The best time was around 11pm for any good viewing and astrophoto. Click on the photo for a high-resolution version.

Milky Way - Sagittarius (just above the trees) to Altair (bright star upper left)

Milky Way – Sagittarius (just above the trees) to Altair (bright star upper left)

Here is a quick run-down of a quick setup if you want to give it a try:

  1. Use as short a focal length as you can, 15mm to 25mm is good.
  2. Set the camera to MANUAL for everything, including the focus and disable any image stabilization. Due to the low light level the camera’s electronic won’t be able to automatically focus or stabilize, so disable them.  It’ll just seek and ruin your setup and photos.
  3. Set the ISO to a high value; 800 on older cameras and 3200 on newer models. Higher ISO will give you a brighter image, but with more noise.  You can test various ISO settings to see which one you are comfortable with.  If you are planning on taking many images and stacking them, you can run with a higher ISO as the stacking process will increase your signal-to-noise ratio.
  4. Set the aperture opening as large as possible. Larger openings bring in more light, but depending on the quality of the optics will distort the stars around the edges of the frame.  If you see that the stars stretch near the edges, simply stomp it down one or two stops. Trial and error is best to find the right setup.  If you’re not sure simply go with a large opening and you can later crop the image if the results isn’t pleasing.
  5. Set to capture in RAW, this is best for post-processing.
  6. Look on your lens and set the focus to infinity; this is where you’ll start. If you don’t know where infinity is, look at a faraway object and manually focus on it.
  7. Mount the camera on a tripod and aim at the desired part of the sky.
  8. If you have live preview, use it to fine-tune the focus to get the stars as small as possible. Don’t forget that you can often ZOOM in on the live preview screen.  If you don’t have live preview (like mine) simply take 3 short test photos (5 seconds each) adjusting the focus in the same direction between each photo. Review the three shots to see which one has the smallest stars and repeat this until you’ve achieved what you believe to be the best image.
  9. Set the exposure time to 20 seconds. With focal lengths in the 15-25mm range the stars will remain relatively round.
  10. Take as many photos as you wish.

You can experience with different setups (F-stop, ISO, focal and exposure lengths) and you’ll be able to review and compare later to see which gives you the best image.  That way the next time you’ll have your GO-TO setup for great shots.

The above was a stack of 4 images taken 17mm F/4, 20 seconds at ISO 800.

I also identified the constellations and some interesting objects in the above shot.

Objects in the Milky Way

Objects in the Milky Way

Wide Field Around Vulpecula

Image

Continuing my wide field photography of the Milky Way I centered on the constellation Vulpecula (little fox) located in the middle of the Summer Triangle.

In the same frame, three Messier objects are identified:  globular cluster M56 and M71; planetary nebula M27.  Interesting fact is star HD189733 (second bright star above M27 in the framed portion) is the nearest extra-solar planet (63 light years) where the presence of water was detected.  But at 700degC, chances for life are pretty slim.

vulpecula_15sep2016_46x30sec_ident

Left to Right: Globular Cluster M71 in Sagitta; Planetary Nebular M27 in Vulpecula; Globular Cluster M56 in Cygnus

The three constellations from left to right are: Sagitta, Vulpecula and Cygnus (also know as Northern Cross).

As a footnote, this was captured with nearly a full moon in a heavily light polluted suburb.  At 30 seconds of exposure time, the luminosity peak was around 75%.

Canon XTi (450D)
50mm F3.2 (ISO 800)
46 x 30sec (23 minutes)

Wide Angle on Constellation Sagitta (Messier 71 and Messier 27)

Image

The fall is a great time for wide-angle photography of the night sky.  The Milky Way passes overhead which provides a chance to capture some dark nebula.  Unfortunately after I had everything setup the 50mm Canon lens drifted out of focus; I only got about 2-3 frames with decent focus.  By frame 14 of 60, it was too out of focus to even register (align) with software.  When set to manual focus that lens is way too loose.

But I managed to capture a hint of my first dark nebula at the bottom half of the image.  Those immense molecular clouds that block out the background stars.  In the following millions of years, these clouds will collapse to create start nurseries and new solar systems.

Messier 71 (Globular Cluster) and Messier 27 (Planetary Nebula) near constellation Sagitta

Messier 71 (Globular Cluster) and Messier 27 (Planetary Nebula) near constellation Sagitta

Globular cluster Messier 71 and planetary nebula Messier 27 are identified in my image around the constellation Sagitta. I’m surprised at how “bright” and blue that nebula turned out.

Photo Details:
Canon XTi (ISO 800)
Canon 50mm F3.2
14 x 30 sec

Messier 53

Image

In a telescope globular clusters are more interesting to observe than your open cluster because they have a distinctive shape.  Globular clusters are odd stellar objects; they are spherical clumps of stars that actually orbit our galaxy’s core.  But not the way you might think; they don’t orbit in the galactic plane, but often perpendicular to it!  This is not unique to the Milky Way, most nearby galaxies have their share of globular clusters.

Messier 53 is a nice example of a globular cluster located in the Coma Berenices constellation.  It also happens to be one of the more distant globular clusters from the Milky Way.

Globular Cluster Messier 53

Globular Cluster Messier 53

Skywatcher 80ED
Canon 400D (ISO 800)
19 x 60sec

For this one I decided to try my luck at 60sec of exposure time, and the results aren’t too bad.  I did have to throw out a few shots due to periodic error causing elongation in the stars.   Also during the stacking a used a sigma 2.3 value to discard anything that fell out of standard distribution to reduce the impact of the few bad images.

Leo Triplet

Image

Small telescopes aren’t ideal for galaxies, unless you aim to snap a picture of the Leo Triplet.  The area around Leo has many galaxies, but the three below (M65, M66 and NGC3628) are brightest and most recognized.

Leo Triplet - M66 Galaxy Group

Leo Triplet – M65 (right), M66 (below) and NGC3628 (upper left)

All three galaxies are of the spiral type, but look different because of their orientation.  NGC3628 is edge-on and the dark band in the middle are dust lanes that cut across it.  This trio is located 35 million light years away.

Skywatcher 80ED
Canon 400D (ISO 800)
32 x 30sec

Crab Nebula – Need Bigger Scope

Image

After my series of open star clusters, I decided to try my luck with the neighboring Crab Nebula (Messier 1).  A single 30s exposure show some signal, but barely above the background light pollution.

Very faint M1, just above light pollution levels

Very faint M1, just above light pollution levels

OK, lets see what the wonders of digital stacking and post-processing can do…

After stacking 28 frames, and various histogram and level stretching, I was able to get the nebula to stand out.  That’s quite an improvement from the single frame from above.

Crab Nebula - Messier 1 - Benoit Guertin

Crab Nebula – Messier 1 – Benoit Guertin

I couldn’t get any color out of it, but I believe the color images of the Crab Nebula that you often see are compositions from narrow band filters, and are “scientific colors”.

Conclusions, need to gather more light and image at a longer focal length.  Even if I increase my exposure time, as the object is small I won’t be able to get much detail out of it.  I could add a barlow to double the focal length, but would also need to further increase my exposure time.  If I try this again, I’d need a 2x barlow and at least 2 minutes exposition, and have everything autoguided.  Not there yet… Best reserved for larger and more powerful telescopes.

Skywatcher 80ED
Canon XTi (400D) ISO 800
28 x 30sec (stacked with IRIS and post-processed in GIMP)