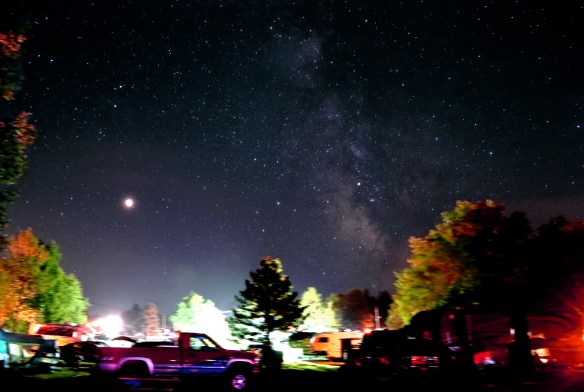
Shooting wide angle long exposures of the sky is always fun, because you never quite know what you will get. On an August night I decided to take a few 20 seconds exposures of the constellation Perseus hoping to catch a few open clusters. However got surprised by the faint glow of Messier 33 (Triangulum Galaxy) in the photos. This is the furthest object that can be observed to the naked eye, located 2.7 million light years away, and part of the Local Group which includes Andromeda and our Milky Way.
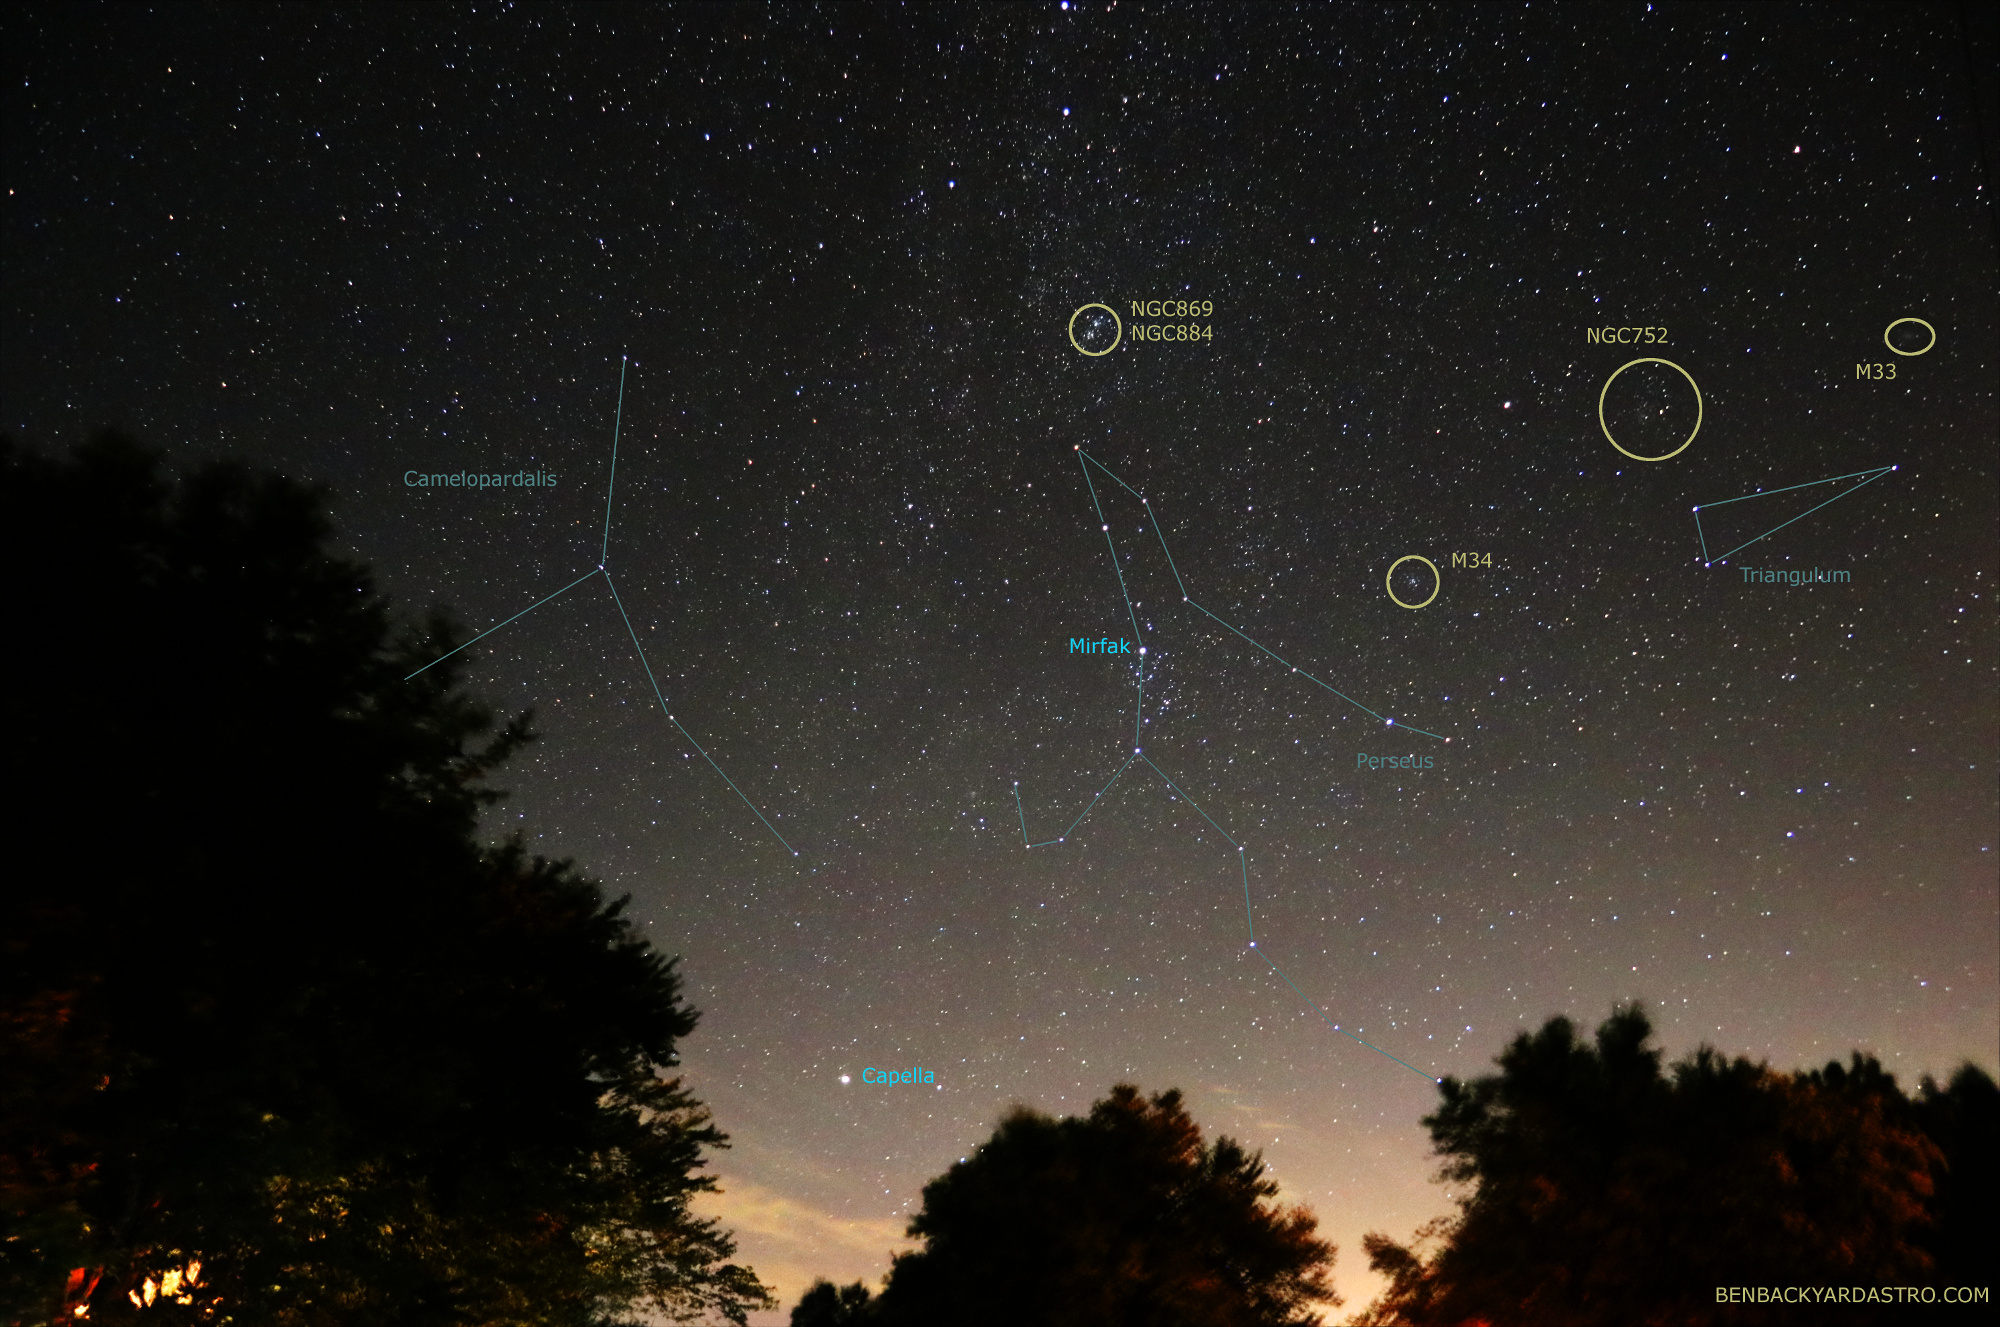
Constellations Perseus and Triangulum (Benoit Guertin) – CLICK FOR FULL SCREEN
4 x 20 seconds
ISO 6400
17mm F4.0
Canon 80D
August 30, 2019