
In Part 2, I explained the steps involved in improving the signal to noise ratio (SNR) by stacking multiple images and removing camera sensor noise (DARK and OFFSET frames). In this third article I will deal with sky gradient removal and white balance.
IRIS is a powerful astrophotography tool, and learning how to use the numerous commands can lead to fantastic photos. You can find good documentation and procedures on the IRIS website, so I won’t go in too much detail here.
While IRIS can process images in 32-bit, it cannot open the 32-bit FIT files generated with DSS. With my image still opened in DSS from the previous step (or by opening the Autosave.fit created by DSS), I select to save the image as a 16-bit FIT such that it can be opened in IRIS.
Below is the result in IRIS, and two things become apparent: 1) the sky has a gradient due to the light pollution from city lights; 2) the sky has a pink hue. These two elements will be corrected in this article.
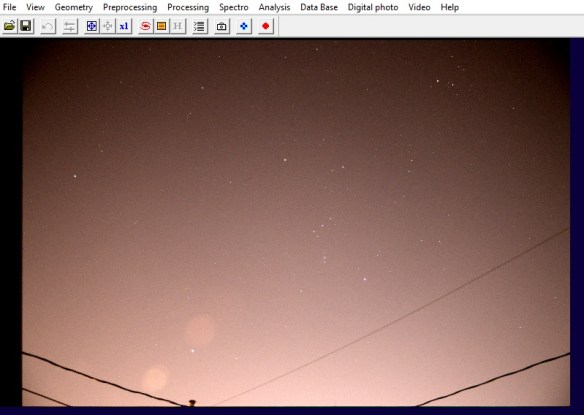
Note, when I opened the image in IRIS, it was inverted, I had to flip it horizontally (menu bar – Geometry/Flip/Horizontal).
The sky gradient removal tool works best when two elements are addressed: 1) nice clean image edge, 2) the background sky is black
Trim the Edge
The image needs to have a nice edge around the border (i.e. be smooth all the way to the edge). Hence any dark bands, fuzzy or slopping edges needs to be trimmed. Zooming in on the left part of the image, I will trim at the yellow line, keeping the right-hand part.
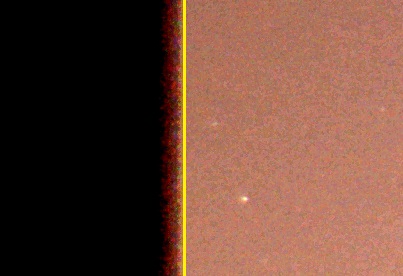
Typing win at the command prompt within IRIS will give you a cursor to select the two corners to crop your image.
A Black Background
The background needs to be black and have an RGB value near 0. To do that, select a small area in a dark portion of your image, with no stars, and use the black command. This will offset the RGB values to be 0 based on the average within the square you selected. Essentially what you are telling the program is that the darkest portion of your image should be black.
White Balance
The sky gradient removal tool can also correct the background sky color, but before doing so, we need to adjust the white balance such that white stars appear white. To do this correctly you will need a star map (Cartes du ciel, C2A, Stellarium) and locate a star in your image that is as close to our own star color: G2V. This is not exactly for beginners, if you don’t know how, skip and do the white balance later in a photo editor. Once the star located, simply selected it with a small box and use the white command in IRIS.
We perceive a white piece of paper in sunlight to be white, hence light coming from a star of the same spectrum as our Sun should also look white in photos. It’s essentially a white balance exercise, but selecting a star in your image to calibrate instead of most programs which uses the average of the whole image.
Sky Gradient Removal
With that done, you can now select from the menu Processing / Remove gradient (polynomial fit) to get the following pop-up

If you have just stars in the image, a Low background detection and Low Fit precision will work. However if you have intricate details from the Milky Way with dust lanes and all, then a High setting will better preserve the subtle changes. Try various combination to see what works best for your image. You can also do one pass with Low, and then follow it with a 2nd pass at High.
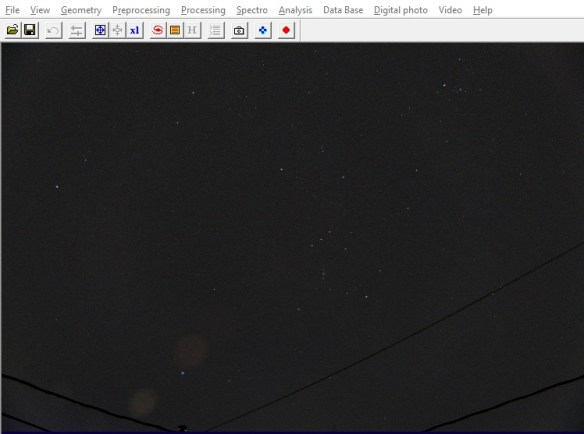
The result of all this is presented below: the sky gradient is gone, and the sky background is now a nicer black instead of a pink hue. And if you did the white balance, then the stars are also of the right color.
ADDED September 11, 2020 – More information on Sky Gradient Removal
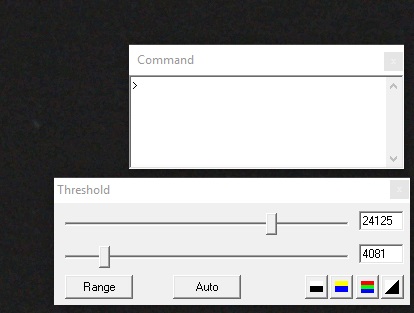
I should mention that the two most important dialog boxes in IRIS are the Command prompt and Threshold. When viewing and performing the various operations, the threshold values (essentially the min/max for brightness and darkness) often needs to be adjusted to get a good image and see the required detail.
The next step will be importing the file in a photo editor for final adjustments. Color saturation, levels and intensity can be adjusted in IRIS, but I find a photo editor to offer better control. And because I will continue my editing in a photo editor do not set the Threshold values too narrow. I prefer a grey sky and then do a non-linear adjustment in a photo editor to get a darker sky.
More to come in another article

Pingback: Astrophotography in the City – Part 2 | Ben Backyard Astronomy
Pingback: Removing Sky Gradient in Astrophoto | Ben Backyard Astronomy