Made a quick tutorial on how to remove background gradient with GIMP
You need the GIMP Astronomy Plugin

Made a quick tutorial on how to remove background gradient with GIMP
You need the GIMP Astronomy Plugin
What makes it possible to be able to generate a photo of the Milkyway from what appears to be just a faint trace in the original shot?

It all comes down to the signal vs noise. Whenever we record something, sound, motion, photons, etc… there is always the information you WANT to record (the signal) and various sources of noise.
Noise can have many sources:
This noise can be random or steady/periodic in nature. A steady or periodic noise is easy to filter out as it can be identified and isolated because it will be the same in all the photos. However a random noise is more difficult to eliminate due to the random nature. This is where he signal to noise ratio becomes important.
In astrophotography we take not only the photos of the sky, but also bias, darks and flat frames: this is to isolate the various sources of noise. A bias shot is a short exposure to capture the electronic read-out noise of the sensor and electronics. The darks is a long exposure at the same setting as the astronomy photo to capture noise that appears during long exposures due to the sensor characteristics such as hot pixels and amplifier glow. Cooling the sensor is one way to reduce this noise, but that is not always possible. Finally the flat photo is taken to identify the optical noise caused by the characteristics of the lens or mirror as well as any dust that happens to be in the way.
But what can be done about random noise? That is where increasing the number of samples has a large impact. For a random noise, increasing the number of sample points improves the signal to noise ratio by the square root of the number of samples. Hence averaging 4 images will be 2 times improvement than a single photo. Going to 9 will be 3 times better. Etc…
You might be thinking: “Yeah but you are averaging, so the signal is still the same strength.” That is correct, however because my signal to noise ratio is improved I can be much more aggressive on how the image is processed. I can boost the levels that much more before the noise becomes a distraction.
But can’t I just simply duplicate my image and add them together? No that won’t work because we want the noise to be random, and if you duplicate your image, the noise is identical in both.
So even if you are limited to just taking 30-second, even 5-second shots of the night sky and can barely make out what you want to photogram, don’t despair, just take LOTS of them and you’ll be surprised what can come out of your photos.
The simplest form of astrophotography is nothing more than a camera on a tripod shooting long exposures. However by the time you get around to stacking and stretching the levels of your photos to accentuate various elements, such as the Milky Way, the sky gradient will become more apparent. That gradient can come from city lights, the Moon up above and the thicker atmosphere causing light to disperse at low angles to horizon. Normally the wider the field of view, the greater the gradient.
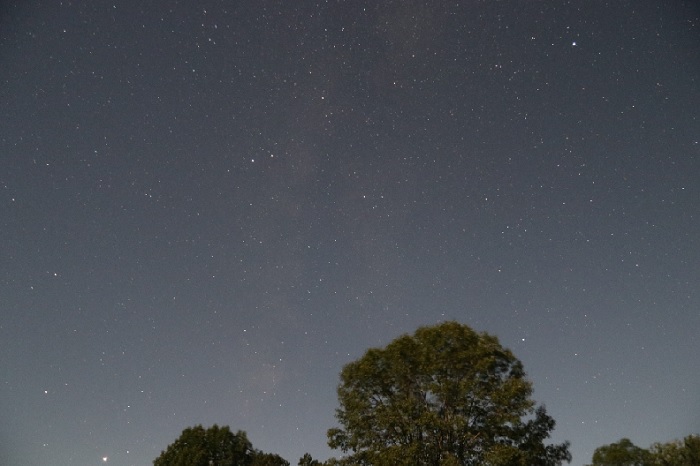
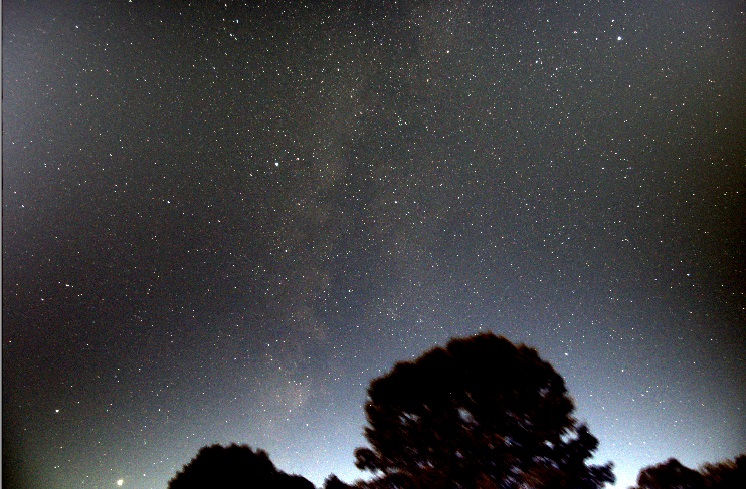
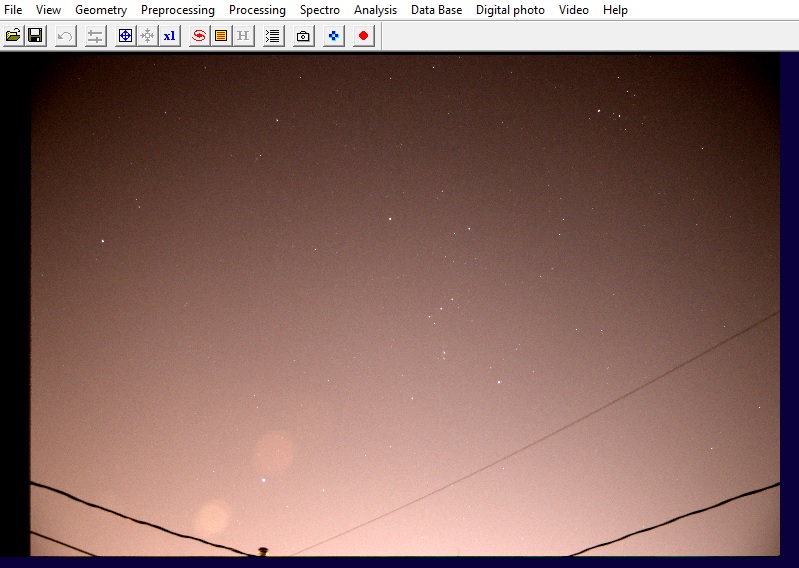
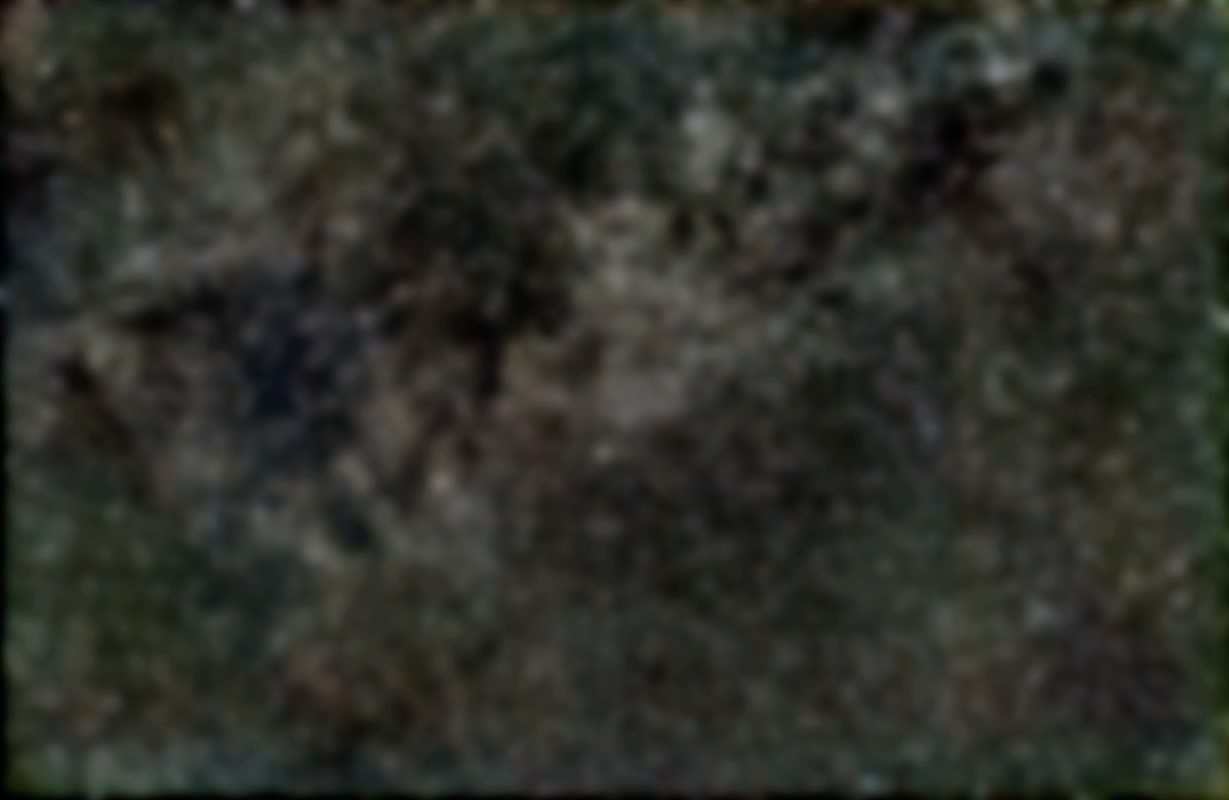
Below is a RAW 20-second exposure of the Milky Way near the horizon taken with a Canon 80D equipped with a 17mm F4.0 lens. The background has a slight gradient; brighter at the bottom. No all that bad.

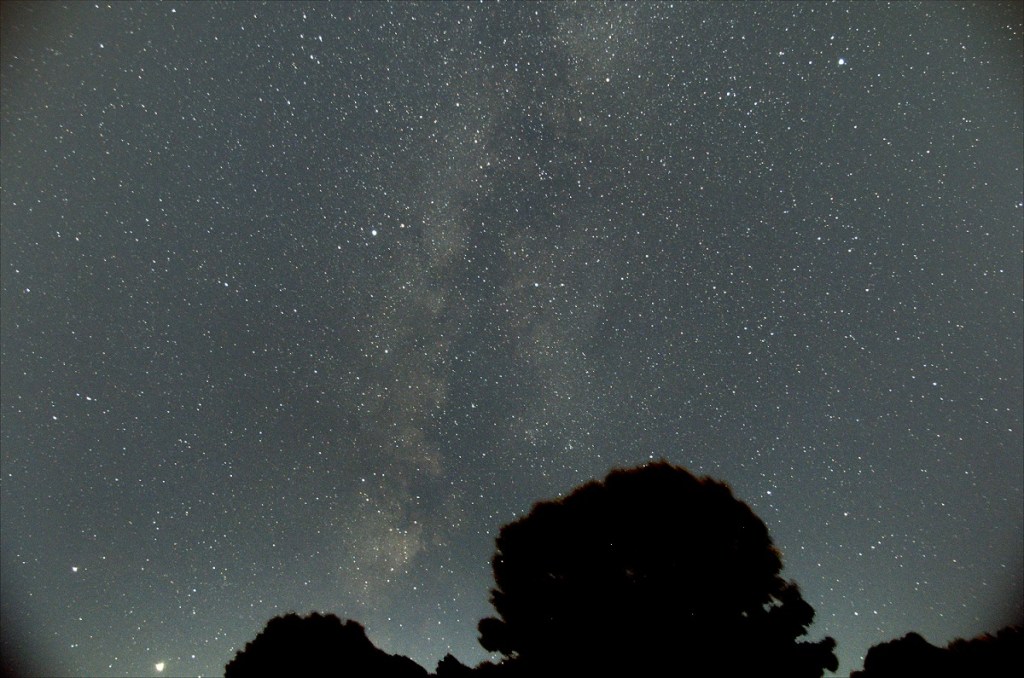
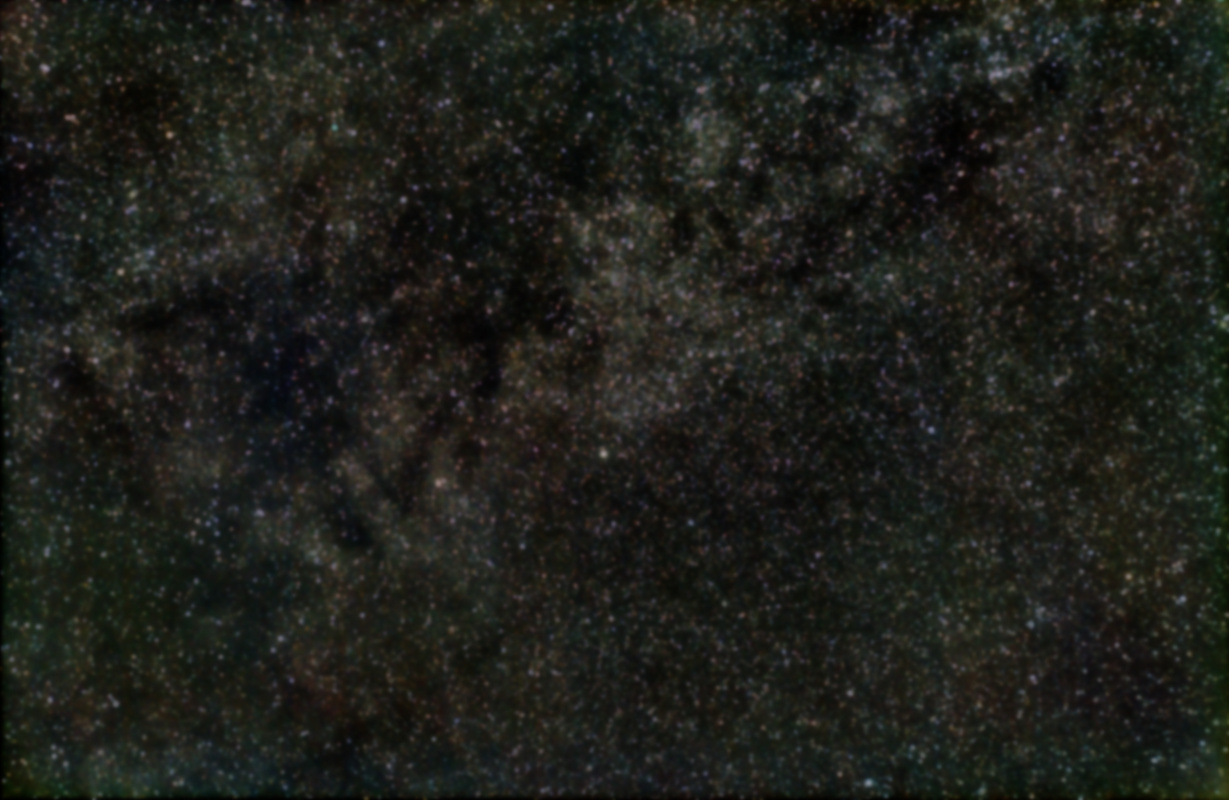
But once you stack multiple exposures and stretch the levels to get the Milky Way to pop out, the gradient only gets worse.
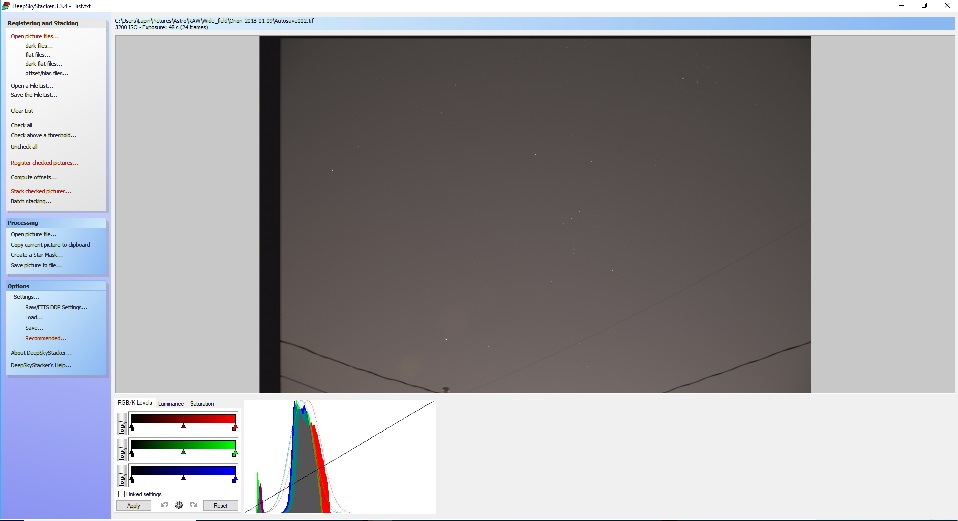
There are various astrophoto software that can remove the sky gradient. The one that I’m familiar with and have been using is IRIS. I know the software is old, but it does a great job. So after I’ve completed my registration and stacking of images with DeepSkyStacker (see my Astrophotography in the City article), the next step is to open the resulting image with IRIS.
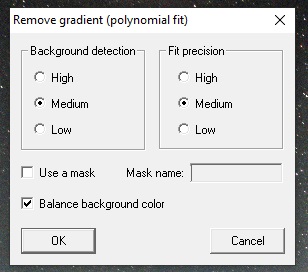
Once the stacked image is loaded in IRIS, head over to the Processing menu and select Remove gradient (polynomial fit) … Actually to get the best results you need to have the background and color corrected as well as trimming the edge of your photo. Got that covered here.

The following menu will appear.
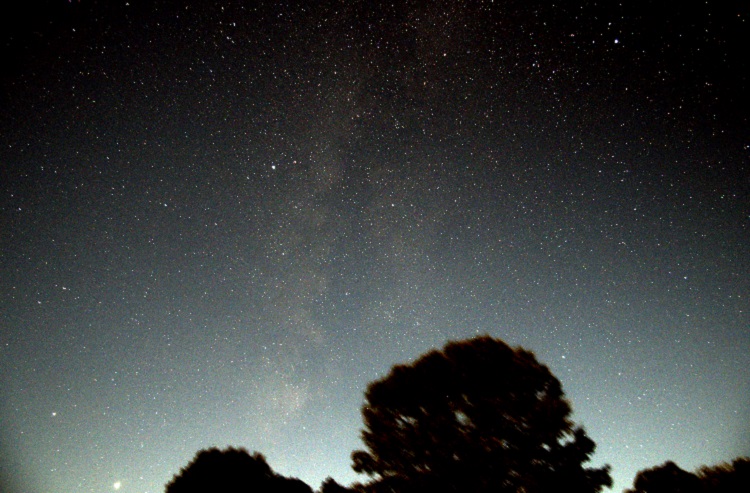
Normally the default settings (as above) will work well. But this image has some foreground content (trees) and that will cause the result to look a little odd. The algorithm is designed to avoid sampling stars, but not so good when there is foreground content like the trees at the bottom of the image.
To correct this you must use the gradient removal function with a mask. The quickest way to create a mask is using the bin_down <value> command. This will change to white all pixels with intensities below <value>, and make black all pixels above it. Areas in black will not be used for sampling, while those in the white areas will. A little trial-and-error is sometimes necessary to select the right value.
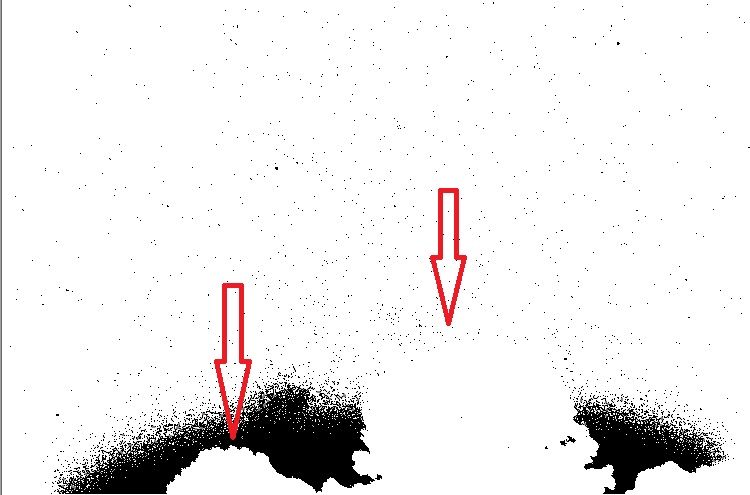
In this case, even with the right bin_down value, the trees that I want to mask are not black, hence I will use the fill2 0 command to create black boxes and roughly block out the trees.
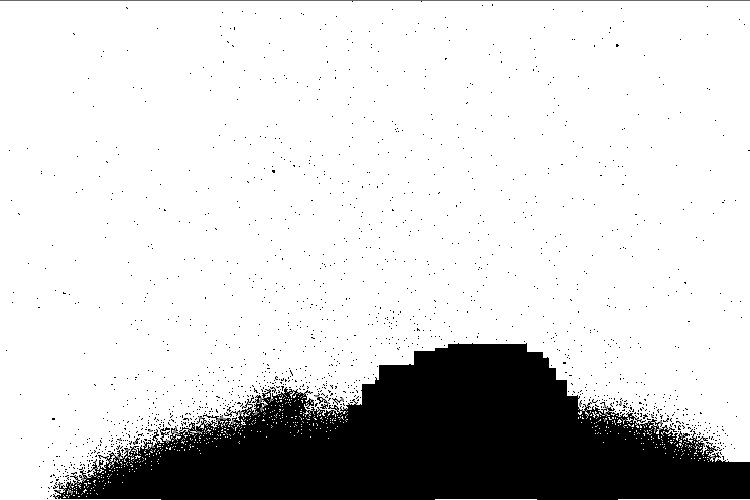
Below is the result after using multiple fill rectangles to mask the trees. This does not need to be precise as the mask is simply used to exclude areas from sampling. It is not like a photo-editing mask.
The resulting mask is saved (I called it mask), and I load back the original image, this time using the gradient removal with the mask option selected.

The program generates a synthetic background sky gradient, based on thousands of sample points and an order 3 polynomial. The image below lets you see the synthetic sky gradient the algorithm generated. This is what will be subtracted from the image.


The final image below is much better and more uniform. There are no strange dark and bright zones like the attempt without the mask.
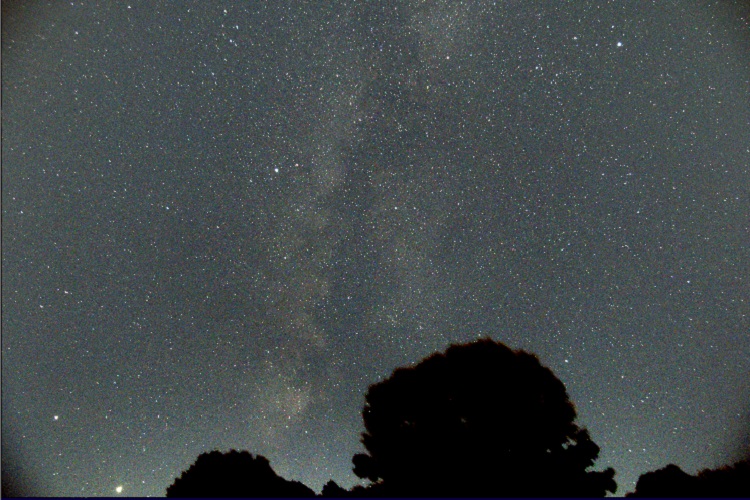
If we compare the original raw images with the new stacked, stretched and sky gradient removed photo the results are pretty impressive.
In Part 2, I explained the steps involved in improving the signal to noise ratio (SNR) by stacking multiple images and removing camera sensor noise (DARK and OFFSET frames). In this third article I will deal with sky gradient removal and white balance.
IRIS is a powerful astrophotography tool, and learning how to use the numerous commands can lead to fantastic photos. You can find good documentation and procedures on the IRIS website, so I won’t go in too much detail here.
While IRIS can process images in 32-bit, it cannot open the 32-bit FIT files generated with DSS. With my image still opened in DSS from the previous step (or by opening the Autosave.fit created by DSS), I select to save the image as a 16-bit FIT such that it can be opened in IRIS.
Below is the result in IRIS, and two things become apparent: 1) the sky has a gradient due to the light pollution from city lights; 2) the sky has a pink hue. These two elements will be corrected in this article.
Note, when I opened the image in IRIS, it was inverted, I had to flip it horizontally (menu bar – Geometry/Flip/Horizontal).
The sky gradient removal tool works best when two elements are addressed: 1) nice clean image edge, 2) the background sky is black
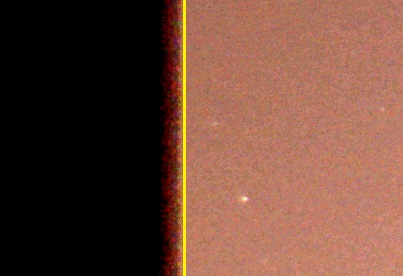
The image needs to have a nice edge around the border (i.e. be smooth all the way to the edge). Hence any dark bands, fuzzy or slopping edges needs to be trimmed. Zooming in on the left part of the image, I will trim at the yellow line, keeping the right-hand part.
Typing win at the command prompt within IRIS will give you a cursor to select the two corners to crop your image.
The background needs to be black and have an RGB value near 0. To do that, select a small area in a dark portion of your image, with no stars, and use the black command. This will offset the RGB values to be 0 based on the average within the square you selected. Essentially what you are telling the program is that the darkest portion of your image should be black.
The sky gradient removal tool can also correct the background sky color, but before doing so, we need to adjust the white balance such that white stars appear white. To do this correctly you will need a star map (Cartes du ciel, C2A, Stellarium) and locate a star in your image that is as close to our own star color: G2V. This is not exactly for beginners, if you don’t know how, skip and do the white balance later in a photo editor. Once the star located, simply selected it with a small box and use the white command in IRIS.
We perceive a white piece of paper in sunlight to be white, hence light coming from a star of the same spectrum as our Sun should also look white in photos. It’s essentially a white balance exercise, but selecting a star in your image to calibrate instead of most programs which uses the average of the whole image.
With that done, you can now select from the menu Processing / Remove gradient (polynomial fit) to get the following pop-up
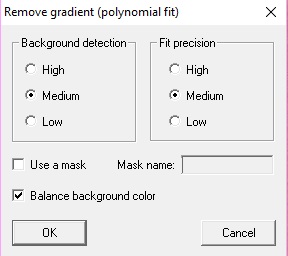
If you have just stars in the image, a Low background detection and Low Fit precision will work. However if you have intricate details from the Milky Way with dust lanes and all, then a High setting will better preserve the subtle changes. Try various combination to see what works best for your image. You can also do one pass with Low, and then follow it with a 2nd pass at High.
The result of all this is presented below: the sky gradient is gone, and the sky background is now a nicer black instead of a pink hue. And if you did the white balance, then the stars are also of the right color.

ADDED September 11, 2020 – More information on Sky Gradient Removal
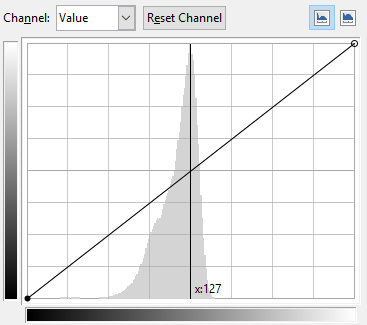
I should mention that the two most important dialog boxes in IRIS are the Command prompt and Threshold. When viewing and performing the various operations, the threshold values (essentially the min/max for brightness and darkness) often needs to be adjusted to get a good image and see the required detail.
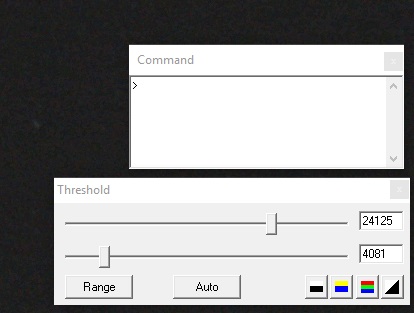
The next step will be importing the file in a photo editor for final adjustments. Color saturation, levels and intensity can be adjusted in IRIS, but I find a photo editor to offer better control. And because I will continue my editing in a photo editor do not set the Threshold values too narrow. I prefer a grey sky and then do a non-linear adjustment in a photo editor to get a darker sky.
More to come in another article
Continuing with my series on how to do astrophotography in the city…
In Part 1 I described how to set up the camera and take pictures for astrophotography. So if you’ve followed up to here you should have the following 40 images stored on your camera in RAW format.
– 20 LIGHT frames
– 10 DARK frames
– 10 OFFSET frames
The next step is relatively simple, entirely performed on a computer, you simply have to set it up with the right parameters, the right files and off it goes. The purpose is to register (align) the LIGHT frames and stack them to improve the Signal/Noise Ratio (SNR) such that we can adjust the dynamic range and “tune-out” the unwanted bright sky while keeping the stars.
There are lots of software out there that can perform the task of registering (aligning) and stacking images. They all look for pin-point stars in an image and use those as references to align your LIGHT frames such that when they are added, the pin-point stars all stack up correctly.
I’ve used three different software, all of which are free:
IRIS – Very powerful, but not exactly user-friendly. If your camera is 2015 and newer, it may not decode correctly the RAW files. However if you know how to use IRIS, the results can be quite amazing. I will still use IRIS, but that will be in Part 3.
Registax – Works best with planetary and lunar images, especially video is used instead of individual images. However cannot open RAW files.
DeepSkyStacker – (aka DSS) Simple to use, but the resulting image has to be post-processed in an image editor. This is what I use for the Canon 80D and what is described below.
With the Canon 80D, I have to use DeepSkyStacker as IRIS does not correctly decode the Canon 80D RAW files. With my previous camera (Canon EOS Rebel XTi) I would have gone straight to IRIS for all the processing.
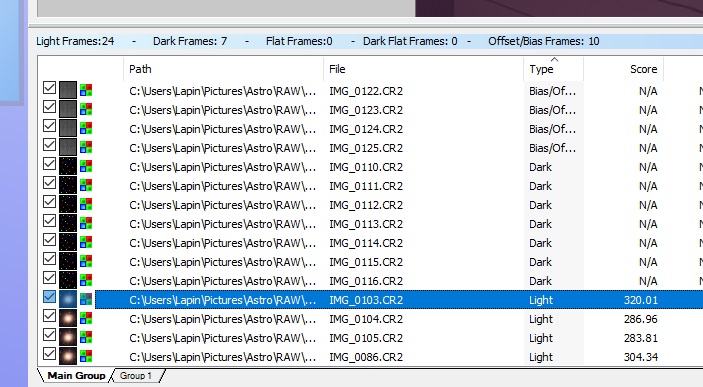
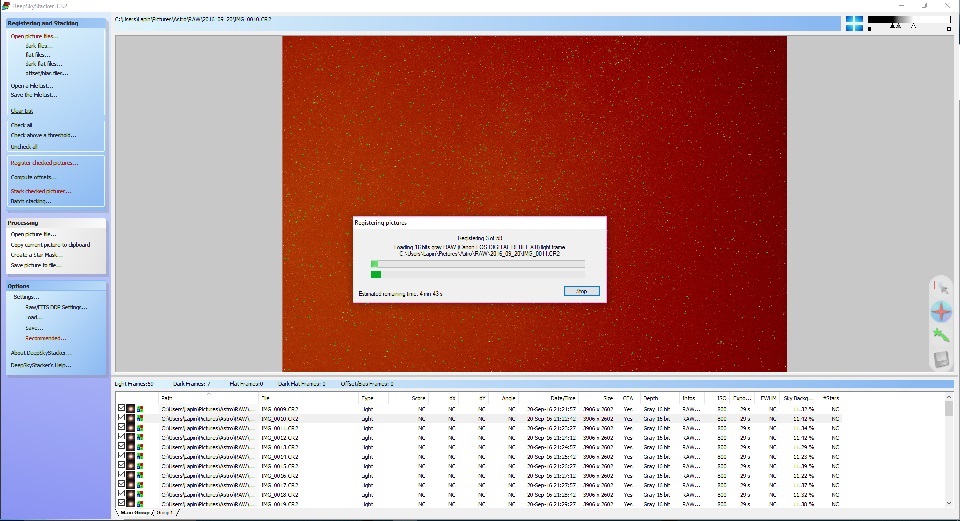
The first step is to open each of the LIGHT, DARK and OFFSET frames with DSS using the upper left menu.

Click on Open picture files and select your LIGHT frames. Then select dark files for your DARK frames and offset/bias files for your OFFSET frames. Once that is done, be sure to select Check all on the left-hand side such that all your files are selected and will be used for processing.
You should see in the lower portion of DSS all your images, tagged respectively Bias/Offset, Dark or Light. More importantly, they should all be checked-marked.
The next step is selecting the Register checked pictures from menu on the left which will bring up this pop-up.

Normally the default settings are good. Essentially DSS will remove the DARK and OFFSET frames from your LIGHT frames, look for stars in each and computer the translation/rotation required to align the stars frame to frame. There needs to be 10 or more stars in each LIGHT frame to be able to align and stack. If that is not the case, it’s possible to play with the threshold in the Advanced settings in order to detect sufficient number of stars in your LIGHT frames.
After that has completed running, DSS will have evaluated all your images, selected the best one as your reference and unchecked any image that could not be aligned. Next is the stacking. The following was established through trial and error with my Canon 80D. You may experiment with different settings to see what each parameter does.
Upon selecting Stack checked pictures, and then selecting Stacking Parameters, the following is presented.
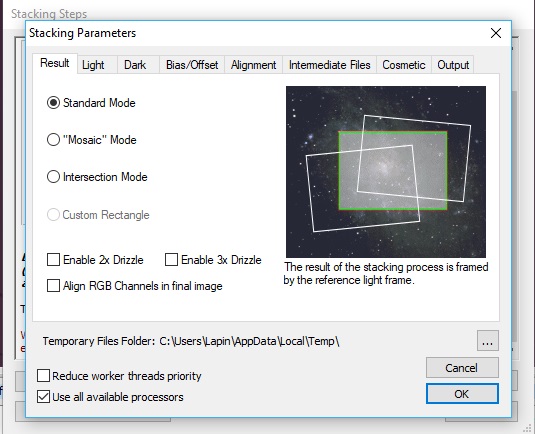
Standard Mode will align and stack the images without cropping. By default this is selected, and cropping can be done at a later time in photo editing.
For wide-angle DSLR images, don’t bother with the Drizzle options. It’s only good when you want to focus on a small galaxy or nebula within your image. If you use this, you better to select an area of interest to keep the file-size and processing time small.
As a DSLR or consumer camera takes one-shot color images, no use to select Align RGB Channels. This would make sense with a monochrome camera, where individual color filters need to be used
The next tab, Light, is where you can have a good say on the final resulting image. Each setting controls how individual pixels are added between each LIGHT frame.

Average is the fastest, and most basic. However random events that show up in 1 or 2 frames like a satellite, meteor or a plane will still be visible in the final image. This is a good setting for a quick preview of the final result.
Maximum is perfect when you want to do things like star trails, or see if among your many LIGHT frames you caught something a moving object such as a comet, asteroid, satellite or meteor. It essentially keeps the brightest pixel from each LIGHT frame.
I tend to use Median Kappa-Sigma clipping. For every pixel, it does a distribution of the intensity, and if in a frame that pixel falls out of the standard distribution, the pixel gets replaced by the median value. It essentially avoids extreme values to mess things up, so a plane passing in 1 or 2 images, or a satellite streaking by will be eliminated in the processing. It also makes for more pin-point stars. In the end, it removes random events from your picture.
From experience, a very important parameter to select is Per Channel Background Calibration. Light pollution in the city tends to have a pink hue, and this can cause the final image to be skewed into the wrong color with the result being either too red, too green or simply grey. By selecting Per Channel Background Calibration, each RAW image is decomposed in its RGB components and calibrated to have a BLACK background sky (because the night sky should be black, and not pink from high-pressure sodium lights).
The remaining parameters in the other tabs should be kept as per default, and you are now ready to let DSS do all the data crunching.
Once completed it will load the resulting image, and by default saved it as a .TIF file. This is a 32-bit image, it will be large (over 234MB with the Canon 80D RAW files), and not many programs will open it. Luckily the Win10 default photo viewer can preview it. But what is important is that the registering and stacking process has kept as much of the useful data (light photos entering the camera) while removing the random and sensor electronic noise. As we are not done processing the image, no point is throwing out data just yet by using compression or lower dynamic range.
DSS offers capability to adjust the Levels, Luminance and Saturation, but it is best to keeps as is and do this fine adjustment in another program like Photoshop or GIMP.
The next steps will be to continue the processing in other programs:
– IRIS to remove the sky gradient
– GIMP (or Photoshop) to adjust levels, curves and saturation
Just when you think you have a good “recipe” to process astronomy images taken with your gear, things don’t quite work out and you end up spending three evenings trying different settings, techniques and steps because you know there’s a better image waiting to be teased out.
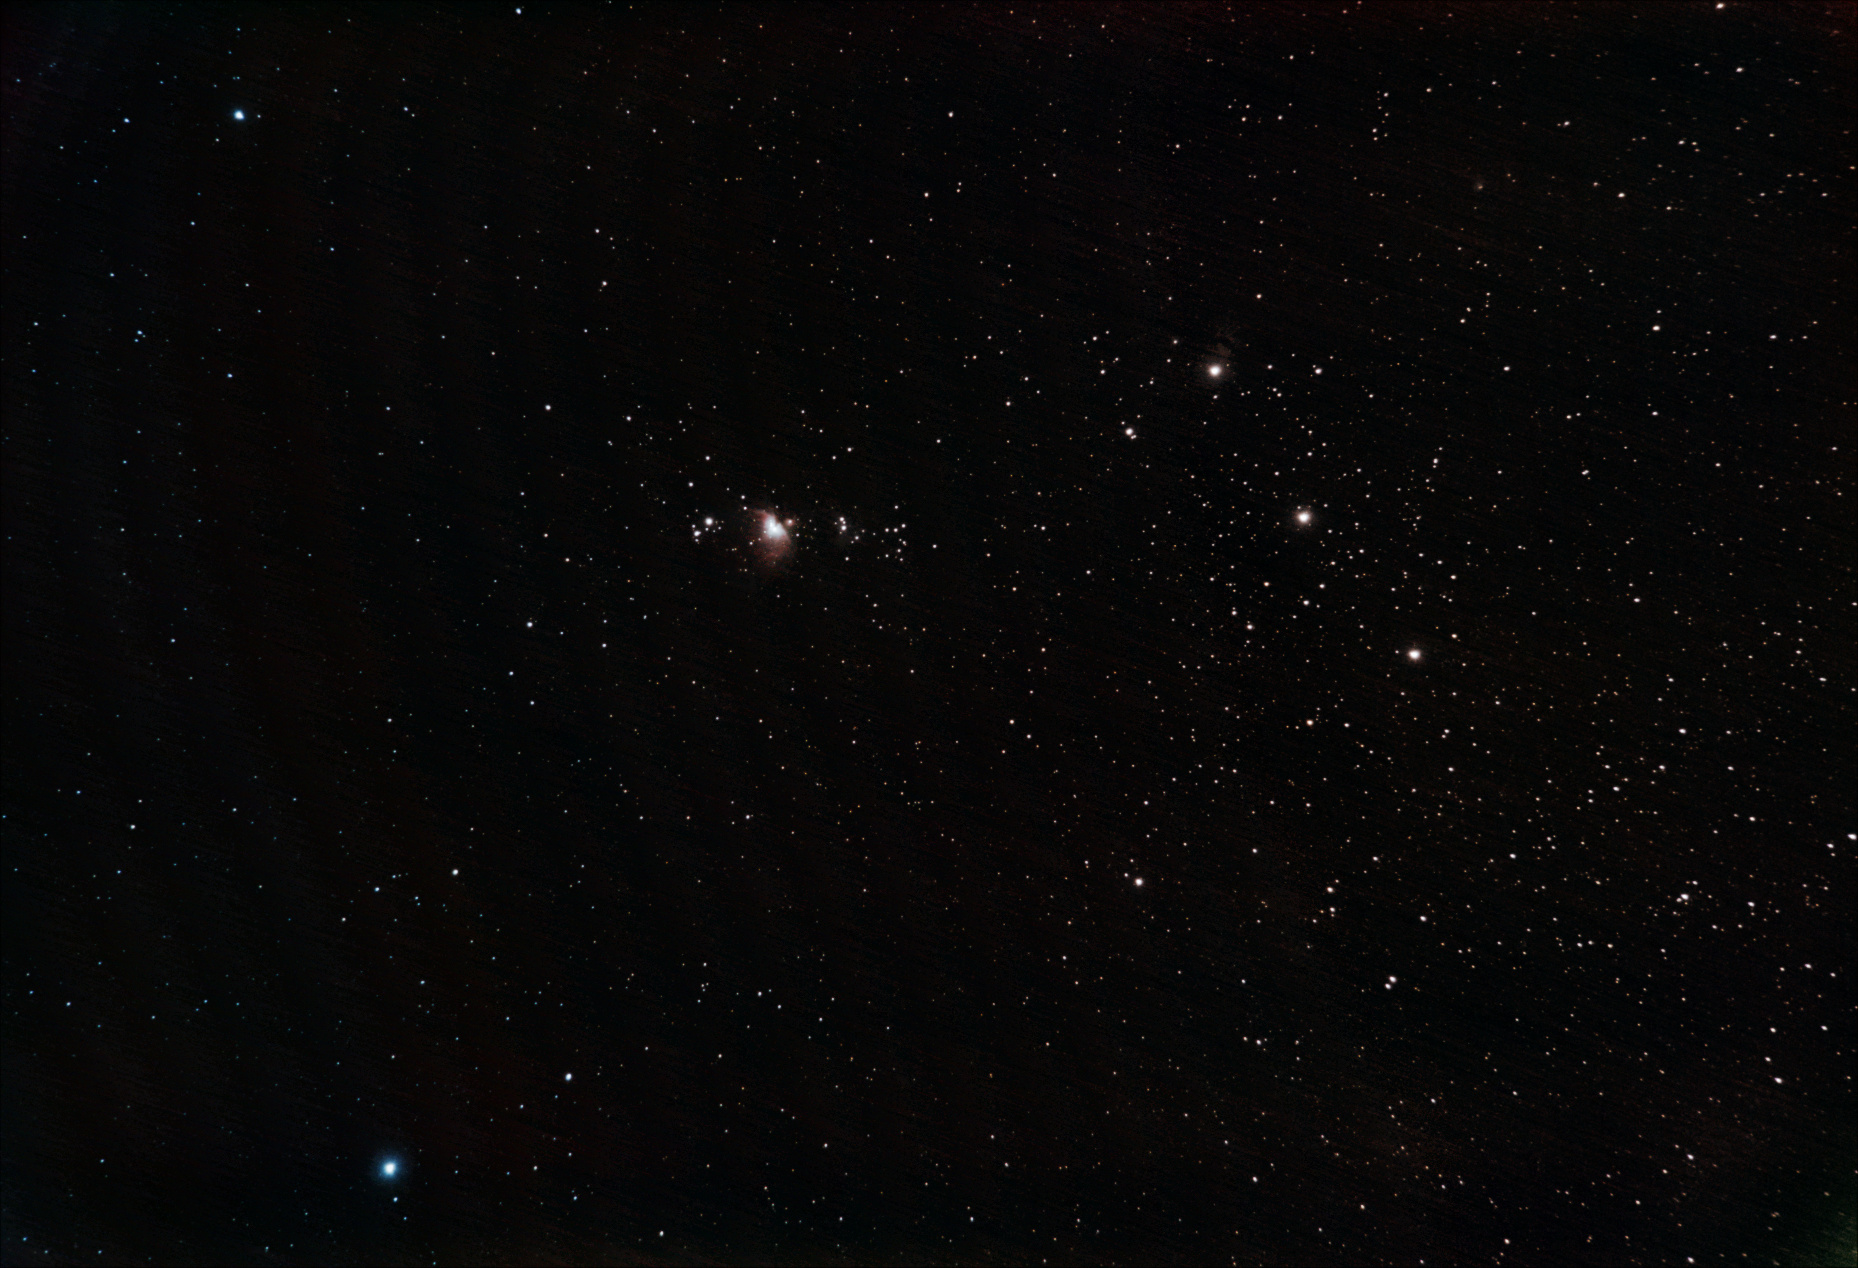
M72 and Lower Orion Constellation – Benoit Guertin
The image above (click for a full frame) is as much as I can stretch out from the lower half of the Orion constellation and nebula with a 20 seconds ISO 800 exposure on 85mm F5.6 Canon lens from my light polluted backyard.
Below is the sky chart of the same area showing the famous Orion Nebula (blue and red box) and the Orion belt with the three bright stars Alnitak, Alnilam and Mintaka. What is unfortunate is there are lots of interesting deep space nebula structures that glow in the hydrogen-alpha spectral lines of near infra-red, but all photographic cameras have IR filters to cut on the sensor those out. That is why many modify the cameras to remove the filter, or get dedicated astro-imaging cameras.

Sky Chart – Lower Orion with nebula and open star clusters
Now, back to the main topic of trying to process this wide field image. I had various issues with getting the background sky uniform, other times the color just disappeared and I was left with essentially a grey nebula; the distinctive red and greenish hue from the hydrogen and oxygen molecules was gone. And there was the constant hassle of removing noise from the image as I was stretching it a fair bit. I also had to be careful as I was using different software tools, and each don’t read/write the image files the same way. And some formats would cause bad re-sampling or clipping, killing the dynamic range.
Below is a single 20 seconds exposure at ISO 800. The Orion nebula (M72) is just barely visible over the light pollution.
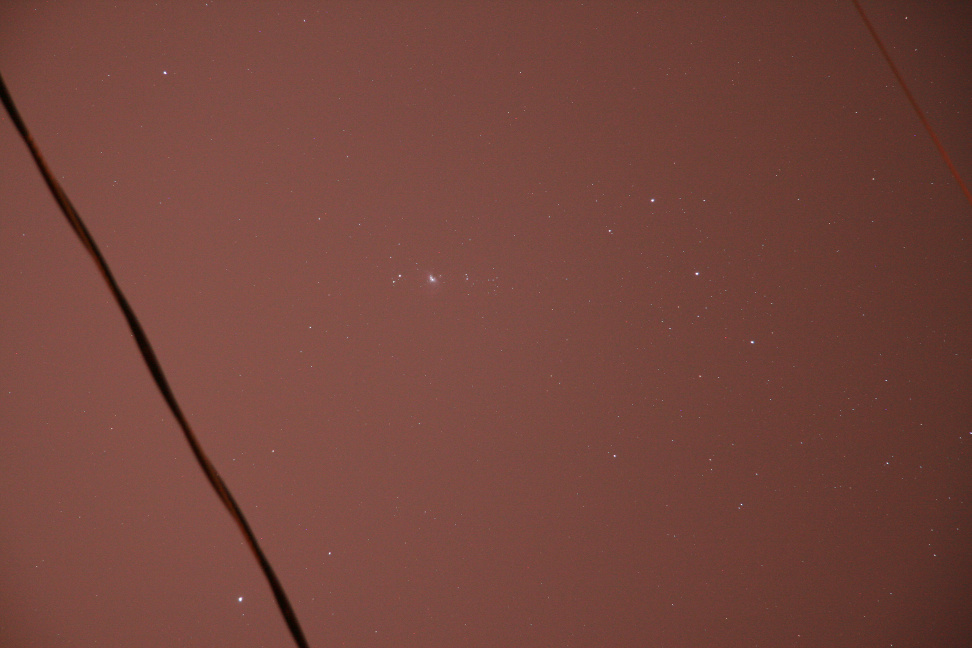
Original image – high light position for 20 seconds exposure
The sky-flog (light pollution) is already half way into the light levels. Yes, there are also utility lines in the frame. As these will slightly “move” with every shot as as the equatorial mount tracked I figured I could make them numerically disappear. More on that later…
Light levels of a 20 second exposure due to “sky fog”
The longer you expose, the more light enters the camera and fainter details can be captured. However when the background level is already causing a peak mid-way, longer exposures won’t give you fainter details; it will simply give you a brighter light-polluted background. So I needed to go with quantity of exposures to ideally reach at least 30 minutes of exposure time. Therefore programmed for 100 exposures.
Once the 100 exposures completed, I finished with dark, flat and offset frames to help with the processing. So what were the final steps to reach the above final result? As mentioned above, I used three different software tools, each for a specific set of tasks: DSS for registration and stacking, IRIS for color calibration and gradient removal and finally GIMP for levels and noise removal.
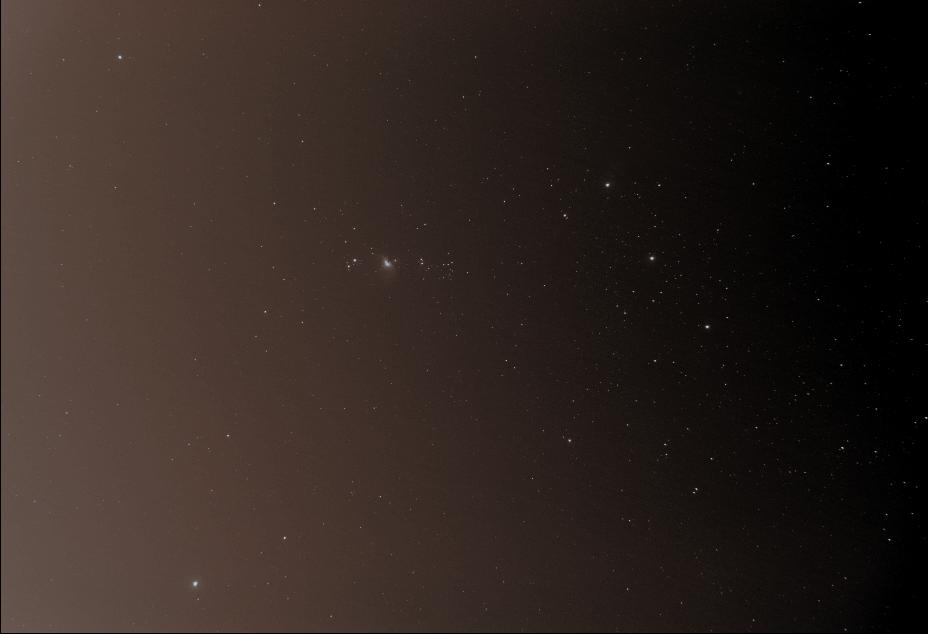
Image before removal of sky gradient in IRIS
Did you know that you can get access to the latest RAW images from the Cassini spacecraft directly from the NASA and JPL website? Not only will you have first look at some stunning images of Saturn, the rings and the Moons like this one below from January 16th. Click the image below for more information from NASA/JPL on that specific photo.

Daphnis making waves – Cassini spacecraft Jan. 16, 2017 – JPL/NASA
But you can also download raw images to try your luck at processing. For this exercise I selected these series of pictures of the strangely perfect hexagonal-shaped storm on Saturn’s north pole.
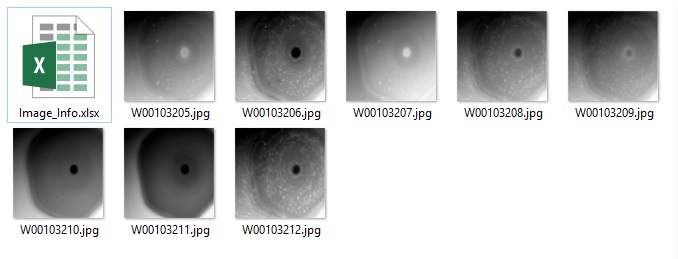
Downloaded raw image set
These are images taken with different filters by the wide field camera, and I noted in an Excel file some information on each image, most importantly which filter was used. Both the narrow and wide CCD on Cassini operate with two filter wheels, hence each image will always list two filters. For those surprised at the rather “small” 1 mega-pixel camera, keep in mind the spacecraft was launched nearly 20 years ago, and development started in the 1980s.
There is a very detailed document on how to use, calibrate and process the images found at the following link. But for what I wanted (quick processing) I only needed to find out which filters were the closest to an RGB setup.
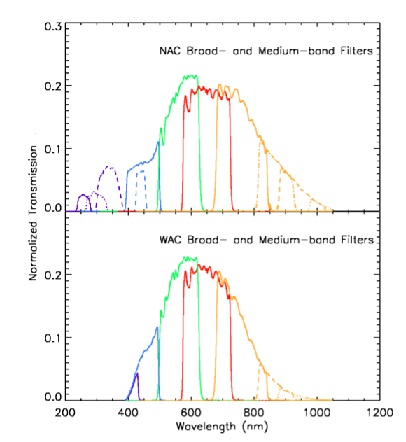
Cassini ISS Broadband Filters
Luckily this is well documented, and found them with the BL1, RED and GRN filters.
The image below is a quick addition of those 3 respective images assigned to red, green and blue channels. The resulting image would be somewhat near the real colours, but I did not take any time to calibrate, hence they are probably a little off…

I also decided to try something that would provide a little more contrast and dive a little into the atmosphere and went with a IR-Red-Blue for RGB assignment by using a one of the narrow-band filters.

Cassini ISS Narrow Band Filters

Saturn with IR, Red and Blue for RGB assignment
Both images above have not be calibrated, stretch or adjusted other than combine the raw images from Cassini.
The NASA/JPL site even has a section for amateurs to submit their photos and host a gallery to see what others have done.
References:
Cassini NASA/JPL site
Cassini Imaging Science Subsystem (ISS) Data User Guide
Tried DeepSkyStacker and I think I’ve found a better and faster way of processing my images.
I had been using IRIS for the better part of the last 6 years, and I remember how impress I was at the results compared to the early versions of Registax for deep sky images. While IRIS is quite manual and command-line based, it nevertheless got the job done and allowed me to experiment with different methods. But now, I decided it was time to move on to something a little modern. I looked at what others were using, and came across DeepSkyStacker.

While IRIS offers a complete package, from image acquisition, pre/post-processing, and analysis tools; DeepSkyStacker only performs the registration and stacking. But it does so in a faster and more efficient way. DeepSkyStacker can fully utilise RAM and multi-core processing; hence what took 30 minutes in IRIS is now down to 5 minutes in DeepSkyStacker.
It also automates many steps, and you can even save the process and create batches. So it’s down to load all your files, and then one click to register and stack.
DeepSkyStacker – Processing Files
I tried the with some wide field of views I had taken back in September. And the resulting image appeared to be better. Now I still have to use IRIS as I like how it can remove the sky background gradient and adjust the colors. And GIMP is still required for the final adjustments. So here are the main steps that gave me good results:
Now for a little more playing around, and trying it on some on my older pictures.
UPDATE:
DeepSkyStacker saves files in 32-bit TIFF by default. After stacking many images the dynamic range is quite large, and this is not data we want to loose. But the problem was finding a program that was able to correctly handle the 32-bit file format. The next release of GIMP (version 2.10) will handle 32-bit files, but GIMP 2.8 was limited to 16-bit and even there it would convert the image to 8-bit for manipulation (GIMP 2.9.2 and up might work, but needs to be compiles on your computer – development package). Not good… Before downloading yet another photo imaging software I tried some of my current programs and found that the Microsoft Photo Gallery software for Windows 10 does a great job of handling the 32-bit TIFF files. Once the image opened, under File – Make a Copy I save a version in JPEG. Yes I know not ideal, but I avoid a lot of the quantization conversion error and I’m able to continue my processing in IRIS and GIMP.
We spend lots of money on expensive optics and hours trying to get the focus spot-on or the mount alignment/guiding perfect for smooth tracking to avoid blurry and stretched stars. So why would you want to blur your final image?
Consider the images below. The one of the left is softer and more pleasing to the eyes, yet the stars remained sharp.
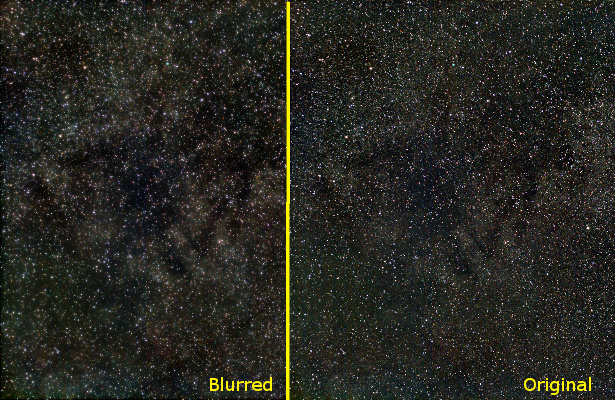
Side-by-side compare of blurred and the original image
One way to obtain this effect is by creating copies of the image, applying varying blur to each and then adding them from heaviest to the least blur using the Lighten only layer mode.
Take your original image and duplicate as required (in my example I blurred two layers, hence need a total of three identical layers).
Original image (centered on Constellation Vulpecula)
Apply heavy blur to the bottom layer. At the same time, reduce the color saturation and adjust the levels to get nice blacks. You want the blacks to be nice and dark such that the general shape of the cloud-like structures appear due to the bright and dark zones. In this example, the blur was applied to a level of 80 pixels.
Heavy blur to the bottom layer, and reduced color saturation
Repeat the same for the middle layer, but with less blur (level of 20 pixels). If you want the colors of the stars to pop out, increase the color saturation. It will create an effect of nebulosity around bright stars. Once again, adjust the levels as required.
Medium blur to create nebulosity effect
Finally, the top layer don’t apply any blur, adjust the curves to reduce the faint portion of the image as you don’t need to keep this portion of the image. You only want to keep the nice bright stars. The dim structures are kept in the lower two blurred layers.
Adjust the % between the layers to get the desired effects The pixel intensity from bottom (most blurred) to the top will be kept only if the result is brighter than the previous layer. The sharp and bright stars are from the top layer, while the overall dim structures are from the blurred lower layers.

Final result after blending the 3 layers
Turn the various layers on/off to see what is the contribution of each. It’s a lot of trial and error depending what you accentuate versus what you want to fade into the background. Play with the level of blur, the curves and the % layer blending until you get the effect you desire.
For more information on the original image, see my post on Vulpecula.
I’ve mentioned it before that you don’t need a fancy telescope and tracking equatorial mount to get into astrophotography. Simply a camera on a tripod with a short focal lens can do wonders, especially with the high ISO settings in new cameras. A single 10 seconds exposition can reveal lots of stars, however to capture more photons a longer exposure is not better as the stars will become streaks. But one can easily improve the image and get better signal/noise ratio by stacking multiple images.
However, there is one drawback to stacking multiple exposures if you decide to also capture the landscape: Earth rotates, therefore the sky moves while the landscape stays still. If you align the images using the stars, then the landscape becomes a blur. Not the end result that we want. Luckily a quick composition with two layers and a mask solves everything.
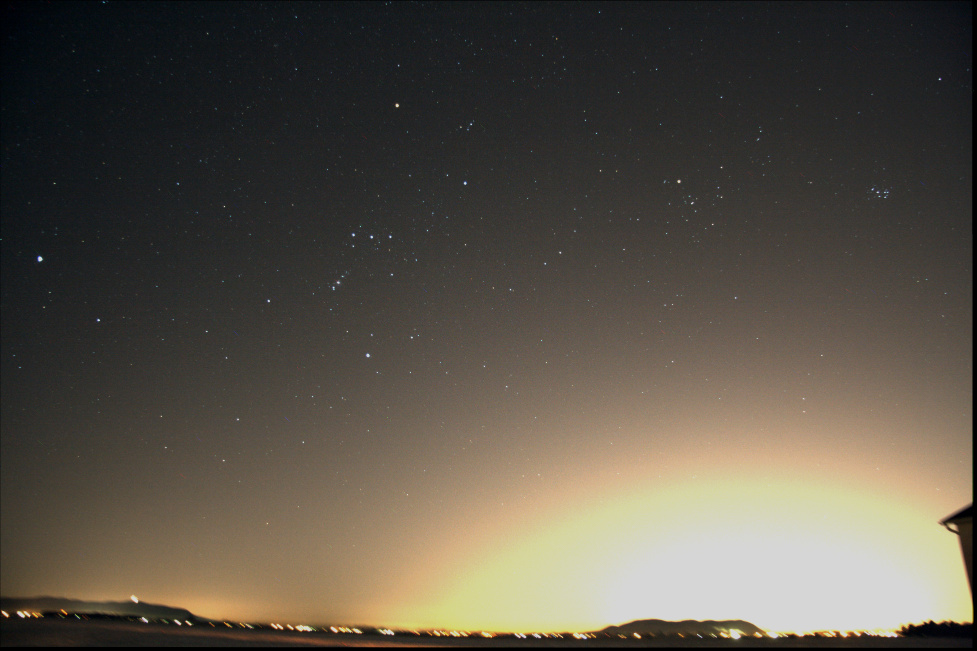
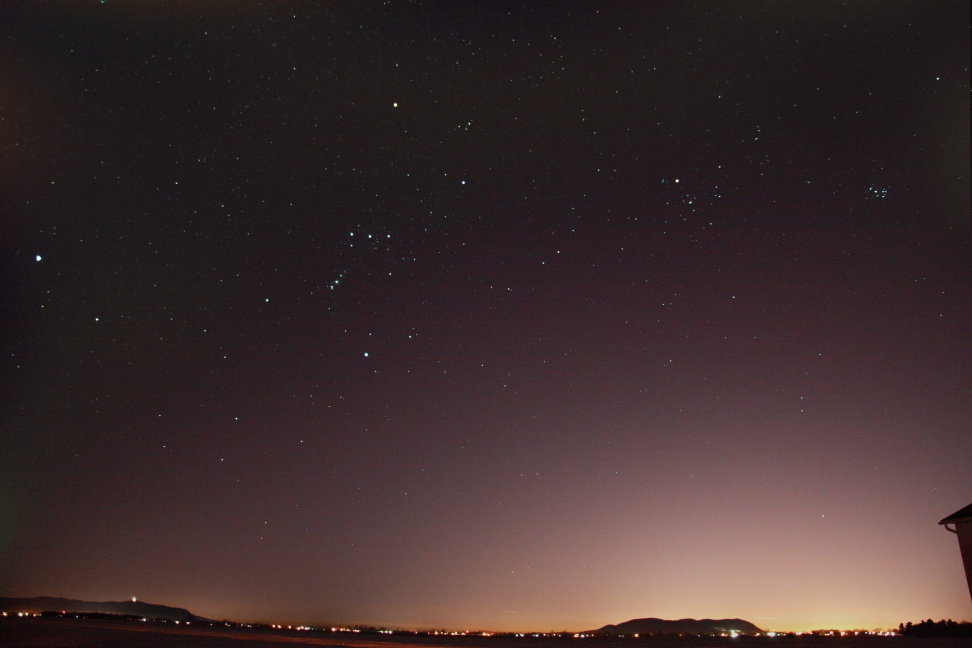
Below is a single 10 seconds exposure at ISO 800 with a 17mm F4 lens; you have the landscape with city lights and the stars above. Yes that is Orion…

Single 10sec exposure (ISO 800)
In order to improve my signal, I worked with IRIS to align and stack 5 frames, this reveals many more stars, but also amplified the light pollution.
Aligning and stacking 5 images. More stars appear.
Luckily within IRIS there is a function to remove sky gradient. The algorithm takes a series of sample points and attempts to make the sky uniform. Not bad, the images are not a hopeless case.

Removing the sky gradient with IRIS
As mentioned above, the alignment was performed with the stars, hence the background is now blurring. Below is a close-up.
But when aligning on stars, the landscape blurs.
That is just 5 images, stack a much larger quantity or with more time between frames and it will only get worse. It becomes pointless to shoot with the landscape if the end result is blurry. Luckily working with layers in a photo editor can easily solve the issue. We want to keep the stars from the stacked image, but the landscape from a single frame. Follow these easy steps:
Creating a mask for my layer: white is transparent, black will block
The end result, is improved image of the sky, and a landscape that is still sharp.
Both layers added with the mask
Below is a comparison the composition with stack and layer (left) and a single shot (right). We are able to achieve both of our goals of getting more stars (more signal) while keeping the landscape from becoming a blur.
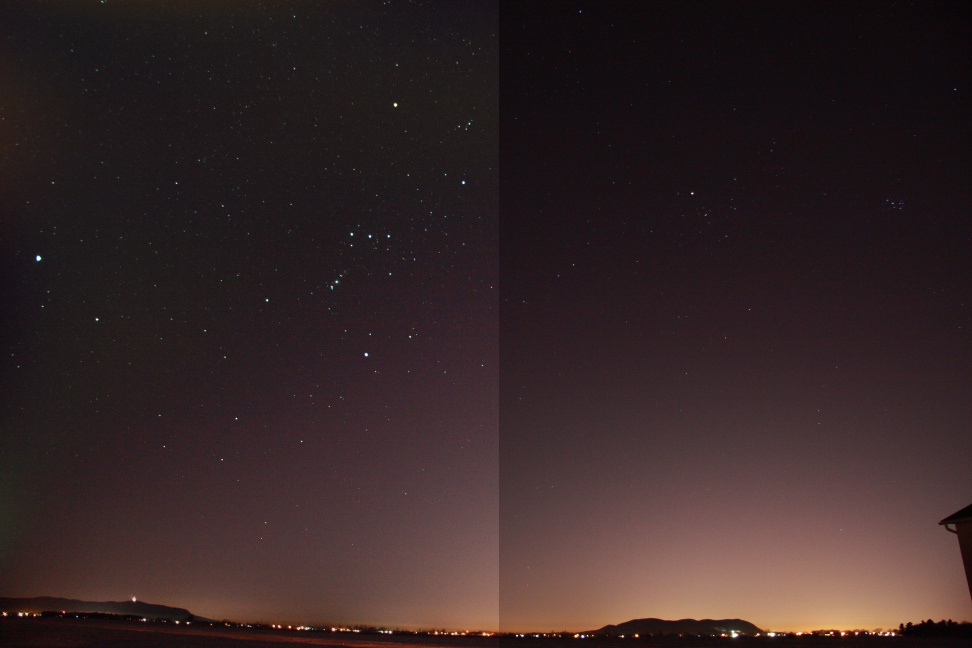
Comparing the composition with layers (left) and single shot (right)
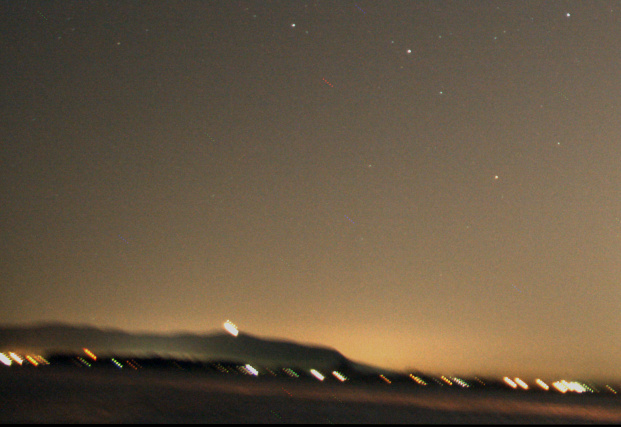
And why not take some time to identify some key features in the image.

Constellations Orion and Taurus above the landscape. (Click to open)
Mark Bailey
Electronics plus software tips and tricks
Astronomy, and Computer Technology
A site dedicated to learning Astronomy One Step at a Time
Charles Bracken
one post at a time
Astronomy, space and space travel for the non scientist
My adventures with amateur astronomy
Discoveries, Journeys & Milestones in Space Exploration
Welcome to a journey into our Universe with Dr Dave, amateur astronomer and astrophotographer for over 40 years. Astro-imaging, image processing, space science, solar astronomy and public outreach are some of the stops in this journey!
Observations, mostly astronomical from Limavady, UK (55N, 6.9W).
Photography Blog of James Silvester
Astronomy and Amateur Radio
The latest news on WordPress.com and the WordPress community.
