If you are a stargazer, you might want to mark your calendar for April 11, 2023. At dusk, look west, you will have a chance to see Venus shining bright just 5 degrees left of the Pleiades, a beautiful star cluster also known as the Seven Sisters. Venus is the brightest planet in the sky and it will be easy to spot with the naked eye or binoculars. If you have a clear sight of the horizon and head out early enough, planet Mercury will be visible low in the sky and at a prime time for viewing at 19 degrees from the sun.
Venus next to the Pleiades on April 11, 2023 after sunset
The Pleiades, also known as the Seven Sisters, is a famous star cluster in the constellation of Taurus. It is one of the brightest and most easily recognizable clusters in the night sky, visible to the naked eye in both hemispheres. The Pleiades consists of about 1000 stars, but only a few are visible to the unaided eye. The brightest stars are named after the mythological daughters of Atlas and Pleione in Greek mythology: Alcyone, Asterope, Celaeno, Electra, Maia, Merope and Taygeta.
Venus just 5 degrees left of the Pleiades
But that’s not all. Venus is also approaching its greatest elongation, which means it is farthest from the sun on the sky’s dome. This will happen on June 4, 2023, when Venus will be 46 degrees east of the sun and will set about three hours after sunset. At that time, Venus will be 49% illuminated and will appear as a first quarter phase through a telescope.
Greatest elongations are important events for observing the inner planets such as Mercury and Venus. They orbit closer to the sun than Earth. Therefore, it always appears near the sun when the sky is still blue and bright or lower over the horizon, and never overhead at midnight.
If you want to learn more about Mercury or Venus and its position in the sky, you can check out some online resources such as EarthSky.org or SkyandTelescope.org. They have detailed information and charts about Venus’s movements and appearances in the sky. You can also use a free online planetarium program such as Stellarium (what I used for the above screen captures) to see how Venus looks from your location at any time.
It’s a interesting to realise that anybody with a smart phone can now photograph our gas giant, Jupiter, located over 865,000,000 km away. You’ll need some better optics to get the moons of Jupiter, but it’s still very impressive that light emitted by the Sun bounced off the planet and traveled space all the way to the small 2mm opening of the lens and sensor on the phone to record a photo.
You’ll have to set the photo app into manual focus and use the “pro” setting to set the ISO and exposure, as the full automatic won’t be able to deal with such small light points in a dark background. But even hand held the results are good, thanks to keeping the exposure above 1/60s.
Below are photos of the Venus and Jupiter in early March taken with nothing more than a Samsung S10. If it wasn’t for Venus being so bright, correctly getting Jupiter would be a greater challenge.
About a week ago I crossed on my news feed that the Geminid meteor shower was peaking on the 13th and 14th and it should be a good year. At the same time I saw some pretty impressive photos of photographers catching spectacular fireballs as these tiny dust and grains of rock plunge into the atmosphere.
Braving the below freezing weather I setup the Canon 80D on a tripod in the back yard to see what I could catch. I read that the best time for the Geminids is 2am, I wasn’t going to stay up that late on a weeknight, so 10pm would have to do.
Wanting to capture as much of the sky as possible, the zoom lens is set to 17mm and wide open at F4. Note that I live in the city with considerable light pollution (I guess that’s what happens when electricity is cheap) which meant only the brightest meteors would be visible. Playing around with the settings I quickly concluded that at ISO1600 10-seconds of exposure would be the longest I should use to avoid having an over exposed sky. Normally it’s best to have the image intensity peak on the left half of the histogram. This can be quickly checked by viewing a captured image and selecting the Info option.
The camera operated for over an hour and managed to take 304 images before the memory card was full. The camera could have kept going much longer had I wiped the card clean before setting up as the battery still had over 25% charge.
Once the photos transferred on computer I reviewed all the images and identified those that had what appeared to be a meteor, plane or clouds such that I could do the necessary processing later on.
I know the chance of catching a spectacular fireball is slim, but it’s still interesting to review the images for any surprised and explore the various types of processing that can be done.
The easiest and quickest thing to do with all these images is a time-lapse movie. This is essentially a no-brainer. I used Canon Digital Photo Professional 4 to perform some color and brightness corrections on the photos prior to creating the movie. The benefit of this software is that you can save the “recipe” you used on one photo and apply it to all. I also did a batch processing to generate individual JPEG with 1080p of resolution to limit the quantity of GB of intermediate files required for this time-lapse movie.
The clouds that showed halfway through the sequence limited what I could do next with regards to “processing”. My next plan was for star trails!
I selected the longest stretch of images without clouds and then stacked them without alignment, using the ADD MAX operation in DSS. The result will be star trails as well as light trails from any passing plane. The image below is 122 individual 10 second exposures for just over 20 minutes total exposure time.
Tracks from two planes are clearly visible over the arc motion of the stars. A third plane much higher and on a different flight path also crossed the image if you pay close attention.
The timelapse and the star trails are two quick and interesting results from the photo session, but that was not my initial plan. Next I created a “starless” version of my night sky to serve as a background. This was achieved by selecting 8 images 1 minute apart and stacking them using the SIGMA MEDIAN operation. DSS will compare the pixels of all 8 images and if it falls outside a defined sigma distribution, the pixel will be replaced with the median value. As the images are once again not registered or star-aligned, the foreground will remain fix while the stars will move. As the stars move between each image, they will fall outside the sigma distribution and will be replaced by the median value instead.
With my starless image completed, the next step is to use GIMP to blend together the individual meteor trails with the starless nigh sky image. I use a MASK to select just the meteor trail of each photo that I previously identified contained a meteor. Each photo was manually added as a layer to the starless background.
Picture saved with settings applied.
There’s a total of four faint meteor trails as well as one very bright but short lived meteor in the middle. That short bright one ended up being special. Most meteor trails appear only on one frame, but this one left a smoke/dust trail that lingered for a few frames (40 seconds) and can be seen drifting in the high-altitude winds. To best see this, I selected some photos, cropped, enhanced the individual frames and generated an animated GIF.
The last processing I did was select a large sequence of photos that had no clouds or planes but this time register them such that the stars would be aligned between each frame. I simply did an ADD AVERAGE to stack the 62 individual photos, creating the equivalent of a 10 minute exposure of the night sky.
Because the field of view is wide, and I wasn’t in a particularly dark sky area the resulting photo isn’t that interesting, not like some of the other ones of the Milky Way taken while camping away from cities. However I was able to crop the image down to an area that had multiple Open Star Clusters showing up. Swipe to see the photo with the Open Star Clusters identified by their Messier Catalog number.
Click here to enlarge the above photo.
There you have it, a camera outside on a tripod for 1 hour and plenty of interesting results.
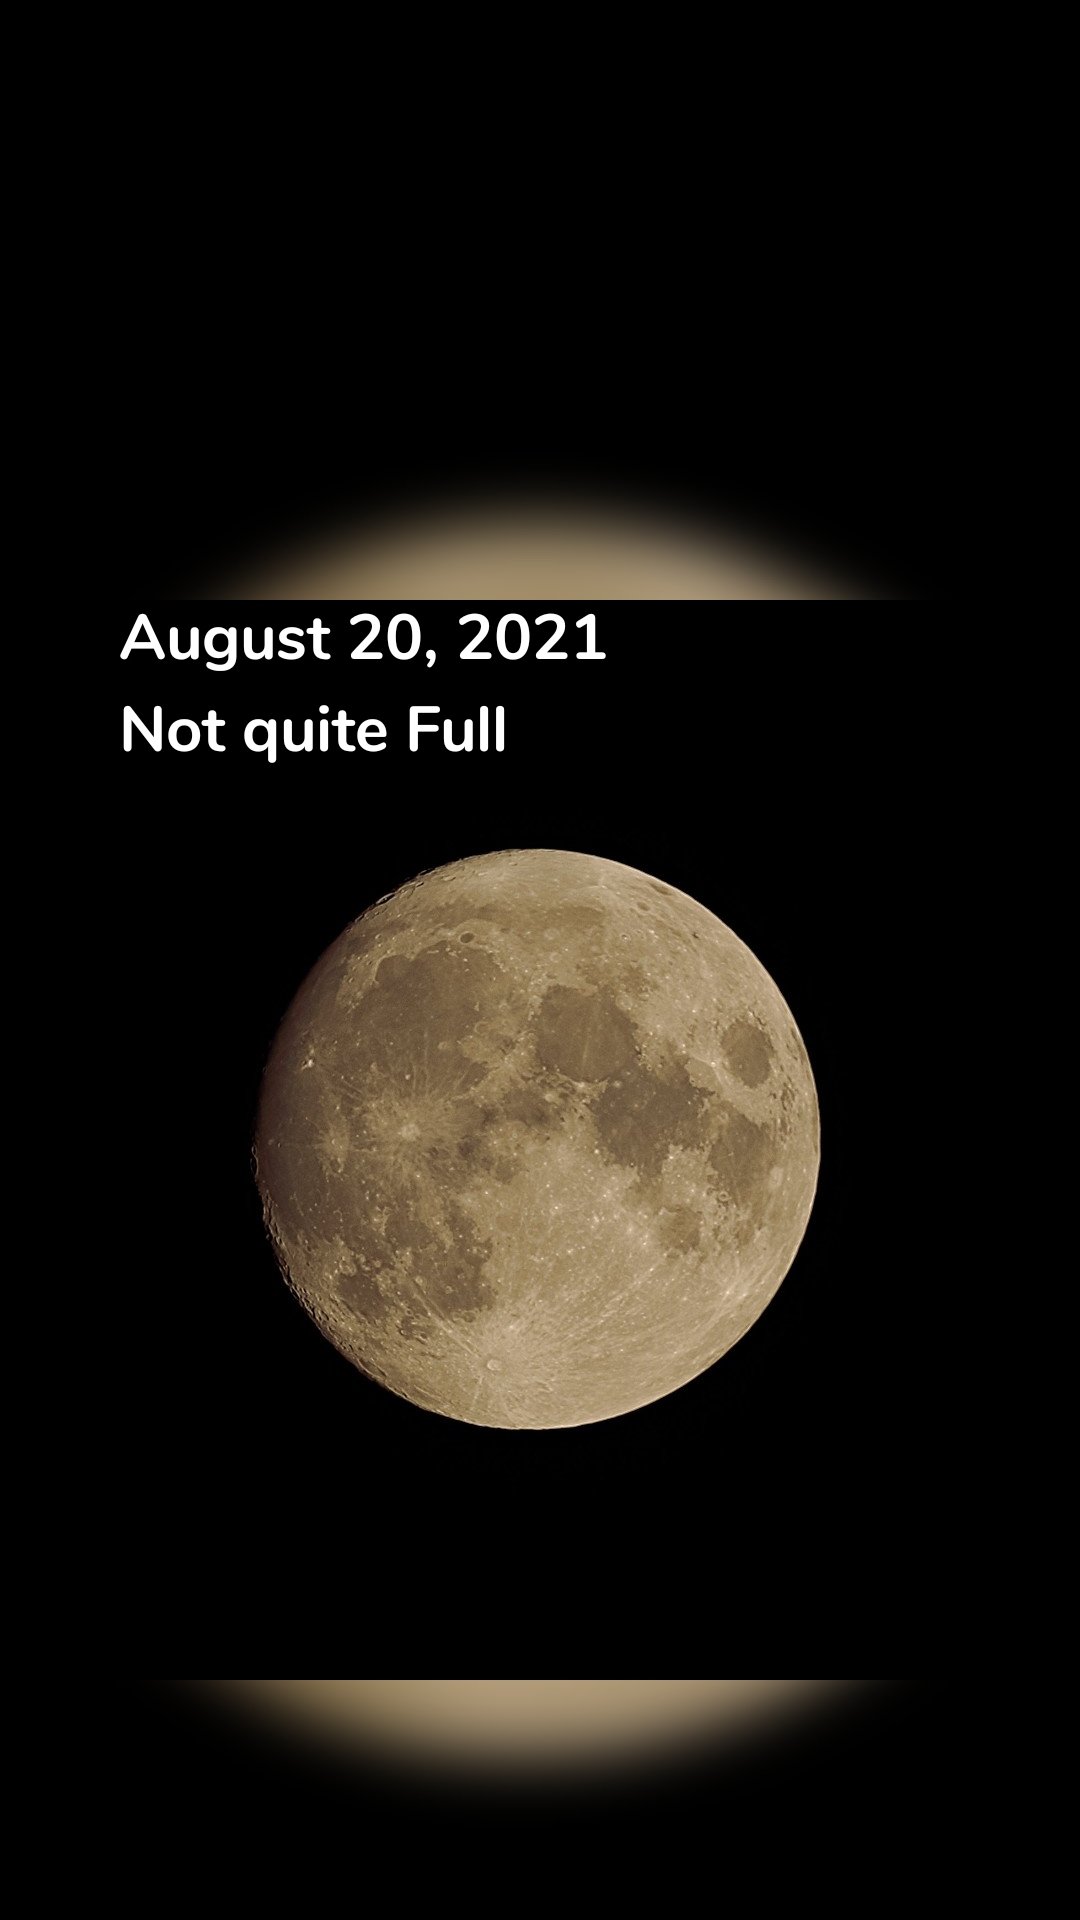
There’s been lots of attention over Mars this past week. I can’t really blame all the media coverage, the Mars 2020 Perseverance EDL to the Martian surface was really cool and a great feat for NASA. I enjoyed watching it live on the NASA YouTube feed. But this weekend let’s turn our attention to the Snow Moon; the only full moon in February.
The full moon will occur at 3:17am Saturday, so tomorrow evening will be the best time to catch it. There’s nothing particularly special about this full moon, not a Blue Moon (second Full Moon in the month) or “Super Moon”. The name Snow Moon comes from the Farmer’s Almanac as February is normally the month that receives the most snow in North America.
The great thing about full moons is that you don’t need to stay up all night and wait outside in the frigid cold to see it. At this time of year, in the Northern hemisphere, the Moon is visible for more that 12 hours a day.
If you’re tempted to photograph the Snow Moon, leave the mobile phone behind, it’ll just give poor results and you’ll end up frustrated with frozen fingers. Instead just enjoy the view, paying close attention to the various dark “seas” spanning the lunar surface.
If you do try taking a picture, grab a DSLR or compact camera with manual mode. Set the ISO around 200 and the focus to manual. Your shutter speed should be high, around 1/800s; a full moon is surprisingly bright. You’re get better results by slightly under-exposing your shot. If you have a tripod, use it, else try to steady yourself on something (railing, chair, car roof, etc..) Subtle movement can easily ruin the details in you photos.
Looking back, the “Great comet of 2020″ C/2020 F3 NEOWISE was a fantastic sight and well worth the 3am alarm to snap some photos back in July. But comet images are notoriously difficult to work with. Should I also add that in older times, comets were often seen as a bad omen, the bearer of bad news? Cough, cough COVID-19 cough…
Anyways, back to astronomy… There are essentially two types of photo registration (alignment) software out there: 1) Deep Sky which uses pin-point stars to perform alignment; 2) Lunar/Planetary uses the large “disk” of a planet or Moon to align based on surface details.
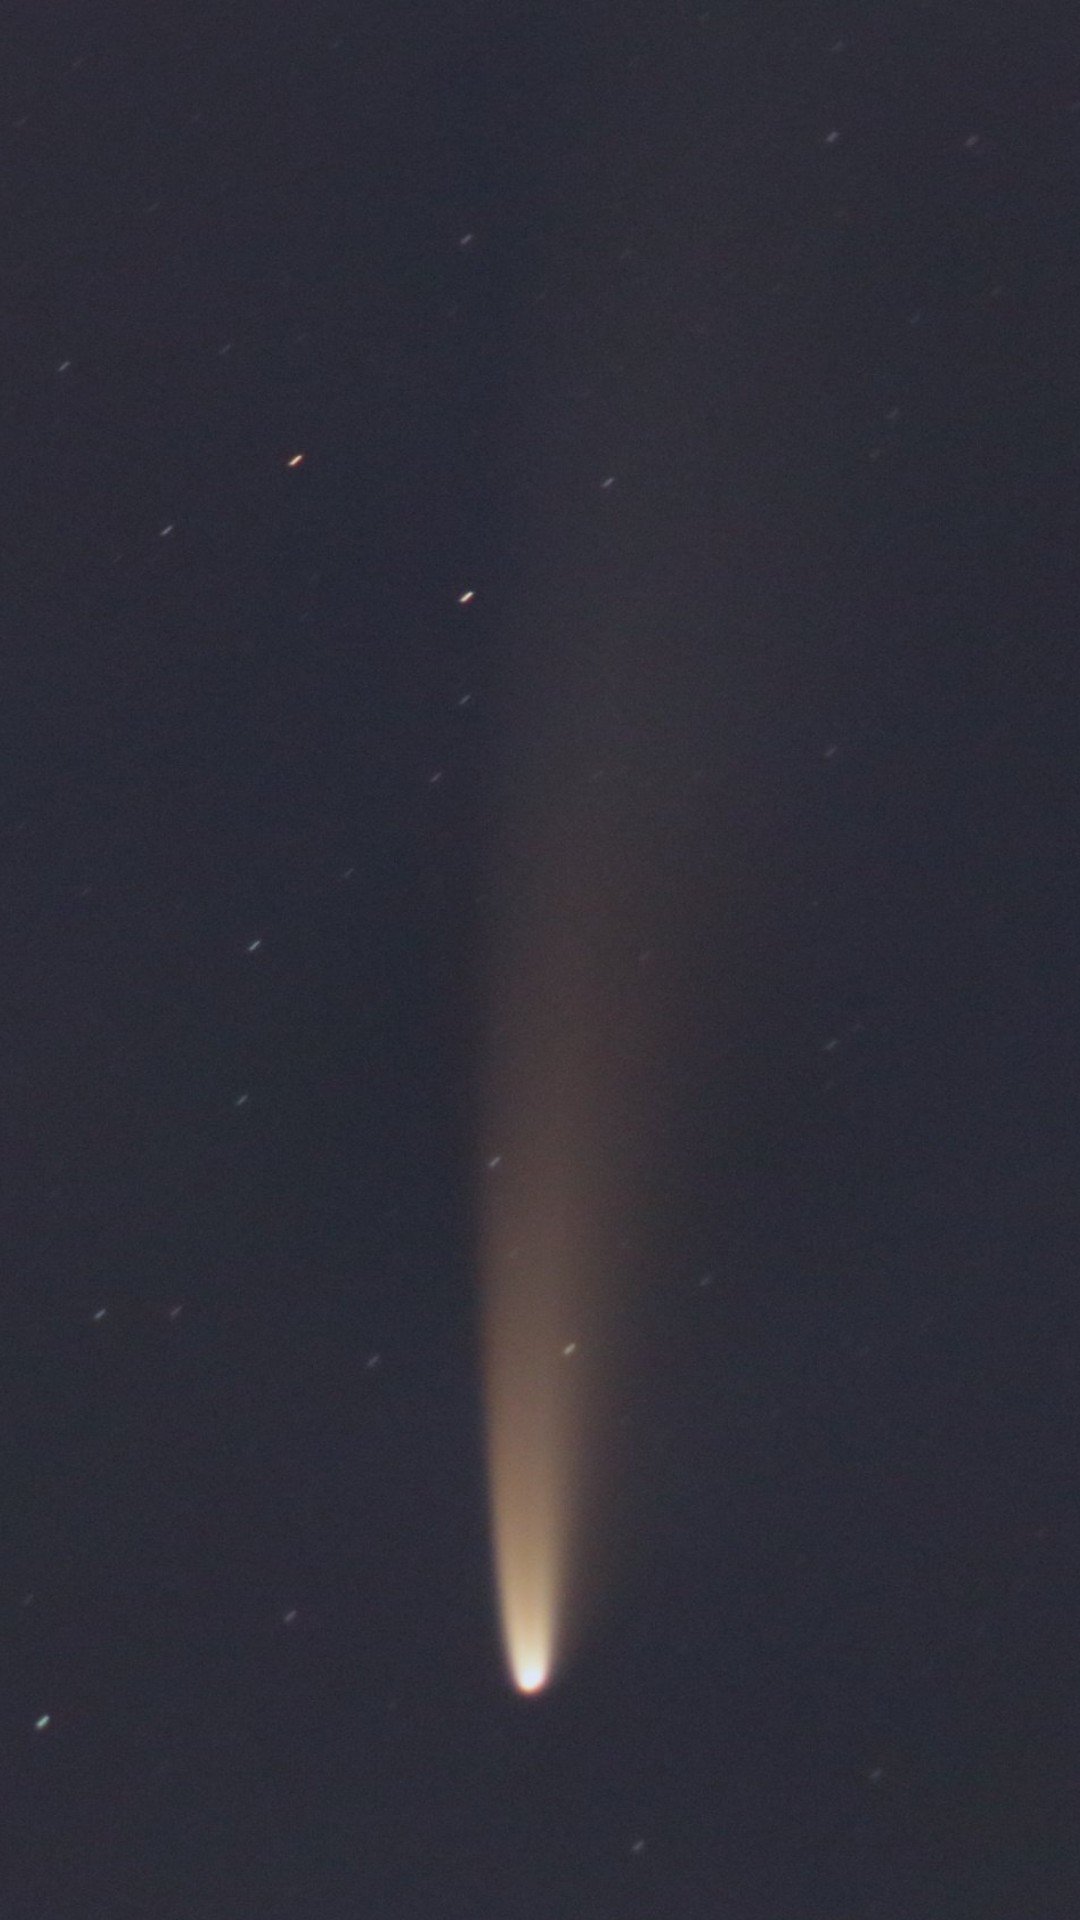
So when you capture long wispy comets like the RAW image below, software like DSS or Registax just can’t cope.
RAW image : Canon 80D 300mm f/5.6 5 seconds exposure at ISO3200 (09-jul-2020)
I turned to standard photo-editing software for a manual alignment and stacking. This is essentially opening one “base” image and then adding a 2nd image as a new layer. I change that 2nd layer to be overlaid as a “Difference” and manually align this 2nd layer to match the base layer. Once that is done I change the layer mode to Addition, and then hide this 2nd layer. Repeat the steps for a 3rd, 4th, 5th, etc. layers until you’ve added all your images. Always aligning with the “base” image to ensure no drift.
If you simply add all those layers up, you will get one very bright image because you are adding pixel intensities. You can do that and then work with the Levels and Curves to bring it back down, or if like me, working with GIMP, then use the Py-Astro plug-ins to do the merging and intensity scaling in a single step with a Merge all layers. Py-Astro can be downloaded here. I haven’t explored all that the plugins have to offer, that will hopefully be in another blog.
Stacking 11 individual frames results in an improvement over a single RAW image (image below). With the stacked image, I’m able to work with the intensities to darken the sky while keeping the comet tail bright.
After merging 11 images manually aligned in GIMP
However the sky gradient is pretty bad, due to the camera lens and because at 4am the sun is starting to shine on the horizon. So off to IRIS to correct the background gradient. From GIMP I save the files as a 16BIT FIT that I can use in IRIS. For steps on how to do this, see my blog about how to remove the sky gradient.
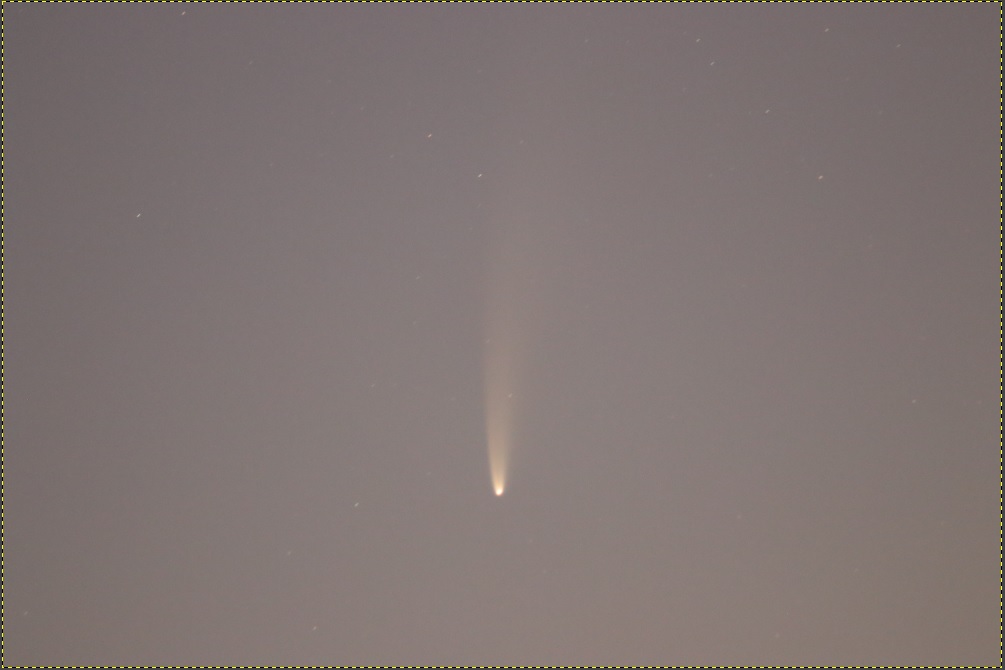
After a quick spin in IRIS, I’m back in GIMP for final color and intensity adjustments, I boosted the BLUE layer and adjusted the dark levels for a darker sky.
Final Processed image of C/2020 F3 NEOWISE from 09-JUL-2020
At one point in time we’ve heard the saying that we are all made of star dust. Therefore, our home , the Milky Way, filled with 250 billion stars should be rather dusty. Right? Well it is, and one famous dust lane that we often see even has a name: The Great Rift.
Say that you are out camping this summer, and you spot the MilkyWay as you are amazed how many stars you can see when away from the city. You remember you have your camera and decide to setup for some long exposure shots to capture all this beauty (lets go for 20 seconds at ISO 3200 17mm F4.0) pointing to the constellation Cygnus. A bit of processing and you should get something like this.
The Milky Way centered on the constellation Cygnus.
Not bad! Lots of stars… a brighter band where the Milky Way arm of the galaxy is located and some darker spots at various places. Those darker areas are gigantic dusk clouds between Earth and the arms of our spiral galaxy that obscure the background stars. If only there was a way to remove all those stars, you could better see these dark areas.
And there is a way to remove stars! It’s called StarNet++, takes a load of CPU power and works like magic to remove stars from photos. Abracadabra!
Above image after processing with the StarNet++ algorithm
Behold! The Great Rift! Well actually just a portion of it. With the camera setup I get at most a 70deg field of view of the sky. Nevertheless, the finer details of these “dark nebula” can be appreciated.
Stripping the stars from an photo does have some advantages: it allows the manipulation of the background “glow” and dusk lanes without concern to what happens to the foreground stars. The resulting image (a blend of both the starless and original image) had improved definition of the Milky Way, higher contrast and softer stars that improve the visual appeal.
While there are plenty of stars above us, what defines a nice Milky Way shots is the delicate dance of light and darkness between the billions of stars and the obscuring dust clouds.
Photo Info: Canon 80D 13 x 20 sec (4min 20sec integration time) 17mm F4.0 ISO3200 Deep Sky Stacker IRIS for background gradient removal and color adjustment StarNet++ GIMP for final processing
When observing a comet, what we see is the outer coma; the dust and vapor outgassing from the nucleus as it gets heated from the Sun.
So I decided to take one of my photos taken with my Skywatcher 80ED telescope (600mm focal length) and see if I could process the image to spot where the nucleus is located.
This can be achieved by using the MODULO command in IRIS and viewing the result in false color. The results are better if you do a logarithmic stretch of the image before the MODULO command. It took some trial-and-error to get the right parameters, but the end results isn’t so bad.
Studying the internal structure of comet C/2020 F3 NEOWISE (Benoit Guertin)
For the fun of it I tried to see if I could calculate the size of the comet nucleus using the image. At the most narrow the nucleus on the photo spans 5 pixels. Based on a previous plate-solve result I know that my setup (Canon 80D and Skywatcher 80ED telescope) results in scale of 1.278 pixels per arc-second. Then I used Stellarium to get the Earth-coment distance on July 23rd (103.278 M km)
When I plugged in all the numbers I get a comet nucleus size of approximately 2000 km, which to me seamed a little on the BIG size.
Welcome to a journey into our Universe with Dr Dave, amateur astronomer and astrophotographer for over 40 years. Astro-imaging, image processing, space science, solar astronomy and public outreach are some of the stops in this journey!


