Atik has just released a new camera dedicated to video astronomy:the Atik Infinity. It is a step up from their Titan that sells for about $600, but still marketed as entry-level camera due to its ease of us and just scratching the $1000 selling price.
Atik Infinity Camera – Atik
It’s designed around the Sony ICX825 sensor, the same one used with good success on their 414EX, and can be ordered as monochrome or color. Atik also supplies a custom software application that allows you to live view, control the camera with real-time integration and broadcast on YouTube the resulting video stream.
While it may not have the active cooling of the 414EX, the lower price, smaller footprint and freedom from dew/frost issues that cooling brings it will certainly draw attention.
Below is a recap of the Atik Infinity live broadcast performed by Atik on September 8th to demonstrate some of the Infinity’s capabilities.
Creating a time-lapse video out of your individual photos is a simple matter with Microsoft Movie Maker. And the cool thing is that it will work with Canon RAW .CR2 format files, so no need to convert them to JPG ahead of time.
The following steps are performed with Windows8.
Step 1 – Select the sequence of images in Microsoft Photo Gallery
Step 2 – Under Create select Movie. This will automatically launch Microsoft Movie Maker with the individual photos loaded in a new Movie Maker Project.
New Movie Maker Project created
Step 3 – Under Edit – Video Tools, change the duration between frames to a value less than 1.0- example 0.20.
Step 4 – Save your movie in the format and resolution you wish. Voila! And why not add a title, caption and a soundtrack to go the extra mile.
Therefore set your camera on a tripod and start taking some pictures of the night sky.
Couldn’t put all those frames to waste, so I processed and assembled them into a time-lapse video showing the Earth’s rotation and the various layers of clouds flying by.
The video was created with Microsoft MovieMaker, a tool that all Win7 and Win8 users have by default. So it’s FREE! Yay!
These were processed in IRIS and saved as BMP, but MovieMaker will also create videos with Canon CR2 RAW Files directly. Therefore dump all your frame and you can generate an instant video without any processing. By default it sets 7.0sec delay between images. Simply select all images and change the value to 0.100 or whatever frame rate you wish. And then export your video.
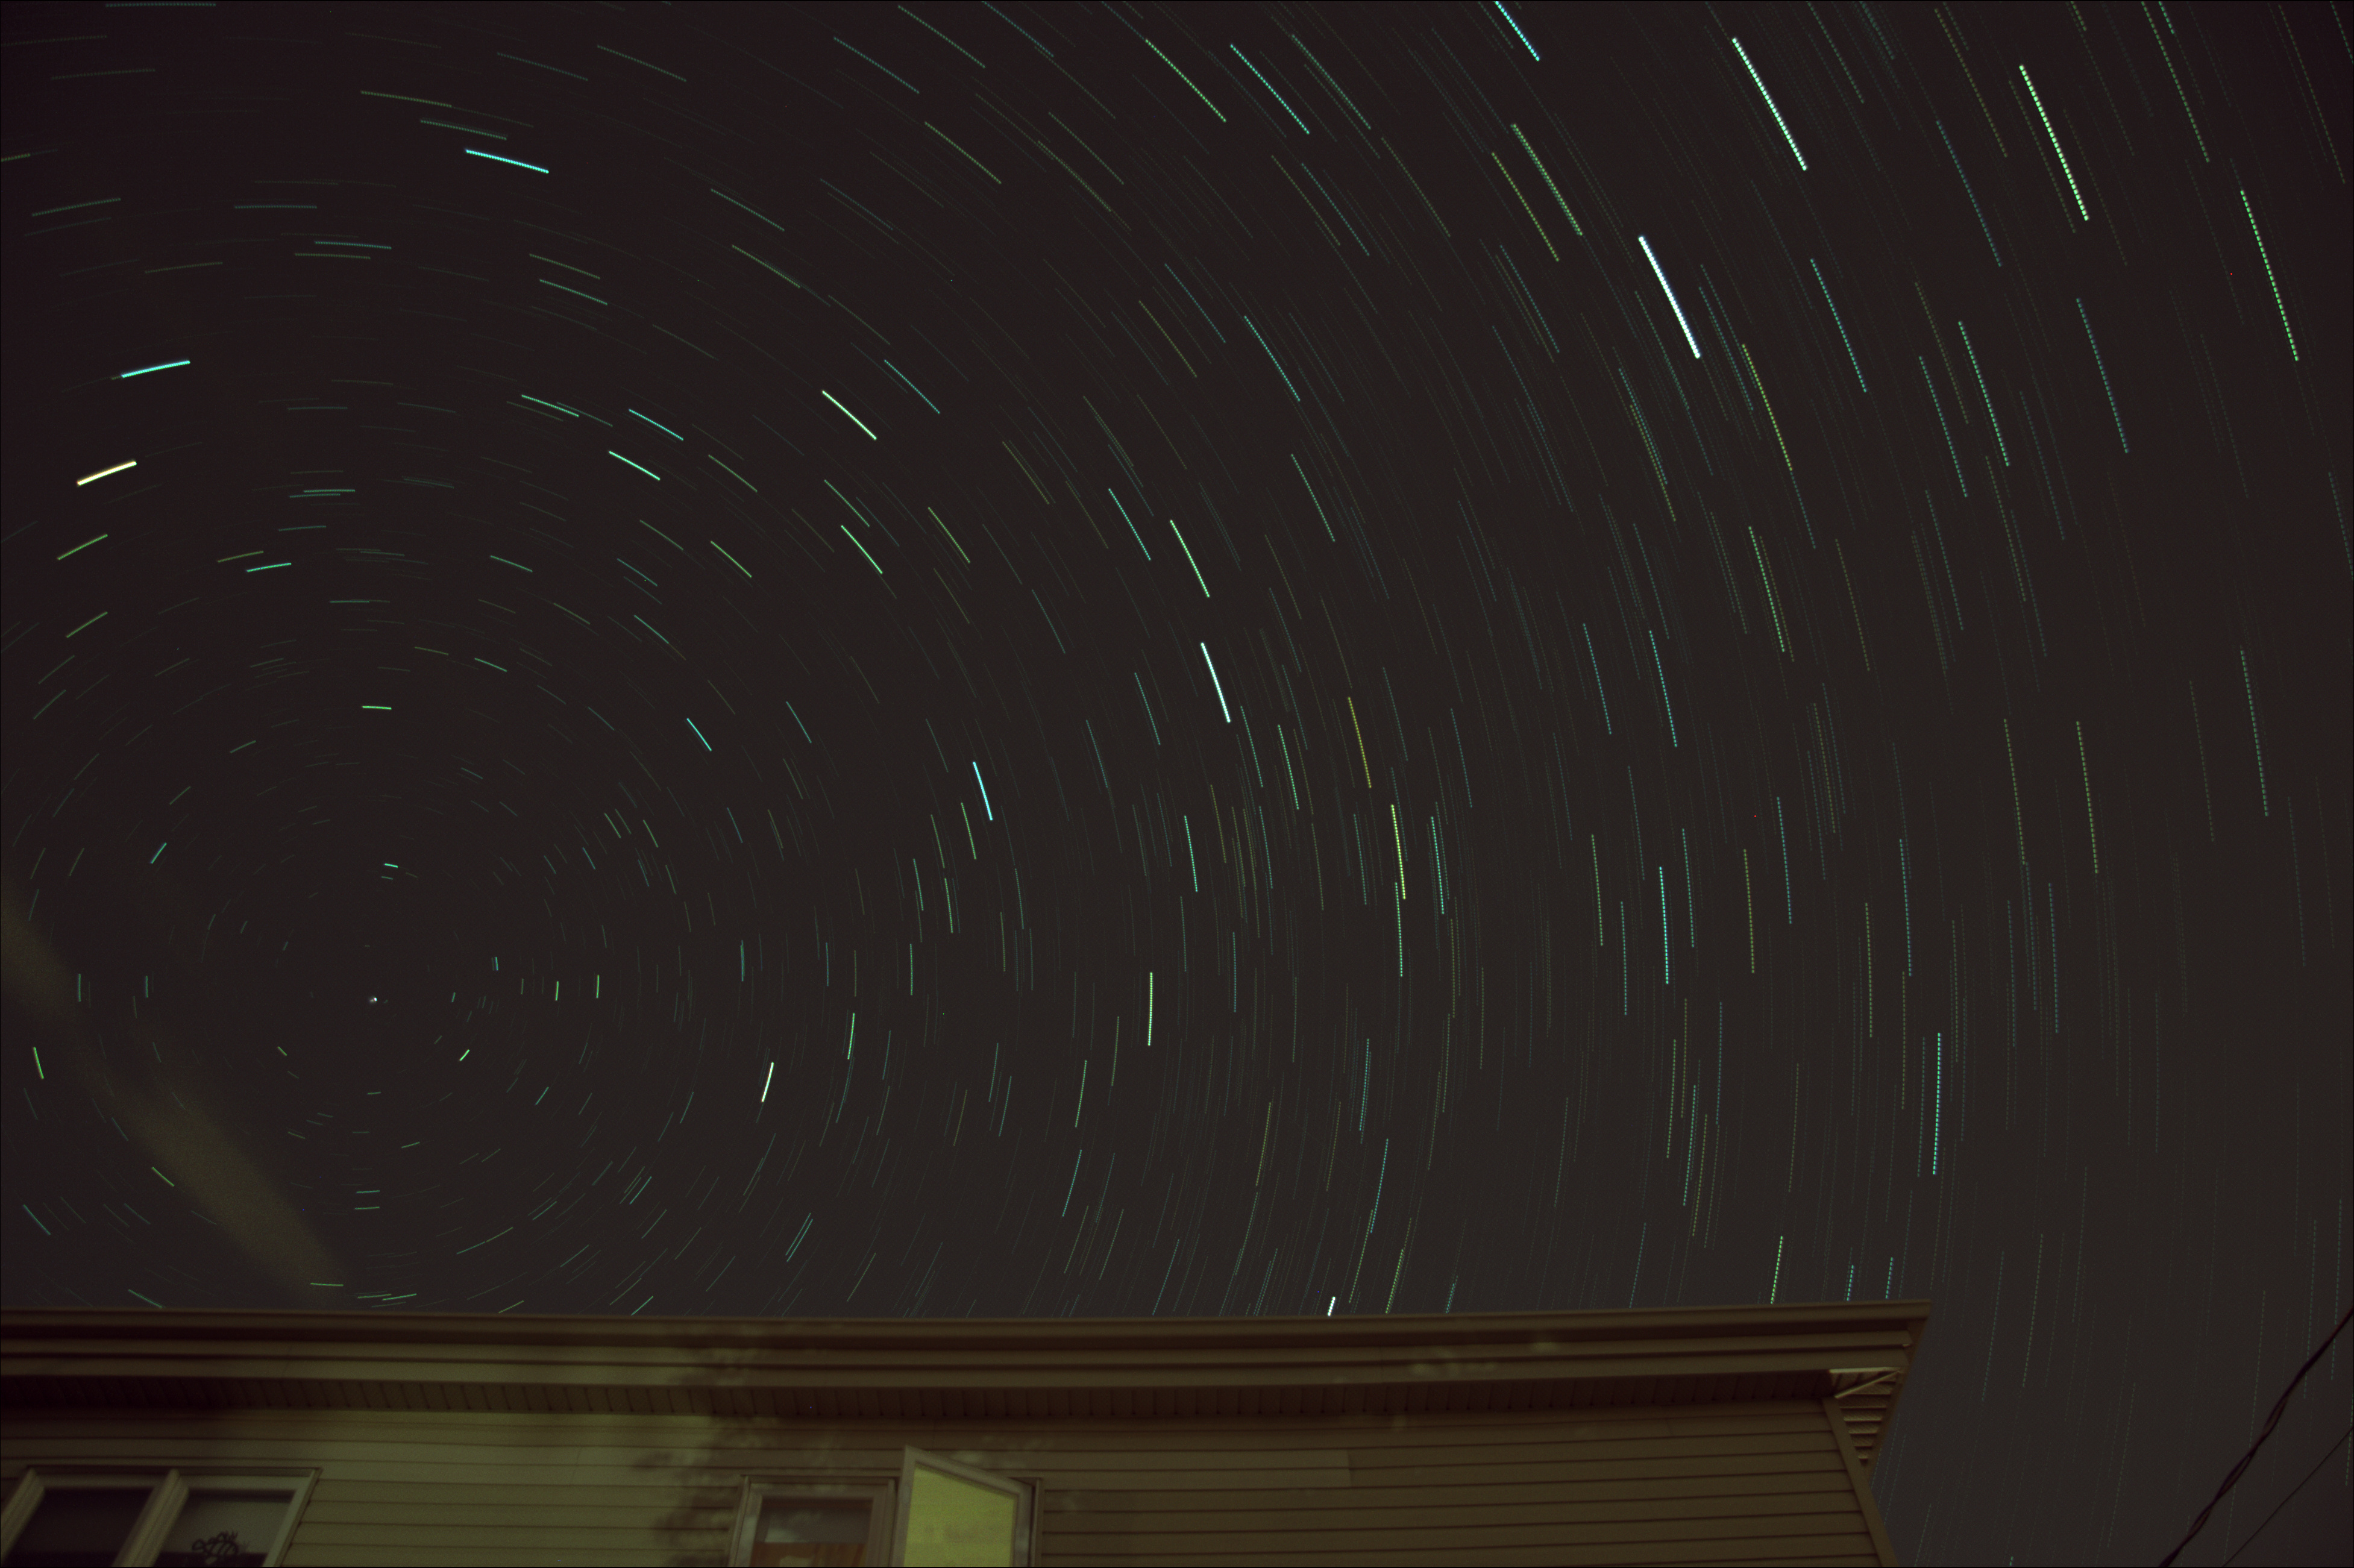
The Perseids peak had already passed, but the sky was better so I decided to set up the trusty Canon XTi and see if I could catch some meteors. This time instead of pointing the camera straight up, I decided to frame the top of the house to provide some reference.
Out of the over 120 shots taken, a sequence of 30 frames were without clouds obscuring the stars. This was a perfect opportunity to mark the celestial pole by adding the images without alignment.
The 2015 Perseids were predicted to be great, largely thanks to Mother Nature turning off its night-light (aka our Moon). Unfortunately the weather wasn’t as cooperative… With clouds over the horizon I knew my window to try to capture some Perseids was quickly vanishing. Nevertheless I setup my camera on a tripod and hoped for the best.
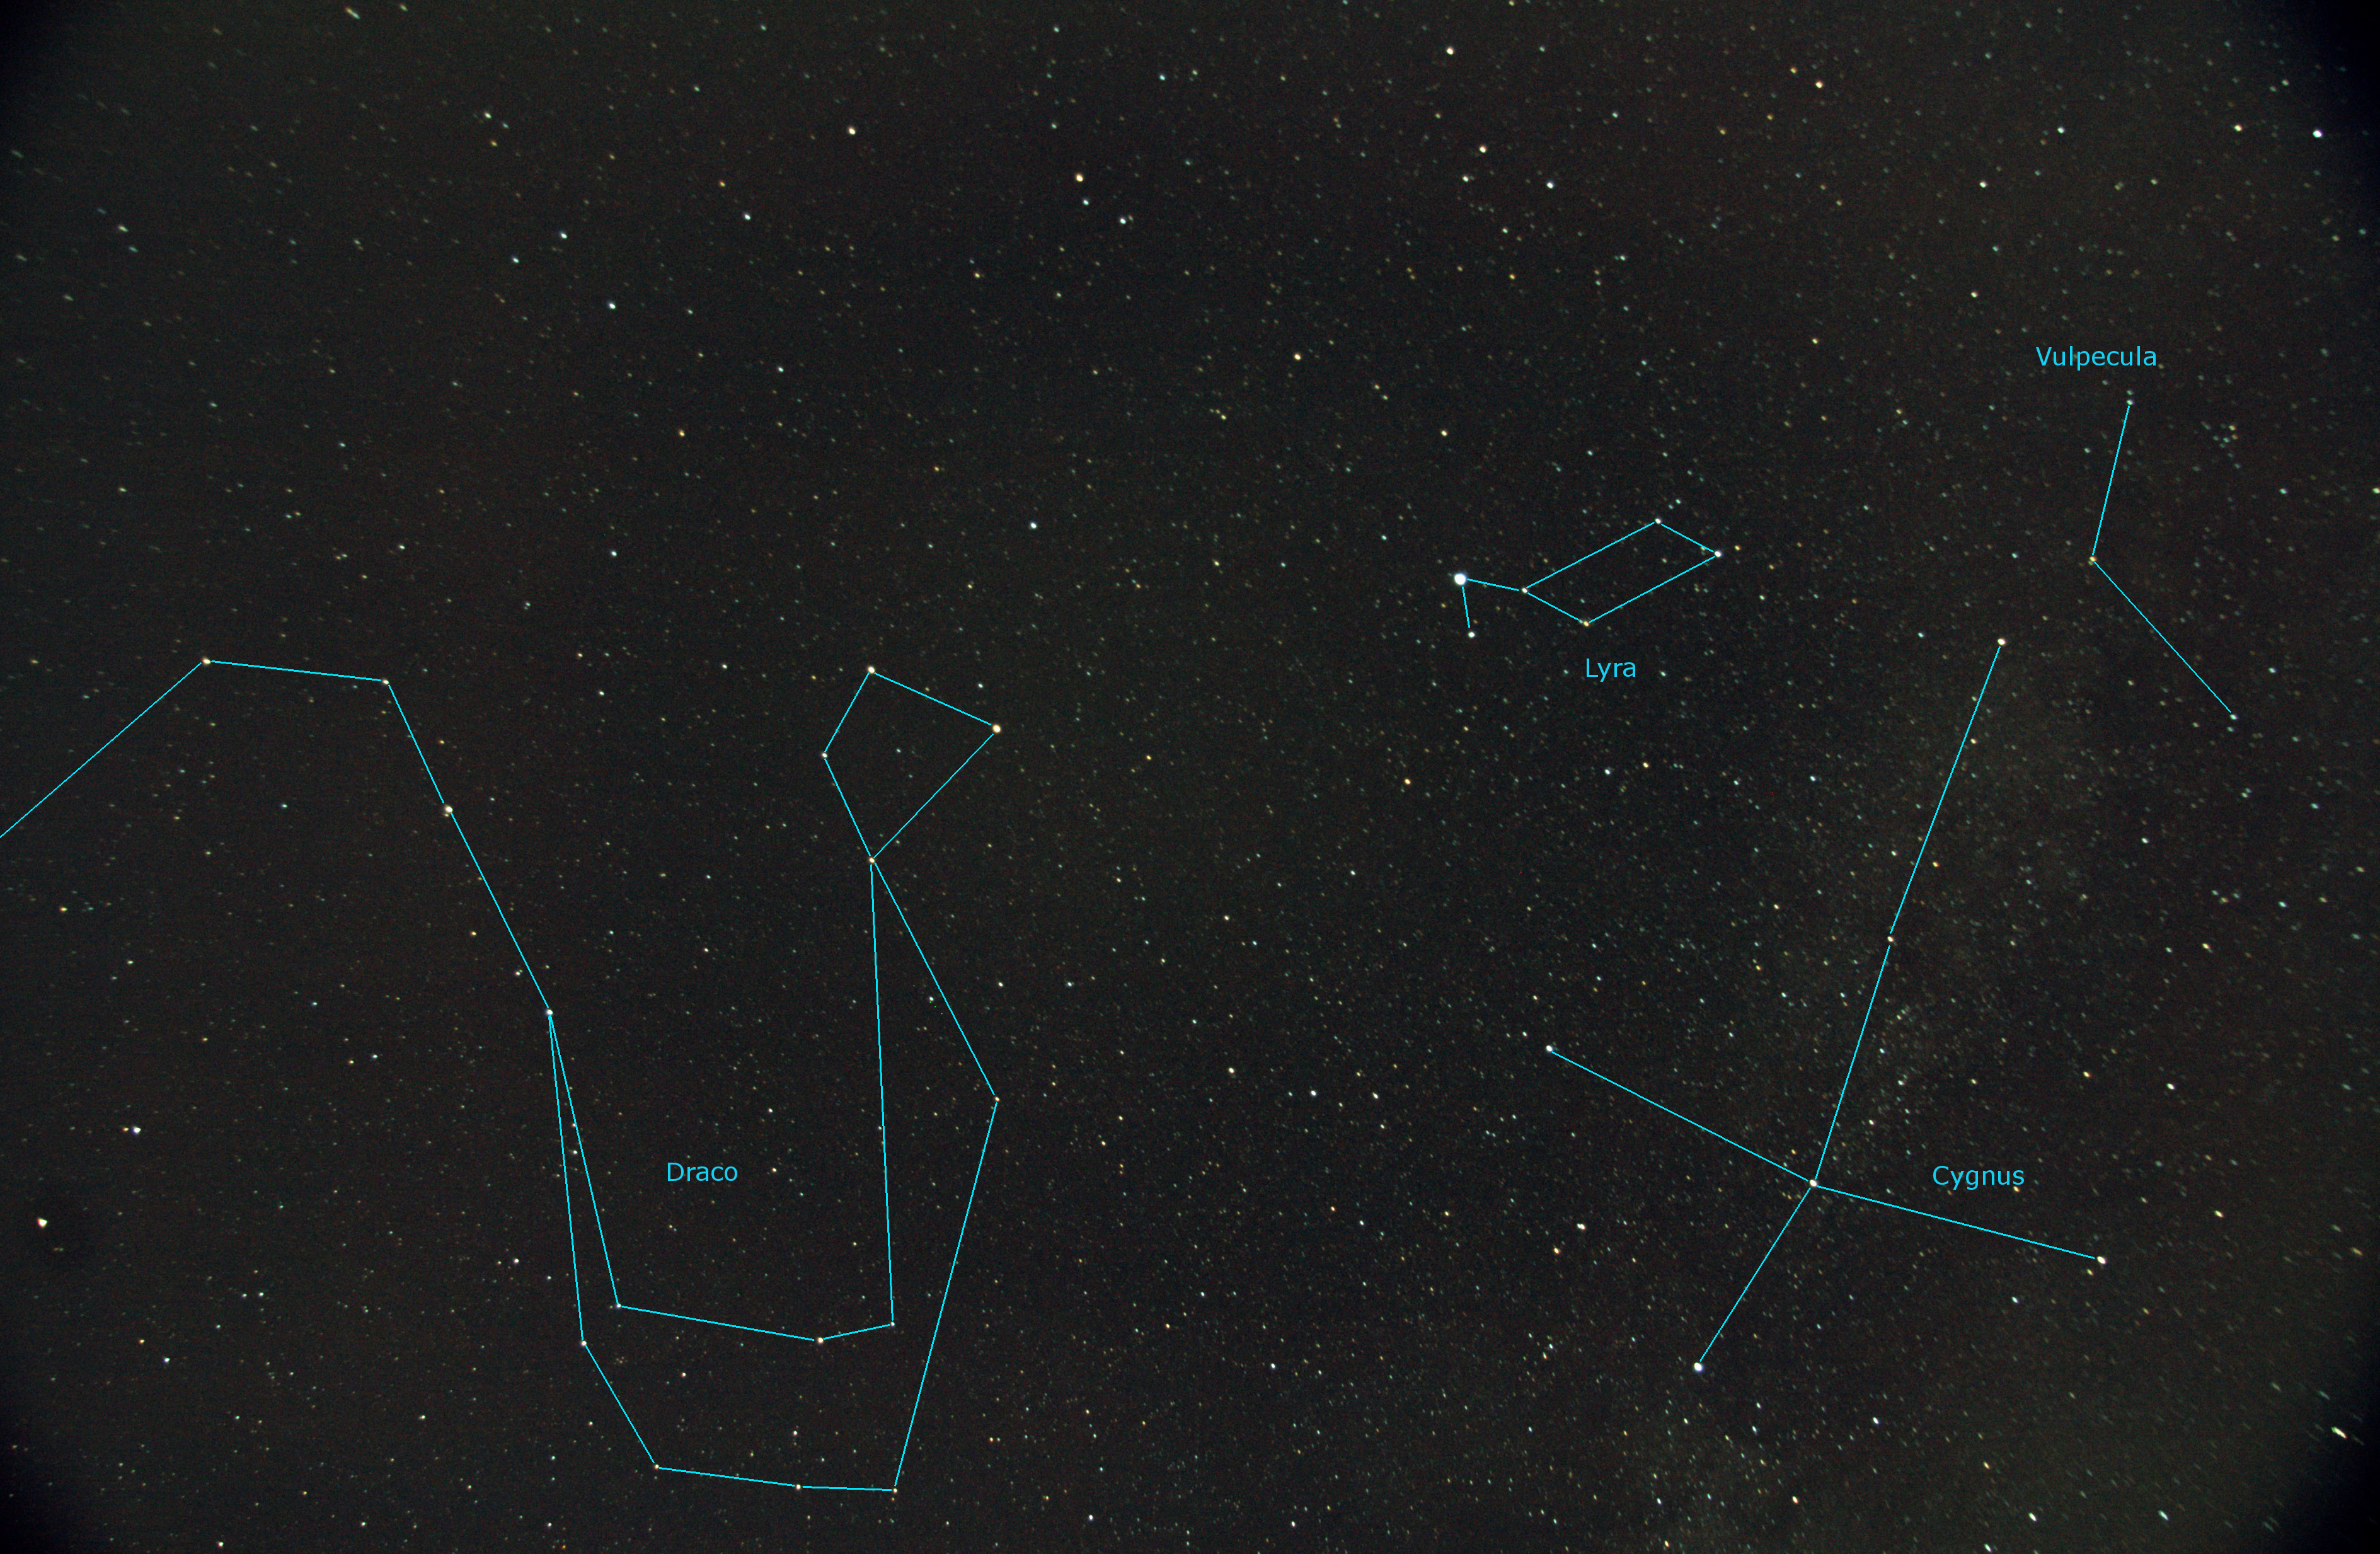
The best I got was 13 shots without clouds. A quick scan of them did not reveal any notable meteor streak. But it wasn’t all a waste. I was able to process, align and stack them to provide a good 60deg field of view around the zenith.
Constellations Draco, Lyra, Cygnus and Vulpecula 13 x 30sec (17mm F4.0 ISO400) Benoit Guertin
Canon XTi
17mm F4.0 ISO400
13 x 30sec
Fixed mount, no tracking
Galaxies are always a challenge… Imaging objects such as nebulas within our galaxy is much better suited to my small telescope. At 700mm focal length, galaxies over 30 million light years away are rather small and lack detail. Nevertheless this is my go at Messier 95 and 96 in the constellation of the Lion.
These galaxies were discovered by Pierre Méchain in 1781 with a 12in telescope, nearly 4 times the size of mine.
Galaxies Messier 95 and 96 – Benoit Guertin
The image was scaled to 30% and I’ve added insets of the galaxies.
Telescope: Sky-Watcher 80ED
Camera: Canon XTi (ISO 400)
Image: 30 x 30sec
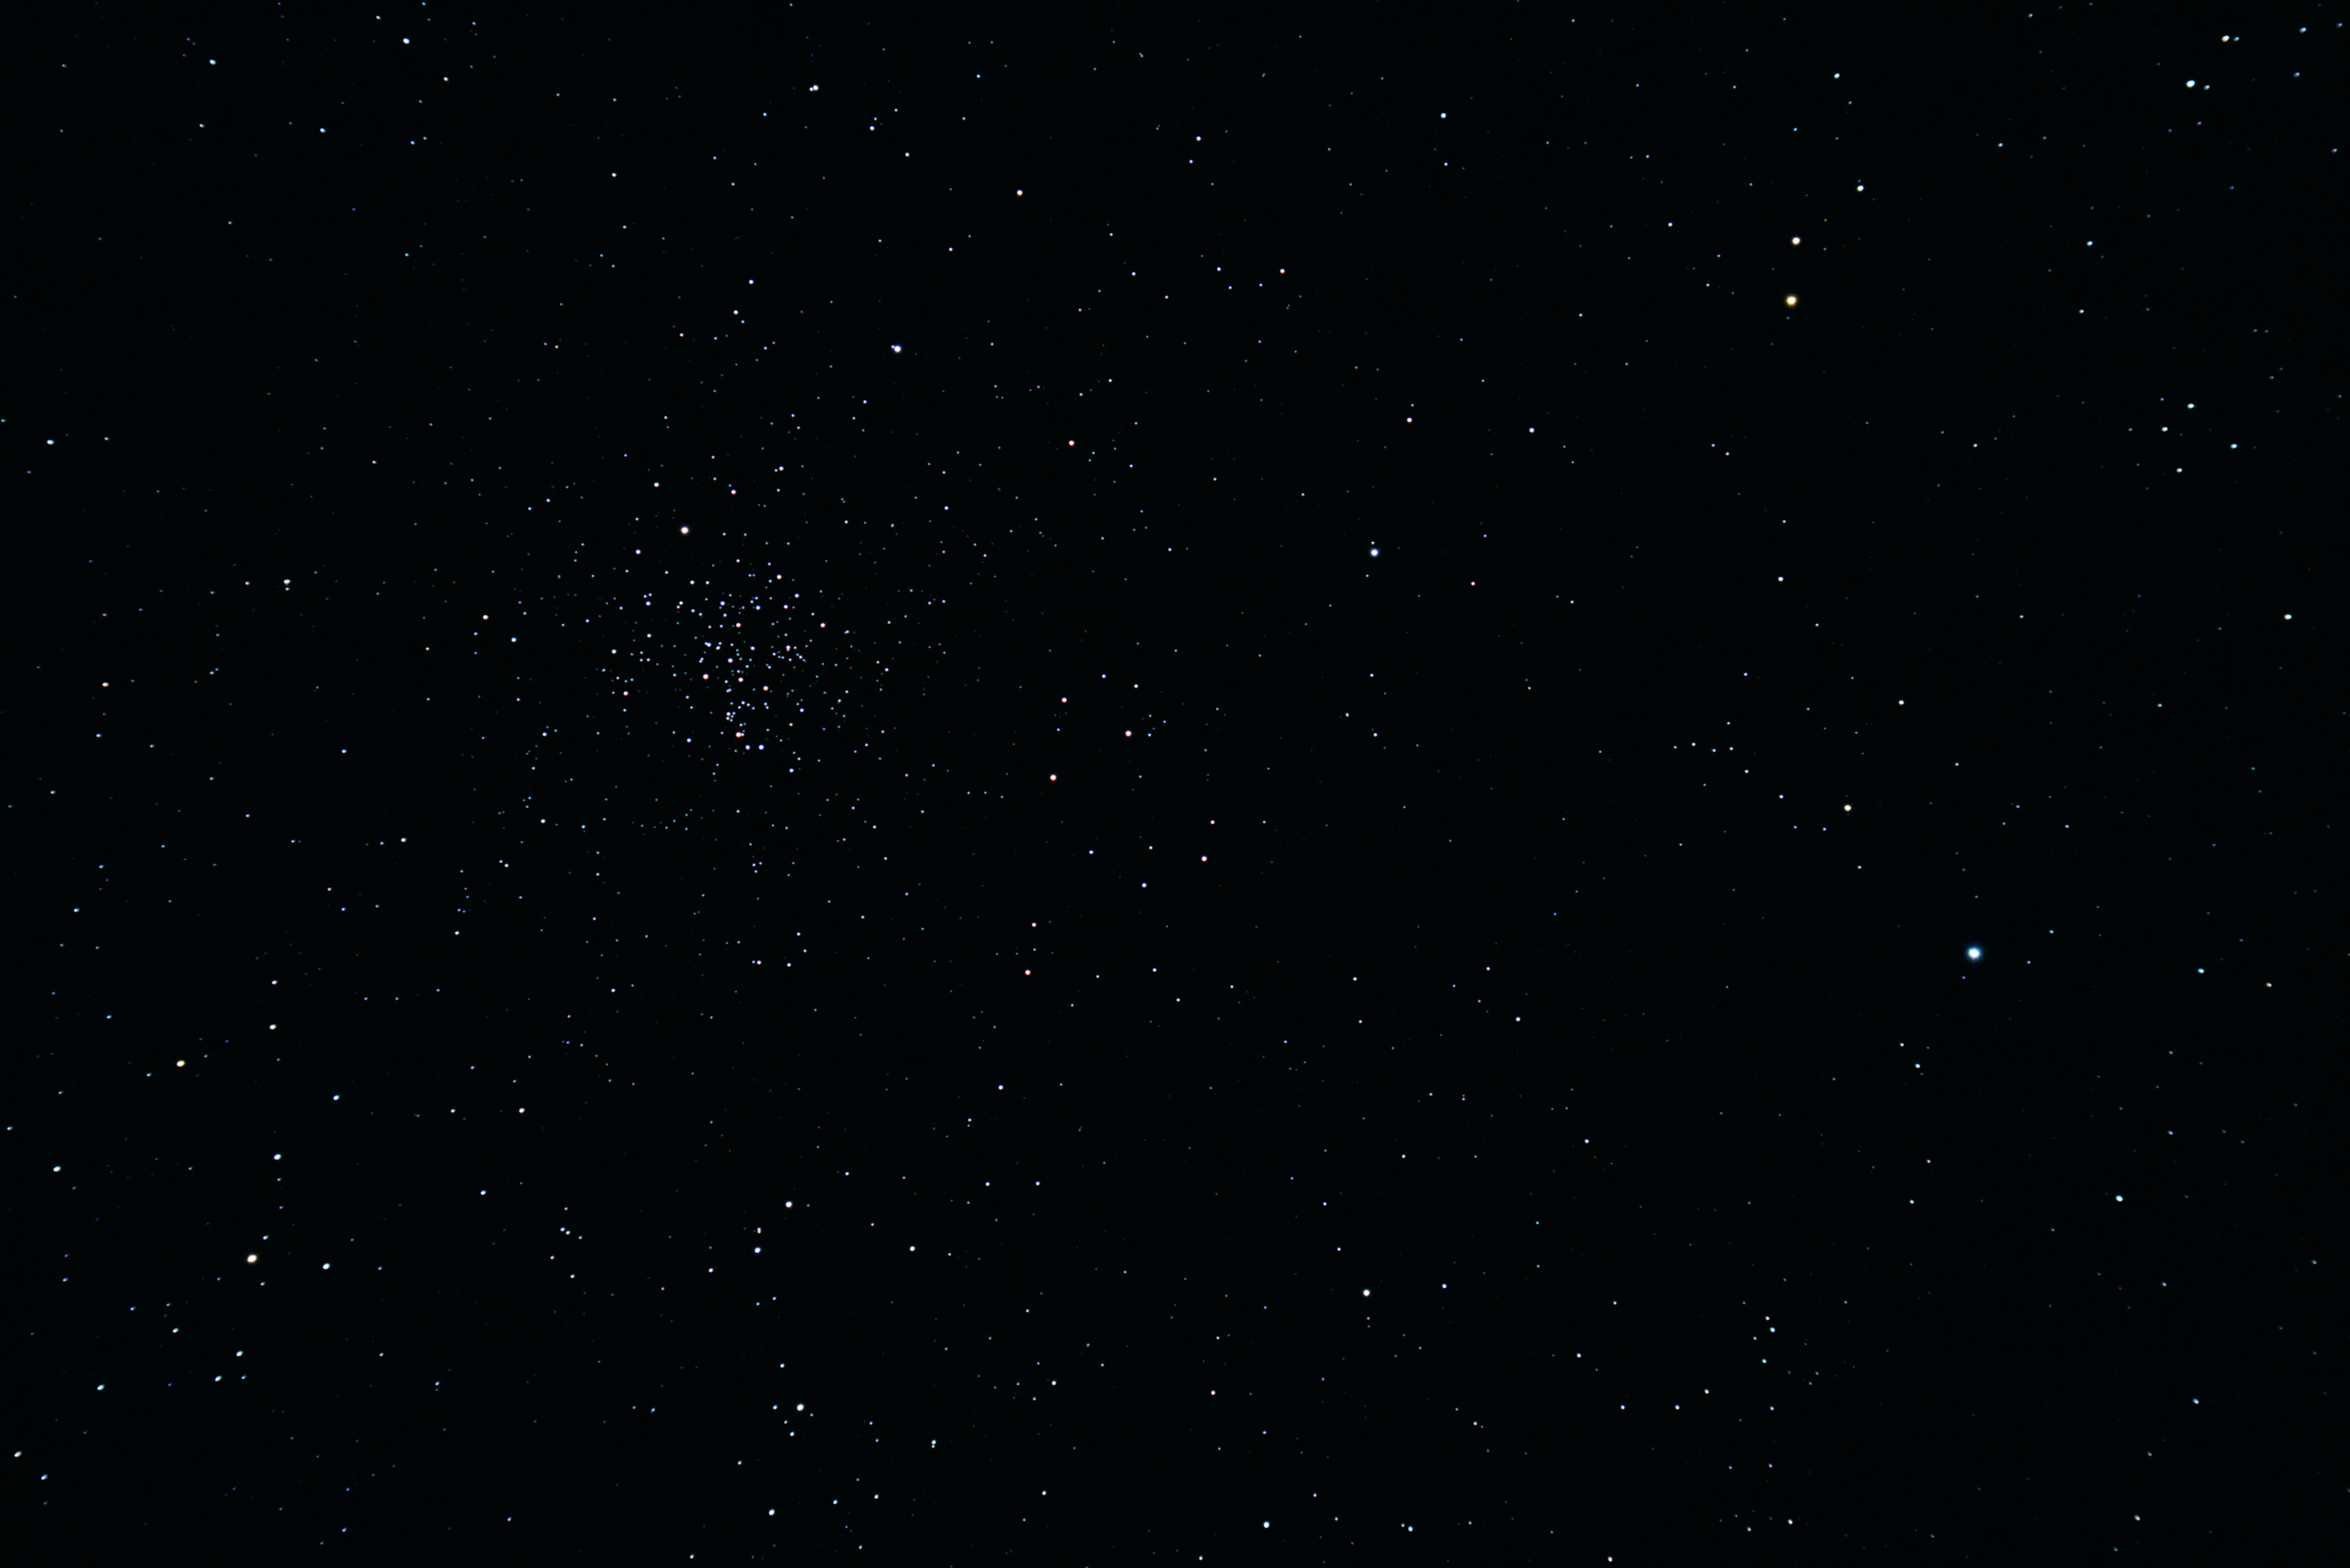
On the same night that I imaged Messier 44 I decided to hop over to another nearby open cluster: Messier 67. While M44 appears three times larger, both of these open clusters are estimated to be of roughly the same size, but M67 happens to be 5 to 6 times farther away.
Click on the image to get the full image, it’s scaled and cropped below.
Open Cluster Messier 67 Benoit Guertin
Telescope: Sky-Watcher 80ED
Camera: Canon XTi (ISO 400)
Image: 19 x 30sec
A few days ago after taking some video of Jupiter with a modified webcam, I slewed over to the open cluster Messier 44 also known as the Beehive Cluster and changed over to the Canon XTi to take some long exposures.
Below is the result of stacking 20 x 30sec exposures at ISO 400.
Messier 44 – Open Cluster Benoit Guertin
Telescope: Sky-Watcher 80ED
Camera: Canon XTi – ISO 400
Image: 20 x 30sec
Planetary imaging is usually where everyone starts. The targets are bright objects in the sky such as the Moon and the planets that don’t require long exposures; Venus, Mars, Jupiter and Saturn. And because there are no long exposures, no need for a mount that tracks. The electronics of a webcam allows between 5 and 60 frames per second (fps), more than enough to get a good image that can be used with any sized telescope, and the result is a AVI movie that can be easily processed.
There are two ways to use the webcam:
Prime focus: the original webcam lens is removed and the telescope becomes the lens; like swapping lens on a SLR camera. Magnification is provided by the focal length of the telescope and the optional use of a barlow lens.
Eyepiece projection: the webcam replaces the eye and the magnification is provided by the ratio of telescope focal length to eyepiece focal length.
In my case I went with a prime focus solution, hence I needed a webcam where the original lens could be removed and replaced with an 1.25″ adapter to fit into the telescope’s focuser.
Philips Vesta Pro 680K webcam modified for use on telescope
The camera sensor, be it CMOS or CCD is sensitive to a wider spectrum than the human eye, therefore most have build-in UV and IR filter, either on the lens or the sensor. As this filter was on the original webcam lens I purchased a BAADER UV-IR Rejection 1.25″ #2459207 filter for use with the adapter. Refractors have a challenge getting all colours focused at the same spot, and even with an APO scope what falls in the UV and IR range will generally appear out of focus. Best to keep those out with a filter.
Today a good planetary imager can be purchased for under $200, but when I started, most astronomy imaging devices ran in the $1000+ camp. The Philips Vesta 680K was rather popular as a wonderful man by the name of Steve Chambers figured out how to easily modify the webcam electronic to get much longer exposures. The Vesta was also equipped with a CCD-based sensor, more sensitive than the CMOS technology used in most webcam. These modified webcam became to be known as Vesta-SC.
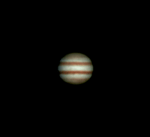
I’ve spotted Jupiter, can I take a photo? Actually you should take a video. The reason is that there is a great deal of turbulence in the atmosphere and this causes the image to blur and giggle about. By taking a video you are doing two things:
Capturing a large quantity of images which can be later processed
May happen upon a brief period of atmospheric stability
Here is a 30 second segment of Jupiter with my setup
I recommend taking a few videos with different settings such that you’ll be able to see after which provided the best results. Select an uncompressed format such as AVI as to not get compression artifacts, and AVIs are easily broken into individual image frames.
Software such as IRIS or REGISTAX can be used to process the video. REGISTAX is actually quite good and painless at doing this. Don’t be intimidated by the large number of settings and parameters, you can get great results out-of-the-box with the default settings.
The process breaks down into 5 steps:
Select your target (what you want the software to track on)
Filter on the frames that have good image quality; only keeping those that are sharp and resemble each other
Align (register) the individual images
Stack the individual images
Wavelet analysis and final brightness/colour balance
Because of the high number of images, you can actually improve image resolution by up-sampling or drizzling the image prior to stacking. The end result is often an image that can be scaled up by 2x while maintaining resolution.
Wavelet analysis is a type of sharpening, similar to unsharp-mask, but treating each level of granularity as a different “frequency”. While unsharp-mask is tuned to a specific size of detail, wavelet is able to treat various levels of details as different layers of the image and add the results.
Jupiter is a good target right now as it’s high in the sky, so you’re not looking through too much atmosphere and turbulence. Now this is far from my all-time best shot, but after a 3 year break, I’m a … Continue reading →
Welcome to a journey into our Universe with Dr Dave, amateur astronomer and astrophotographer for over 40 years. Astro-imaging, image processing, space science, solar astronomy and public outreach are some of the stops in this journey!


 Step 2 – Under Create select Movie. This will automatically launch Microsoft Movie Maker with the individual photos loaded in a new Movie Maker Project.
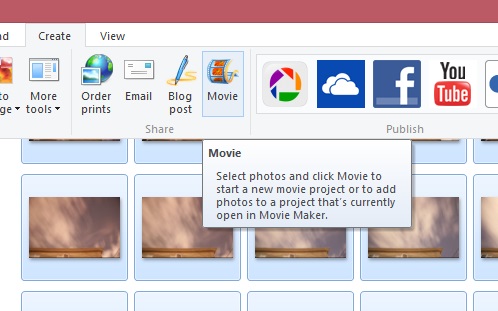

 Step 4 – Save your movie in the format and resolution you wish. Voila! And why not add a title, caption and a soundtrack to go the extra mile.