October 5th 2016 – Mars, Saturn and the Moon

Image

Didn’t have the luxury to scout a better setting to frame the picture.  In the street was actually better than my backyard with all the electric and utility poles/wires.  But nevertheless took a few minutes to frame the scene down the street while standing under a street light.  Click on the image to expand.

October 5th, 2016 - Mars, Saturn and the Crescent Moon

October 5th, 2016 – Mars, Saturn and the Crescent Moon

Almost in the same horizontal plane, you have Mars on the left and Saturn close to the Moon.

As it wasn’t fully dark yet, and I was on a tripod the exposure was rather short: 1/2sec at ISO 400.  Hence no rich star field this time around.  But you do see some of the bright stars such as Antares below Saturn.  Below is an overlay with a star chart.

Overlay with star chart - October 5th, 2016

Overlay with star chart – October 5th, 2016

If you missed it, there is still tomorrow… the Moon will have moved to a position above Saturn.

Layers and Blurring

Image

We spend lots of money on expensive optics and hours trying to get the focus spot-on or the mount alignment/guiding perfect for smooth tracking to avoid blurry and stretched stars.  So why would you want to blur your final image?

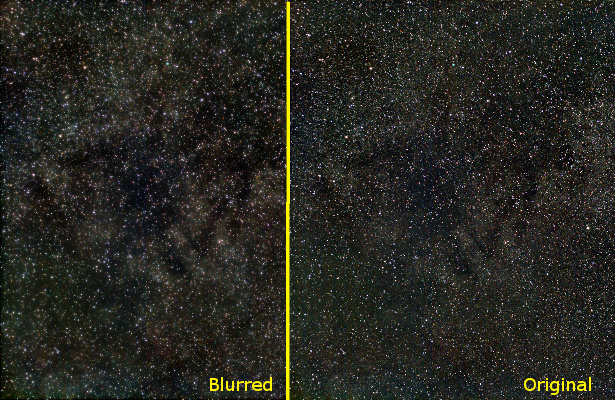
Consider the images below.  The one of the left is softer and more pleasing to the eyes, yet the stars remained sharp.

blurredlayers_compare

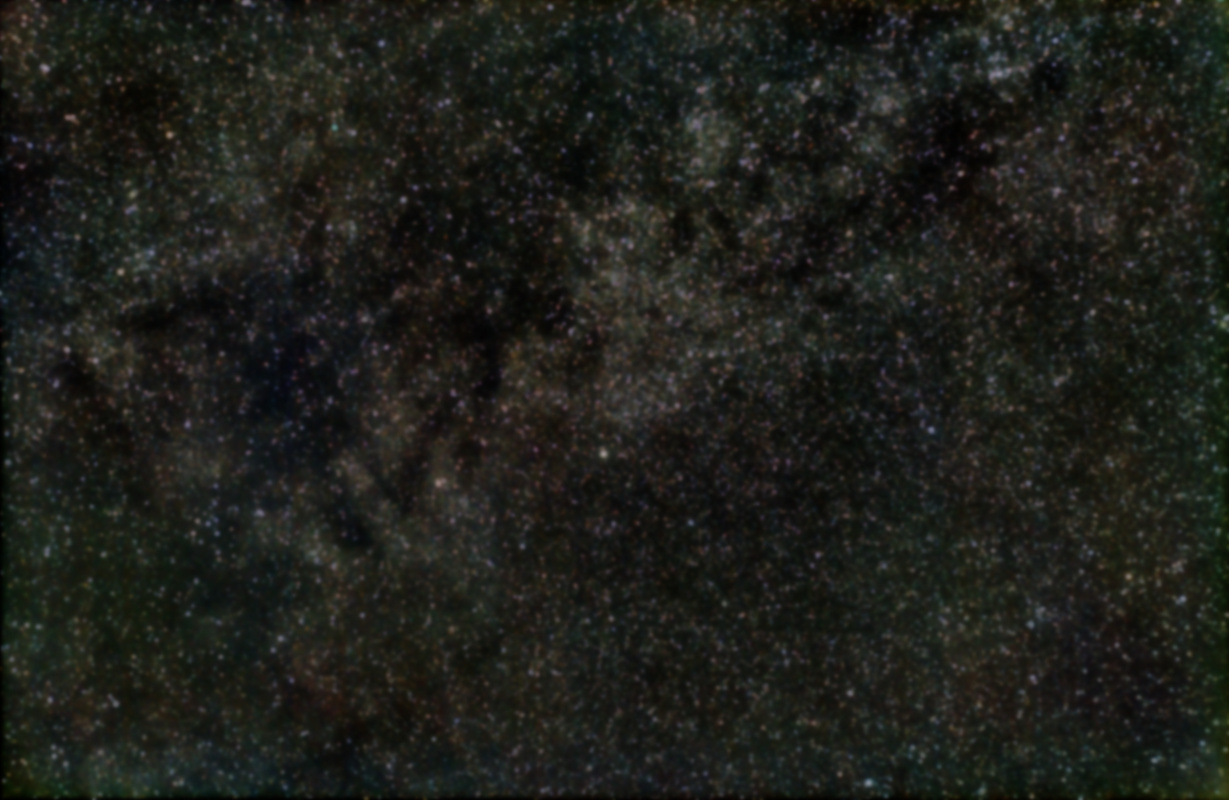
Side-by-side compare of blurred and the original image

One way to obtain this effect is by creating copies of the image, applying varying blur to each and then adding them from heaviest to the least blur using the Lighten only layer mode.

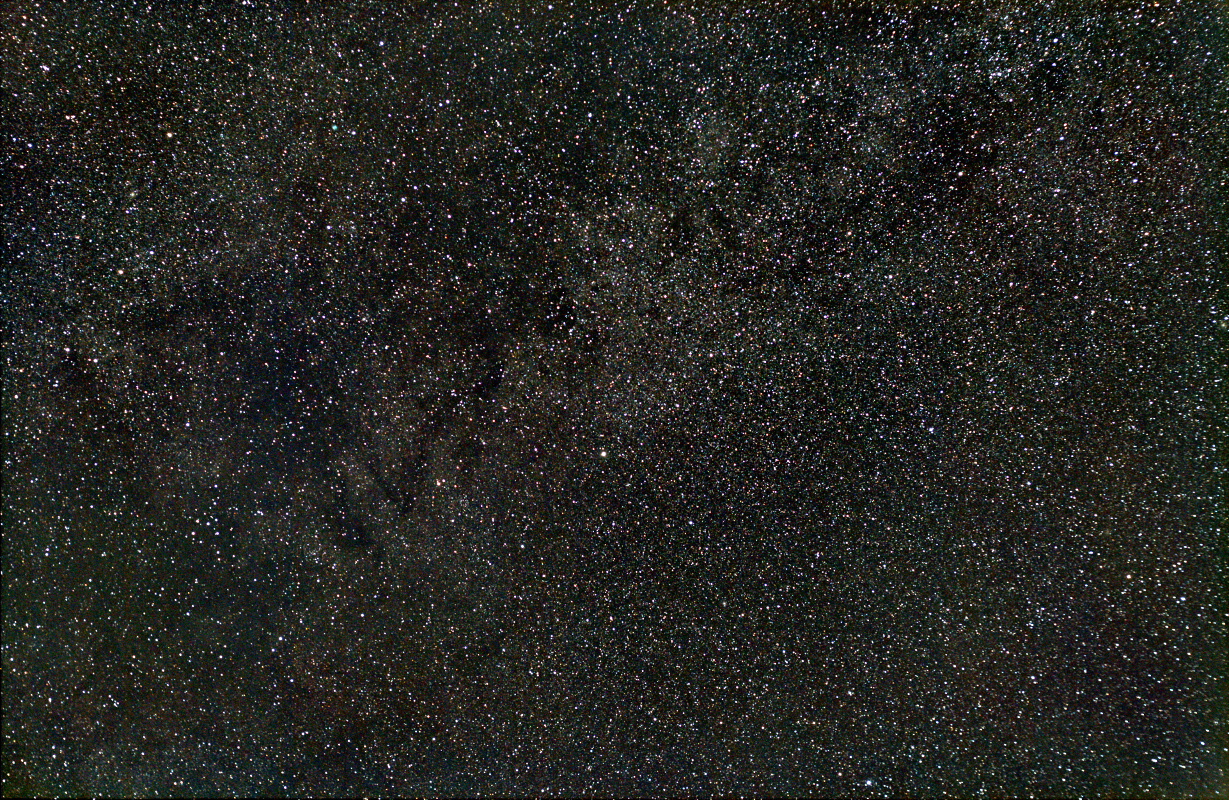
Take your original image and duplicate as required (in my example I blurred two layers, hence need a total of three identical layers).

blurredlayers_original

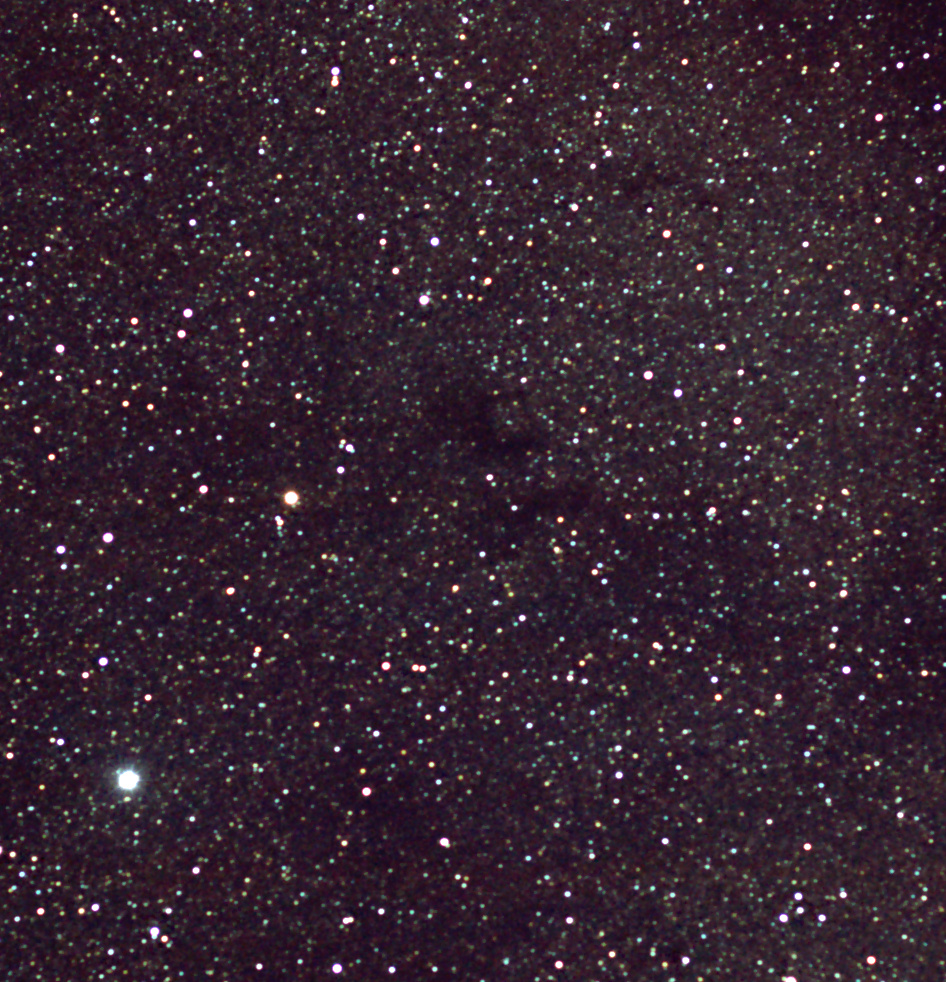
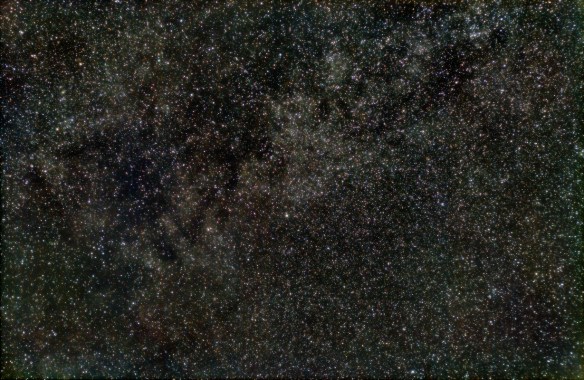
Original image (centered on Constellation Vulpecula)

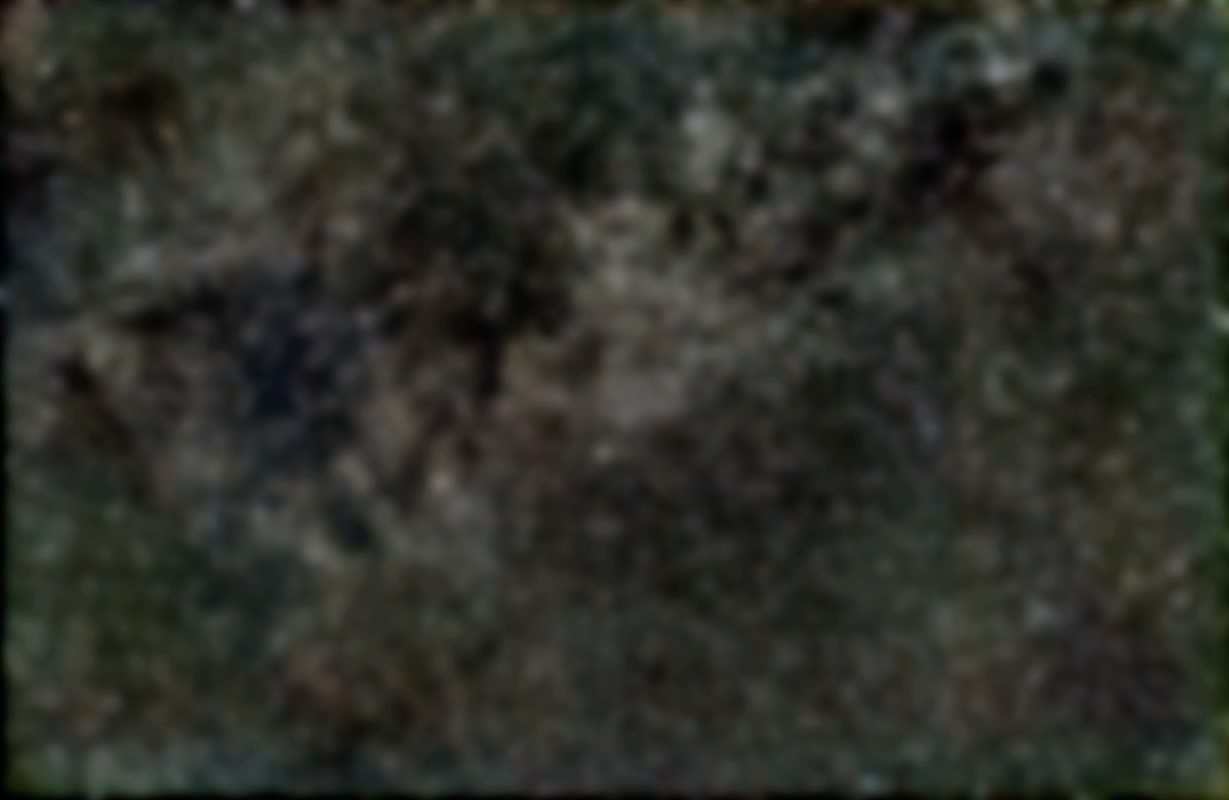
Apply heavy blur to the bottom layer.  At the same time, reduce the color saturation and adjust the levels to get nice blacks.  You want the blacks to be nice and dark such that the general shape of the cloud-like structures appear due to the bright and dark zones.  In this example, the blur was applied to a level of 80 pixels.

blurredlayers_bottom

Heavy blur to the bottom layer, and reduced color saturation

Repeat the same for the middle layer, but with less blur (level of 20 pixels).  If you want the colors of the stars to pop out, increase the color saturation.  It will create an effect of nebulosity around bright stars.  Once again, adjust the levels as required.

blurredlayers_mid

Medium blur to create nebulosity effect

Finally, the top layer don’t apply any blur, adjust the curves to reduce the faint portion of the image as you don’t need to keep this portion of the image.  You only want to keep the nice bright stars.  The dim structures are kept in the lower two blurred layers.

Adjust the % between the layers to get the desired effects  The pixel intensity from bottom (most blurred) to the top will be kept only if the result is brighter than the previous layer.  The sharp and bright stars are from the top layer, while the overall dim structures are from the blurred lower layers.

blurredlayers

Final result after blending the 3 layers

Turn the various layers on/off to see what is the contribution of each.  It’s a lot of trial and error depending what you accentuate versus what you want to fade into the background.  Play with the level of blur, the curves and the % layer blending until you get the effect you desire.

For more information on the original image, see my post on Vulpecula.

Wide Field Around Vulpecula

Image

Continuing my wide field photography of the Milky Way I centered on the constellation Vulpecula (little fox) located in the middle of the Summer Triangle.

In the same frame, three Messier objects are identified:  globular cluster M56 and M71; planetary nebula M27.  Interesting fact is star HD189733 (second bright star above M27 in the framed portion) is the nearest extra-solar planet (63 light years) where the presence of water was detected.  But at 700degC, chances for life are pretty slim.

vulpecula_15sep2016_46x30sec_ident

Left to Right: Globular Cluster M71 in Sagitta; Planetary Nebular M27 in Vulpecula; Globular Cluster M56 in Cygnus

The three constellations from left to right are: Sagitta, Vulpecula and Cygnus (also know as Northern Cross).

As a footnote, this was captured with nearly a full moon in a heavily light polluted suburb.  At 30 seconds of exposure time, the luminosity peak was around 75%.

Canon XTi (450D)
50mm F3.2 (ISO 800)
46 x 30sec (23 minutes)

Dark Nebula – Barnard 142 and 143

Image

In my previous post I captured a hint dark nebula Barnard 142 and 143.  But as the lens drifted out of focus, I could only use a few frames (14 out of 60).  At the next clear sky I aimed Altair in the constellation Aquila with the goal to capture a good 60 frames in-focus to once again capture Barnard 142 and 143.

Dark Nebula Barnard 142 and 143 near Altair (Aquila)

Dark Nebula Barnard 142 and 143 near Altair (Aquila)

The entire image scaled 40% (the above is a crop) is available here.

Canon XTi
50mm F3.2 ISO800
59 x 30sec (29.5 minutes of integration)

Wide Angle on Constellation Sagitta (Messier 71 and Messier 27)

Image

The fall is a great time for wide-angle photography of the night sky.  The Milky Way passes overhead which provides a chance to capture some dark nebula.  Unfortunately after I had everything setup the 50mm Canon lens drifted out of focus; I only got about 2-3 frames with decent focus.  By frame 14 of 60, it was too out of focus to even register (align) with software.  When set to manual focus that lens is way too loose.

But I managed to capture a hint of my first dark nebula at the bottom half of the image.  Those immense molecular clouds that block out the background stars.  In the following millions of years, these clouds will collapse to create start nurseries and new solar systems.

Messier 71 (Globular Cluster) and Messier 27 (Planetary Nebula) near constellation Sagitta

Messier 71 (Globular Cluster) and Messier 27 (Planetary Nebula) near constellation Sagitta

Globular cluster Messier 71 and planetary nebula Messier 27 are identified in my image around the constellation Sagitta. I’m surprised at how “bright” and blue that nebula turned out.

Photo Details:
Canon XTi (ISO 800)
Canon 50mm F3.2
14 x 30 sec

Nearly Full Moon – May 20th

Image

Stepped outside to have a beer on this warm spring evening while the kids played when over the rooftop I see this wonderful Moon in the still blue sky.  Just had to run inside, and grab my camera, telephoto lens and tripod to take a few frames.

Nearly full moon rising over rooftop  - May 20th, 2016

Nearly full moon rising over rooftop – May 20th, 2016

After fiddling with the settings, I realized the tripod was probably not required. This shot was taken at ISO 200 1/200 sec with the zoom lens at 110mm F7.1

The Full Moon is tomorrow : May 21st.

Messier 53

Image

In a telescope globular clusters are more interesting to observe than your open cluster because they have a distinctive shape.  Globular clusters are odd stellar objects; they are spherical clumps of stars that actually orbit our galaxy’s core.  But not the way you might think; they don’t orbit in the galactic plane, but often perpendicular to it!  This is not unique to the Milky Way, most nearby galaxies have their share of globular clusters.

Messier 53 is a nice example of a globular cluster located in the Coma Berenices constellation.  It also happens to be one of the more distant globular clusters from the Milky Way.

Globular Cluster Messier 53

Globular Cluster Messier 53

Skywatcher 80ED
Canon 400D (ISO 800)
19 x 60sec

For this one I decided to try my luck at 60sec of exposure time, and the results aren’t too bad.  I did have to throw out a few shots due to periodic error causing elongation in the stars.   Also during the stacking a used a sigma 2.3 value to discard anything that fell out of standard distribution to reduce the impact of the few bad images.

Moon – Not Waiting for Dark Skies

Image

There’s no need to wait for dark skies to observe and photograph the Moon.  Actually most backyard astronomer don’t like the Moon as it just adds to the light pollution and prefer observing when it’s not around.

But as the Sun is setting and you’re getting your gear out, it’s hard not to take a few moments to swing the telescope over and observe the Moon.  I find the Moon so bright during the night that it almost blinds at the telescope, hence observing it under still blue skies is a great way to observe details without having to squint under darkness.  The photo below as taken at 7pm, still not under dark sky conditions.

April 15th, 2016 Moon - Benoit Guertin

April 15th, 2016 Moon – Benoit Guertin

Skywatcher 80ED
Canon 400D (ISO 400) 1/800sec
Processing with Registax6
Adding wavelet and non-wavelet layers with GIMP

The wavelet processing in Registax greatly increased the finer details on the Moon, however it also increased the noise in the blue sky background.  Therefore I opened both the pre and post wavelet pictures in GIMP and created a mask such that on the wavelet layer, only the lunar surface passed.  This was done by creating a mask based on alpha (luminance) and using BLUR to flag the entire Moon as my area of interest that I wanted to pass through.

Sunspot 2529

Sunspots on the sun come and go.  Count them for many years and you’ll soon find out that there is an 11 year periodic cycle when the solar magnetic activity peaks.  We are presently in Solar Cycle 24 and on the tail end of the double peak of 2011 and 2014.  So why would I want a solar filter when the Sun is heading into a quiet period?

Number of sunspots observed and predicted for 1995 to 2020

Number of sunspots observed and predicted for 1995 to 2020

Well, just because the number of sunspots goes down doesn’t mean that there’s not good some great observing opportunities.  Sunspot 2529 provided that perfect occasion to finally try out my new solar filter.

Sunspot 2529 (April 10, 2016) - Benoit Guertin

Sunspot 2529 (April 10, 2016) – Benoit Guertin

The above image was captured on April 10th, 2016 with on my Skywatcher 80ED with Canon 400D at ISO 200 and 1/500s.  19 frames were processed with Registax6.  Sunspot 2529 is still visible today and may be there for another week as readings indicate that it’s quite stable.

There are various types of solar filter out there.  They all essentially do the same thing which is to permit only a small percentage (roughly 0.001%) of the white light to pass through.  Solar filters are not designed to allow observation of prominence and flares, special hydrogen-alpha narrow-band pass filters are required for that,  but they do allow a view of sunspots and granulation if you happen to have sufficient focal length.  By blocking out most of the sunlight, you can then safely observer or photograph the sun.  Remember not to install your finderscope, and move the telescope away from the sun before removing the solar filter.  Your telescope is a MIGHTY strong magnifying glass.

Shopping around there are generally two types of solar filter: glass and film.  While the glass are more durable, the films offer just as good optical performance at a lower price, especially for larger aperture.

Thousand Oaks Optical R-G Solar Filter

Thousand Oaks Optical R-G Solar Filter

Normally for anything in the optical path, especially filters, backyard astronomers are always looking for the smoothest and most parallel surfaces, but for solar film, it appears that the ripples from the loose film have no effect on the image quality.

The filter that I selected is the R-G Solar Filter from Thousand Oaks Optical.  It provides a light yellow pleasant view of the sun, and works very well both visually and with the DSLR.  I enhanced the yellow in the photo of the sun above, but it’s quite close to what can be seen and photographed.

Mark your calendars for May 9th 14:57UT, Mercury will transit in front of the Sun.  The last time that happened was 2006.

Leo Triplet

Image

Small telescopes aren’t ideal for galaxies, unless you aim to snap a picture of the Leo Triplet.  The area around Leo has many galaxies, but the three below (M65, M66 and NGC3628) are brightest and most recognized.

Leo Triplet - M66 Galaxy Group

Leo Triplet – M65 (right), M66 (below) and NGC3628 (upper left)

All three galaxies are of the spiral type, but look different because of their orientation.  NGC3628 is edge-on and the dark band in the middle are dust lanes that cut across it.  This trio is located 35 million light years away.

Skywatcher 80ED
Canon 400D (ISO 800)
32 x 30sec