
This gallery contains 1 photo.
Open clusters around Orion. Continue reading

Stitched together the 330 photos of the September 27th Lunar Eclipse into a video.
A few things to note. The Moon “jumps” a few times in the video, and I now realize that it’s due to my presence on the wooden deck is sufficient to cause the telescope to shift ever slightly. Also I didn’t really take time for proper polar alignment, I was a good 5deg off and had to re-align during the total eclipse because the tracking was not perfect. And last, some cloud cover rolled in so I wasn’t able to capture the tail end of the eclipse.
Nevertheless, still much better than the few frames I captured back in 2008.
For the curious of the camera setting. The start with the full moon is taken at ISO 200 1/320sec and then increased up to 3.2sec exposures at ISO 400 during the eclipse.
On September 27th, there wasn’t just a lunar eclipse… There was a large magnificent full moon in the sky. Therefore once I had all my gear setup and ready for the show, I decided to snap a few frames before the start of the eclipse.
The sky was wonderfully clear and the seeing great. Through the telescope I noticed very little turbulence in the air. Below is a stack of 11 frames, to which I adjusted the color, the levels and played with the wavelets sharpening to get some detail out of the lunar surface.
Click on the photo for a full resolution version.
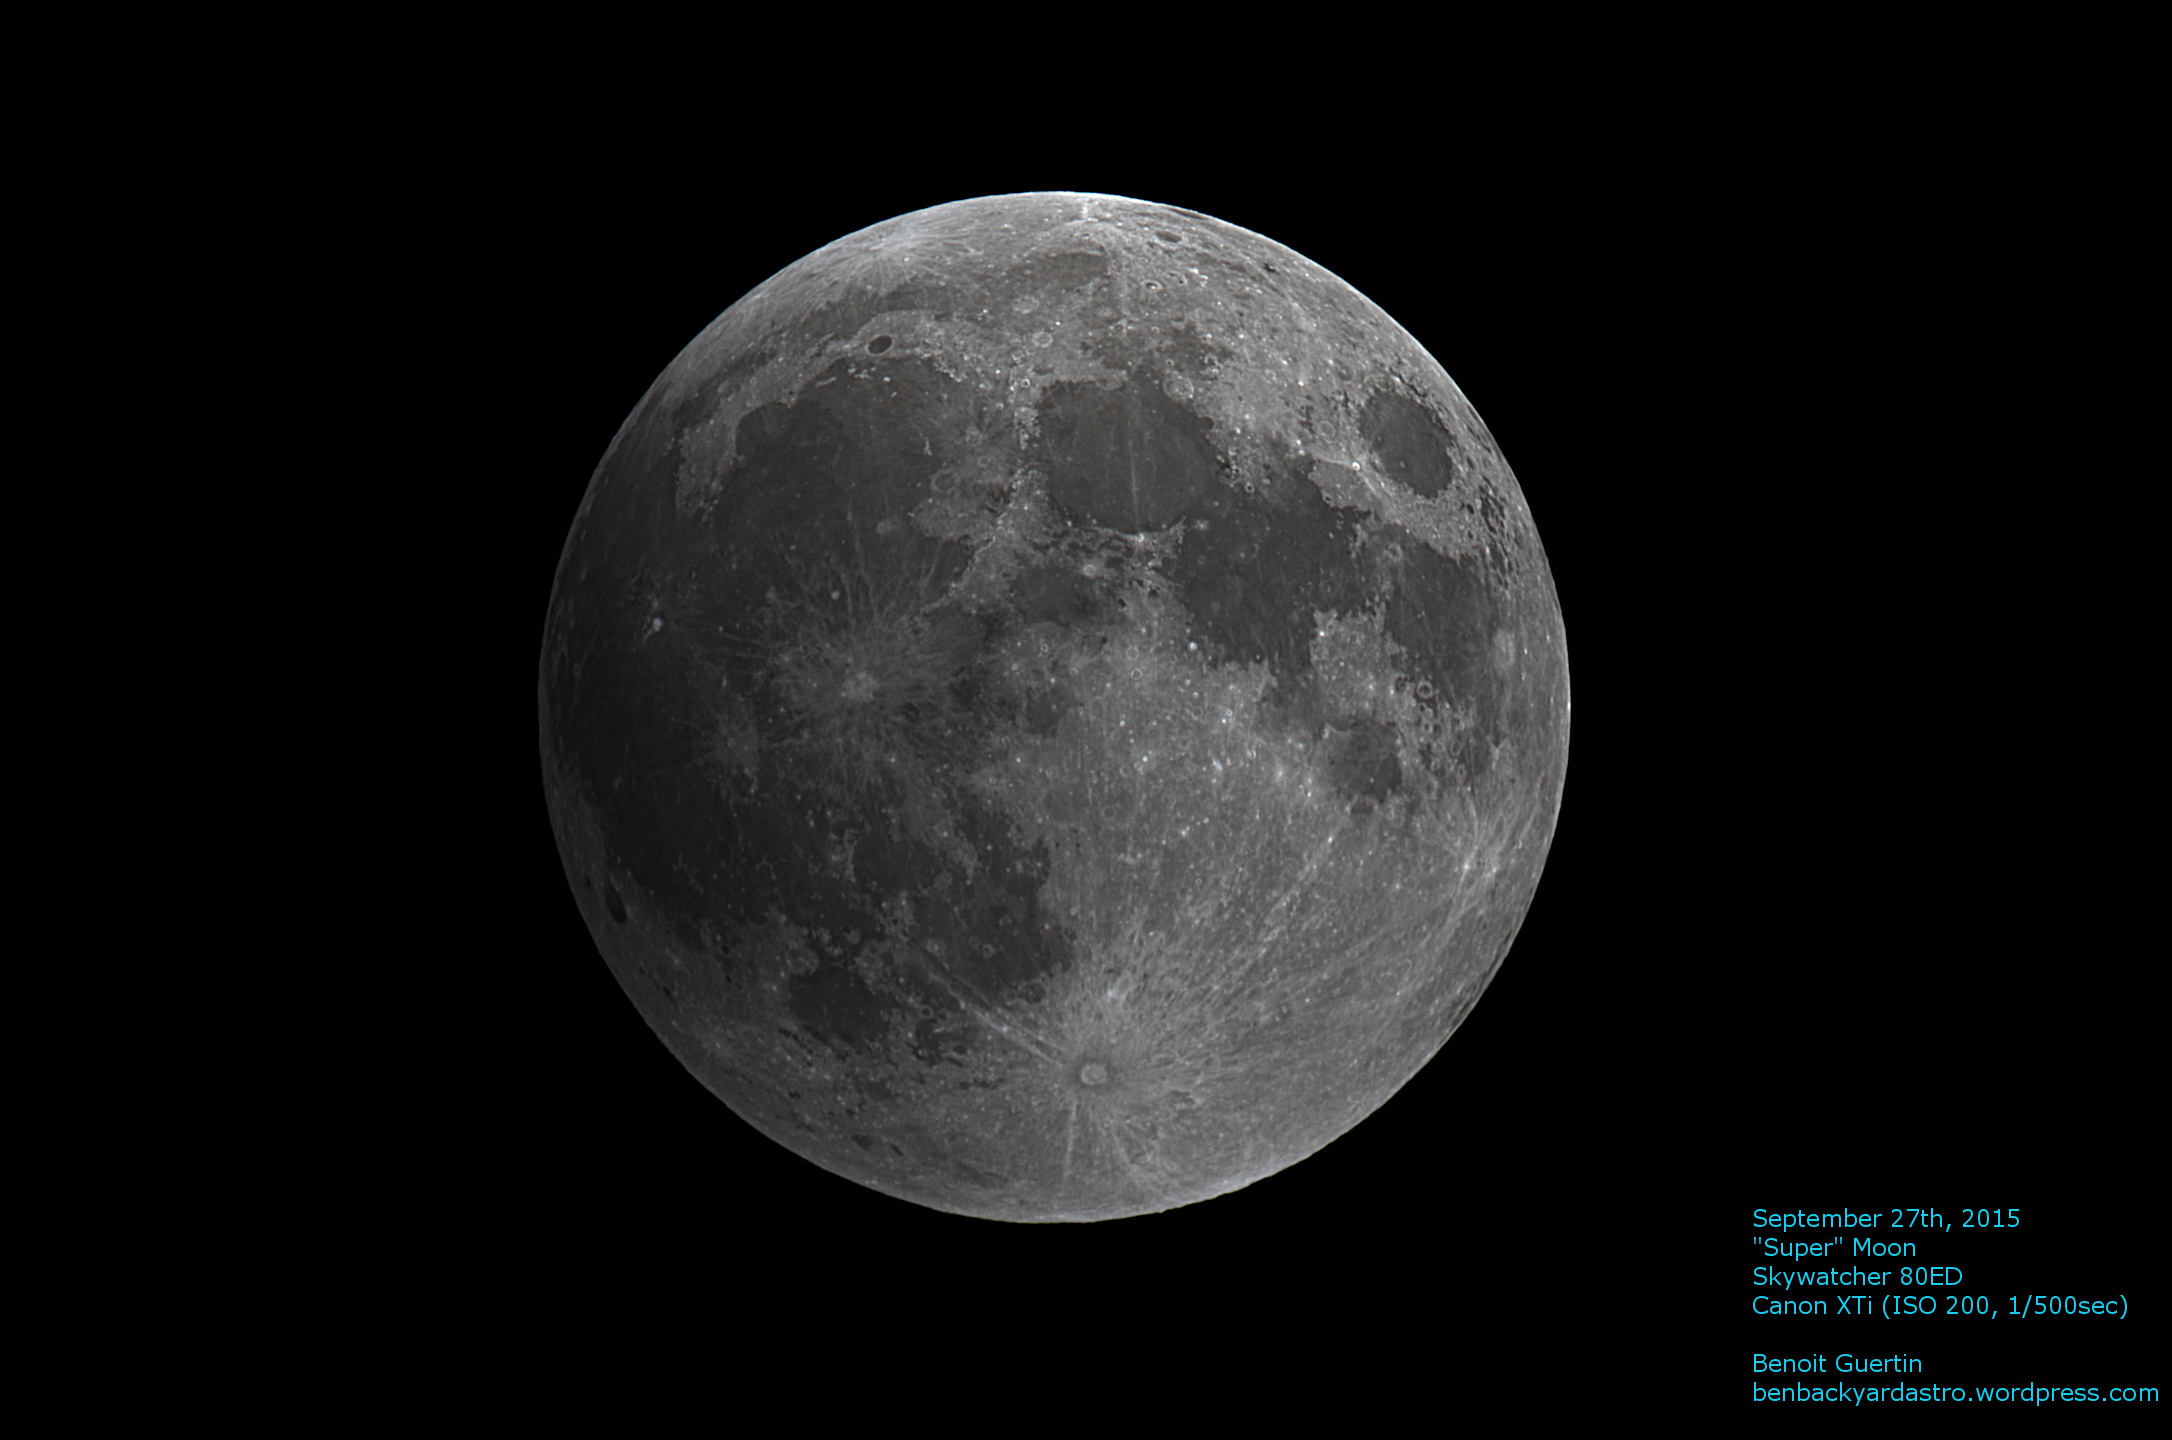
September 27th Full Moon
Transferring over 300 photos (2.5GB) from the old astro-laptop via USB key to my main PC will take some time (30 minutes just to transfer 1.0GB on the key). Therefore the work towards making a time lapse video will be tomorrow.
In the meantime here is one quick pick from the lot of photos taken with the Canon mounted on the telescope. Did a quick stretch and level adjustment, just so I’d have something to show before going to bed.
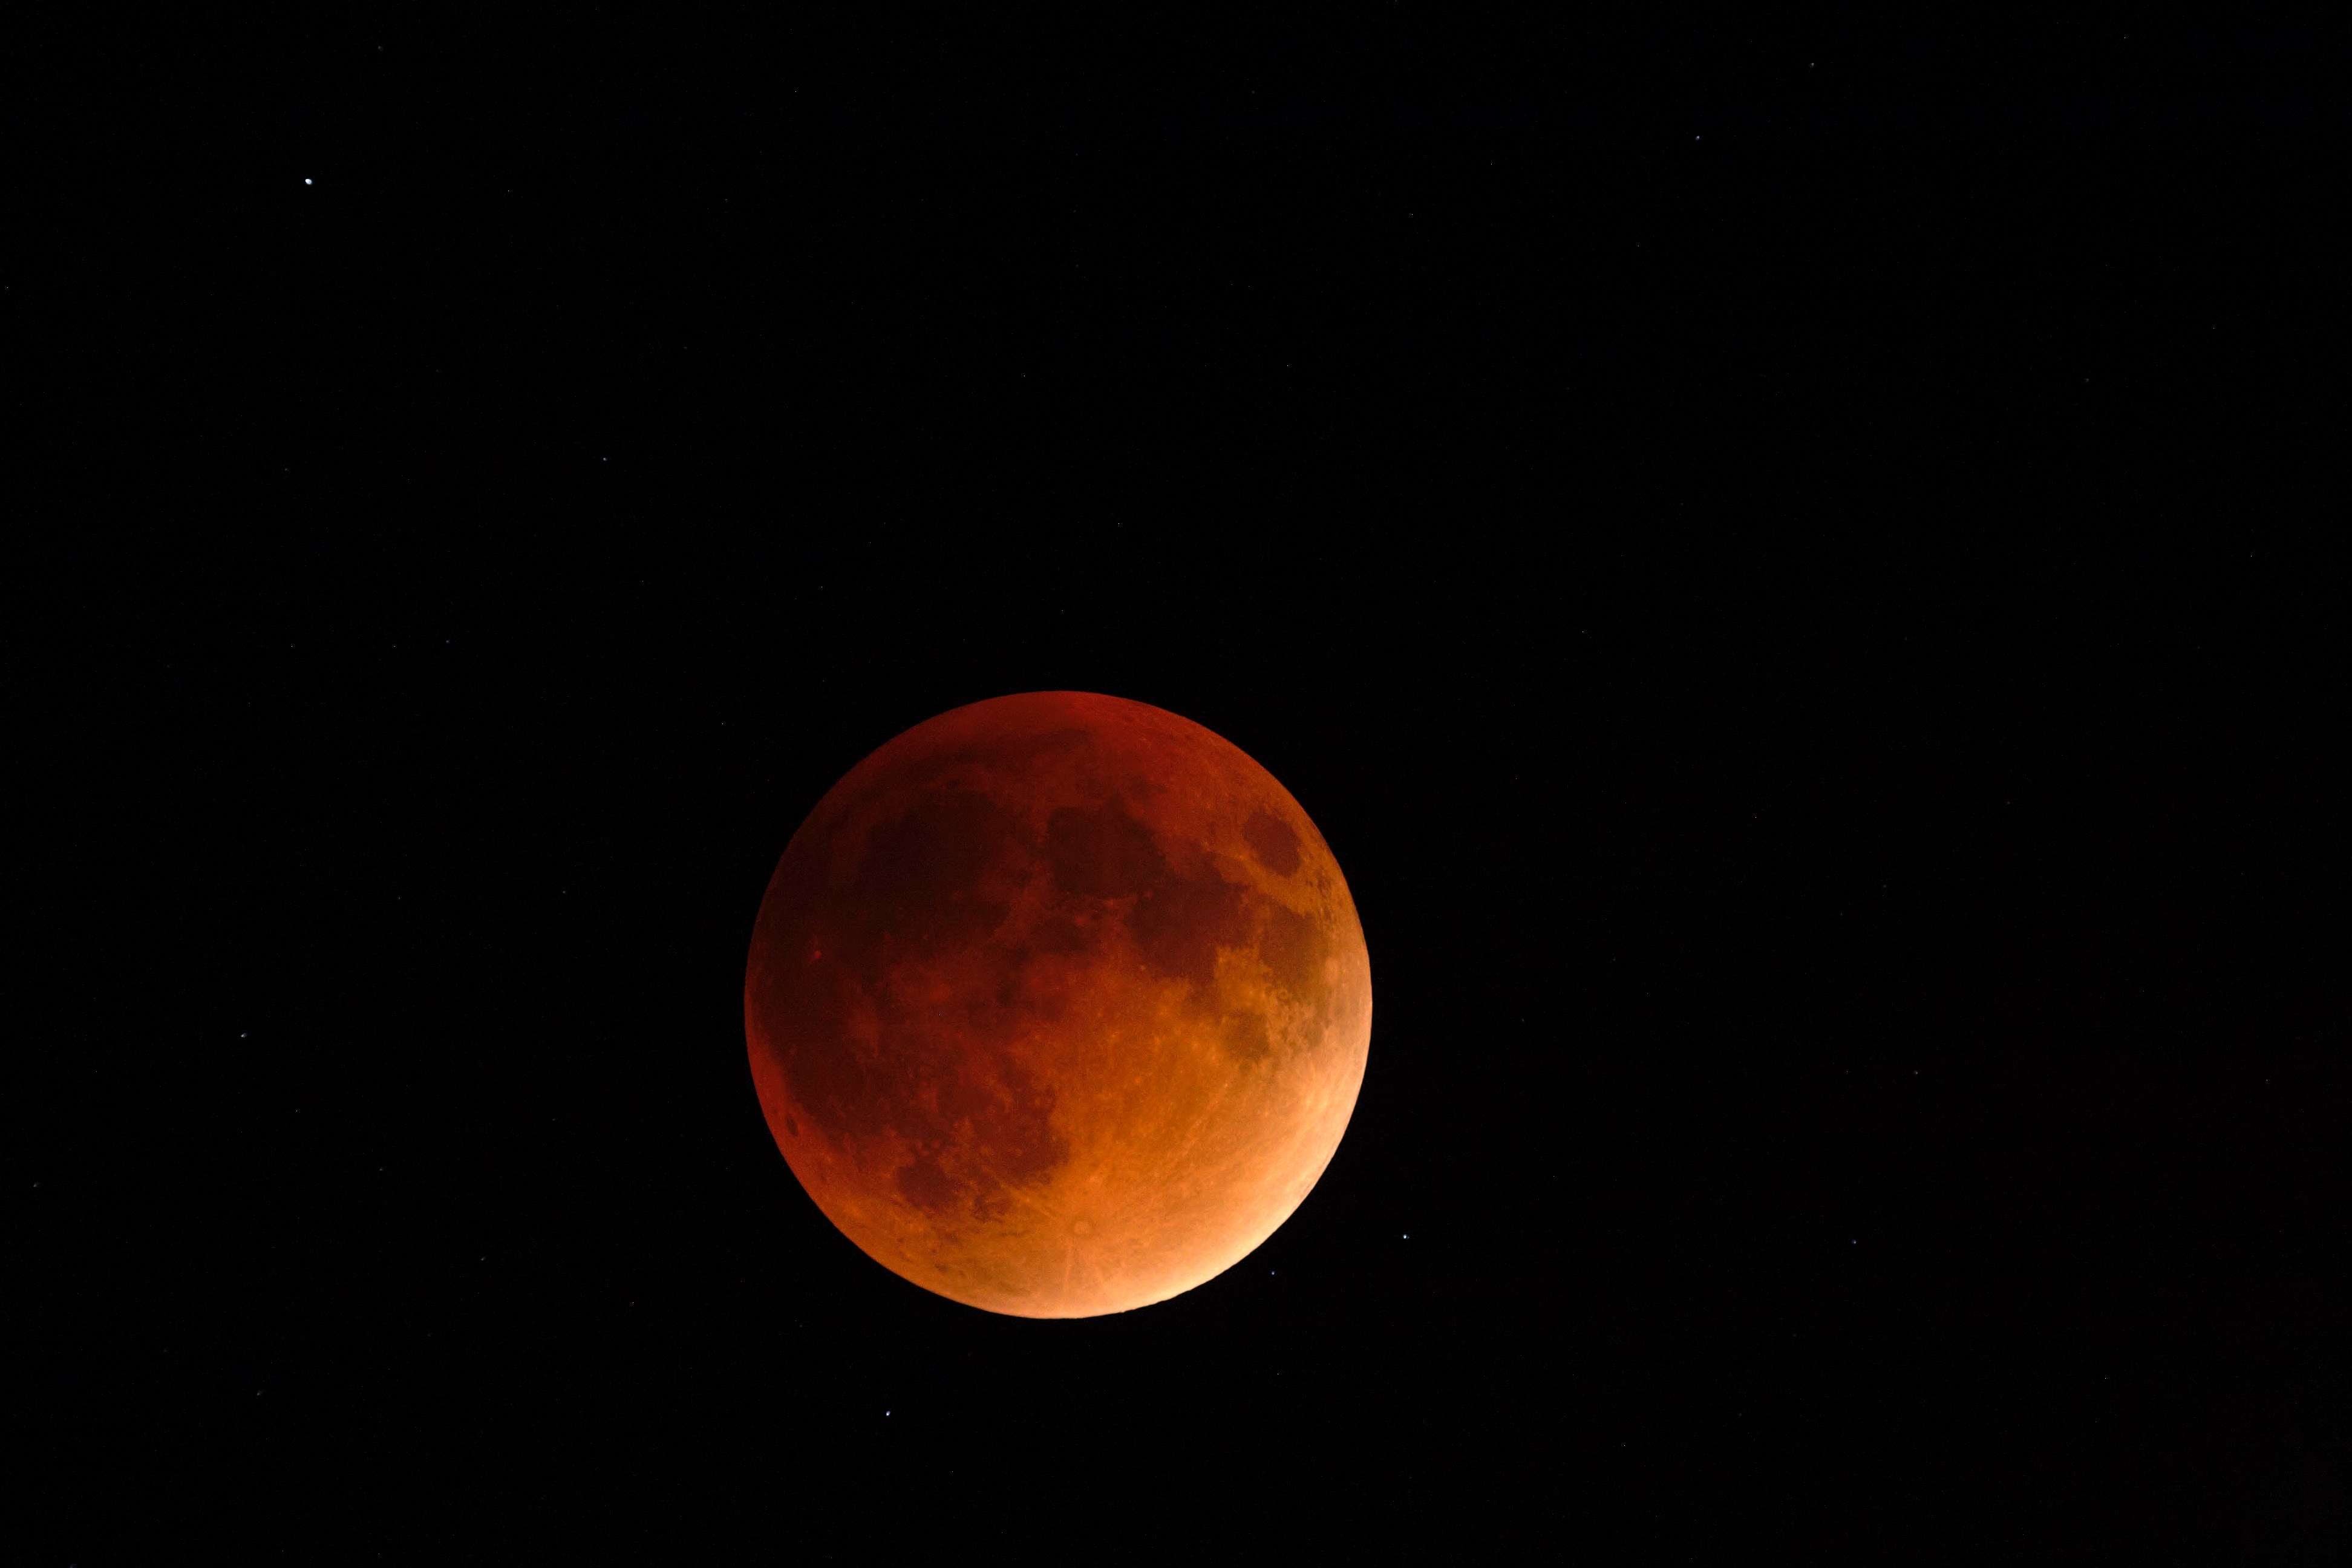
September 27th 2015 Lunar Eclipse
Getting down to a crescent as Earth’s shadow creeps over the Moon.

Down to a crescent
The trusty Skywatcher 80ED is on my Vixen GP mount and have the camera taking one frame every 20 secondes.
I’ll have to adjust the exposure as totality approaches. Below is a view off the computer screen.

Left edge already in the shadow
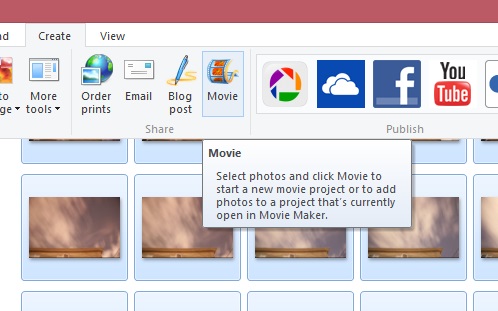
Creating a time-lapse video out of your individual photos is a simple matter with Microsoft Movie Maker. And the cool thing is that it will work with Canon RAW .CR2 format files, so no need to convert them to JPG ahead of time.
The following steps are performed with Windows8.
Step 1 – Select the sequence of images in Microsoft Photo Gallery
 Step 2 – Under Create select Movie. This will automatically launch Microsoft Movie Maker with the individual photos loaded in a new Movie Maker Project.
New Movie Maker Project created
Step 3 – Under Edit – Video Tools, change the duration between frames to a value less than 1.0- example 0.20.
 Step 4 – Save your movie in the format and resolution you wish. Voila! And why not add a title, caption and a soundtrack to go the extra mile.
Therefore set your camera on a tripod and start taking some pictures of the night sky.
Couldn’t put all those frames to waste, so I processed and assembled them into a time-lapse video showing the Earth’s rotation and the various layers of clouds flying by.
The video was created with Microsoft MovieMaker, a tool that all Win7 and Win8 users have by default. So it’s FREE! Yay!
These were processed in IRIS and saved as BMP, but MovieMaker will also create videos with Canon CR2 RAW Files directly. Therefore dump all your frame and you can generate an instant video without any processing. By default it sets 7.0sec delay between images. Simply select all images and change the value to 0.100 or whatever frame rate you wish. And then export your video.
The Perseids peak had already passed, but the sky was better so I decided to set up the trusty Canon XTi and see if I could catch some meteors. This time instead of pointing the camera straight up, I decided to frame the top of the house to provide some reference.
Out of the over 120 shots taken, a sequence of 30 frames were without clouds obscuring the stars. This was a perfect opportunity to mark the celestial pole by adding the images without alignment.
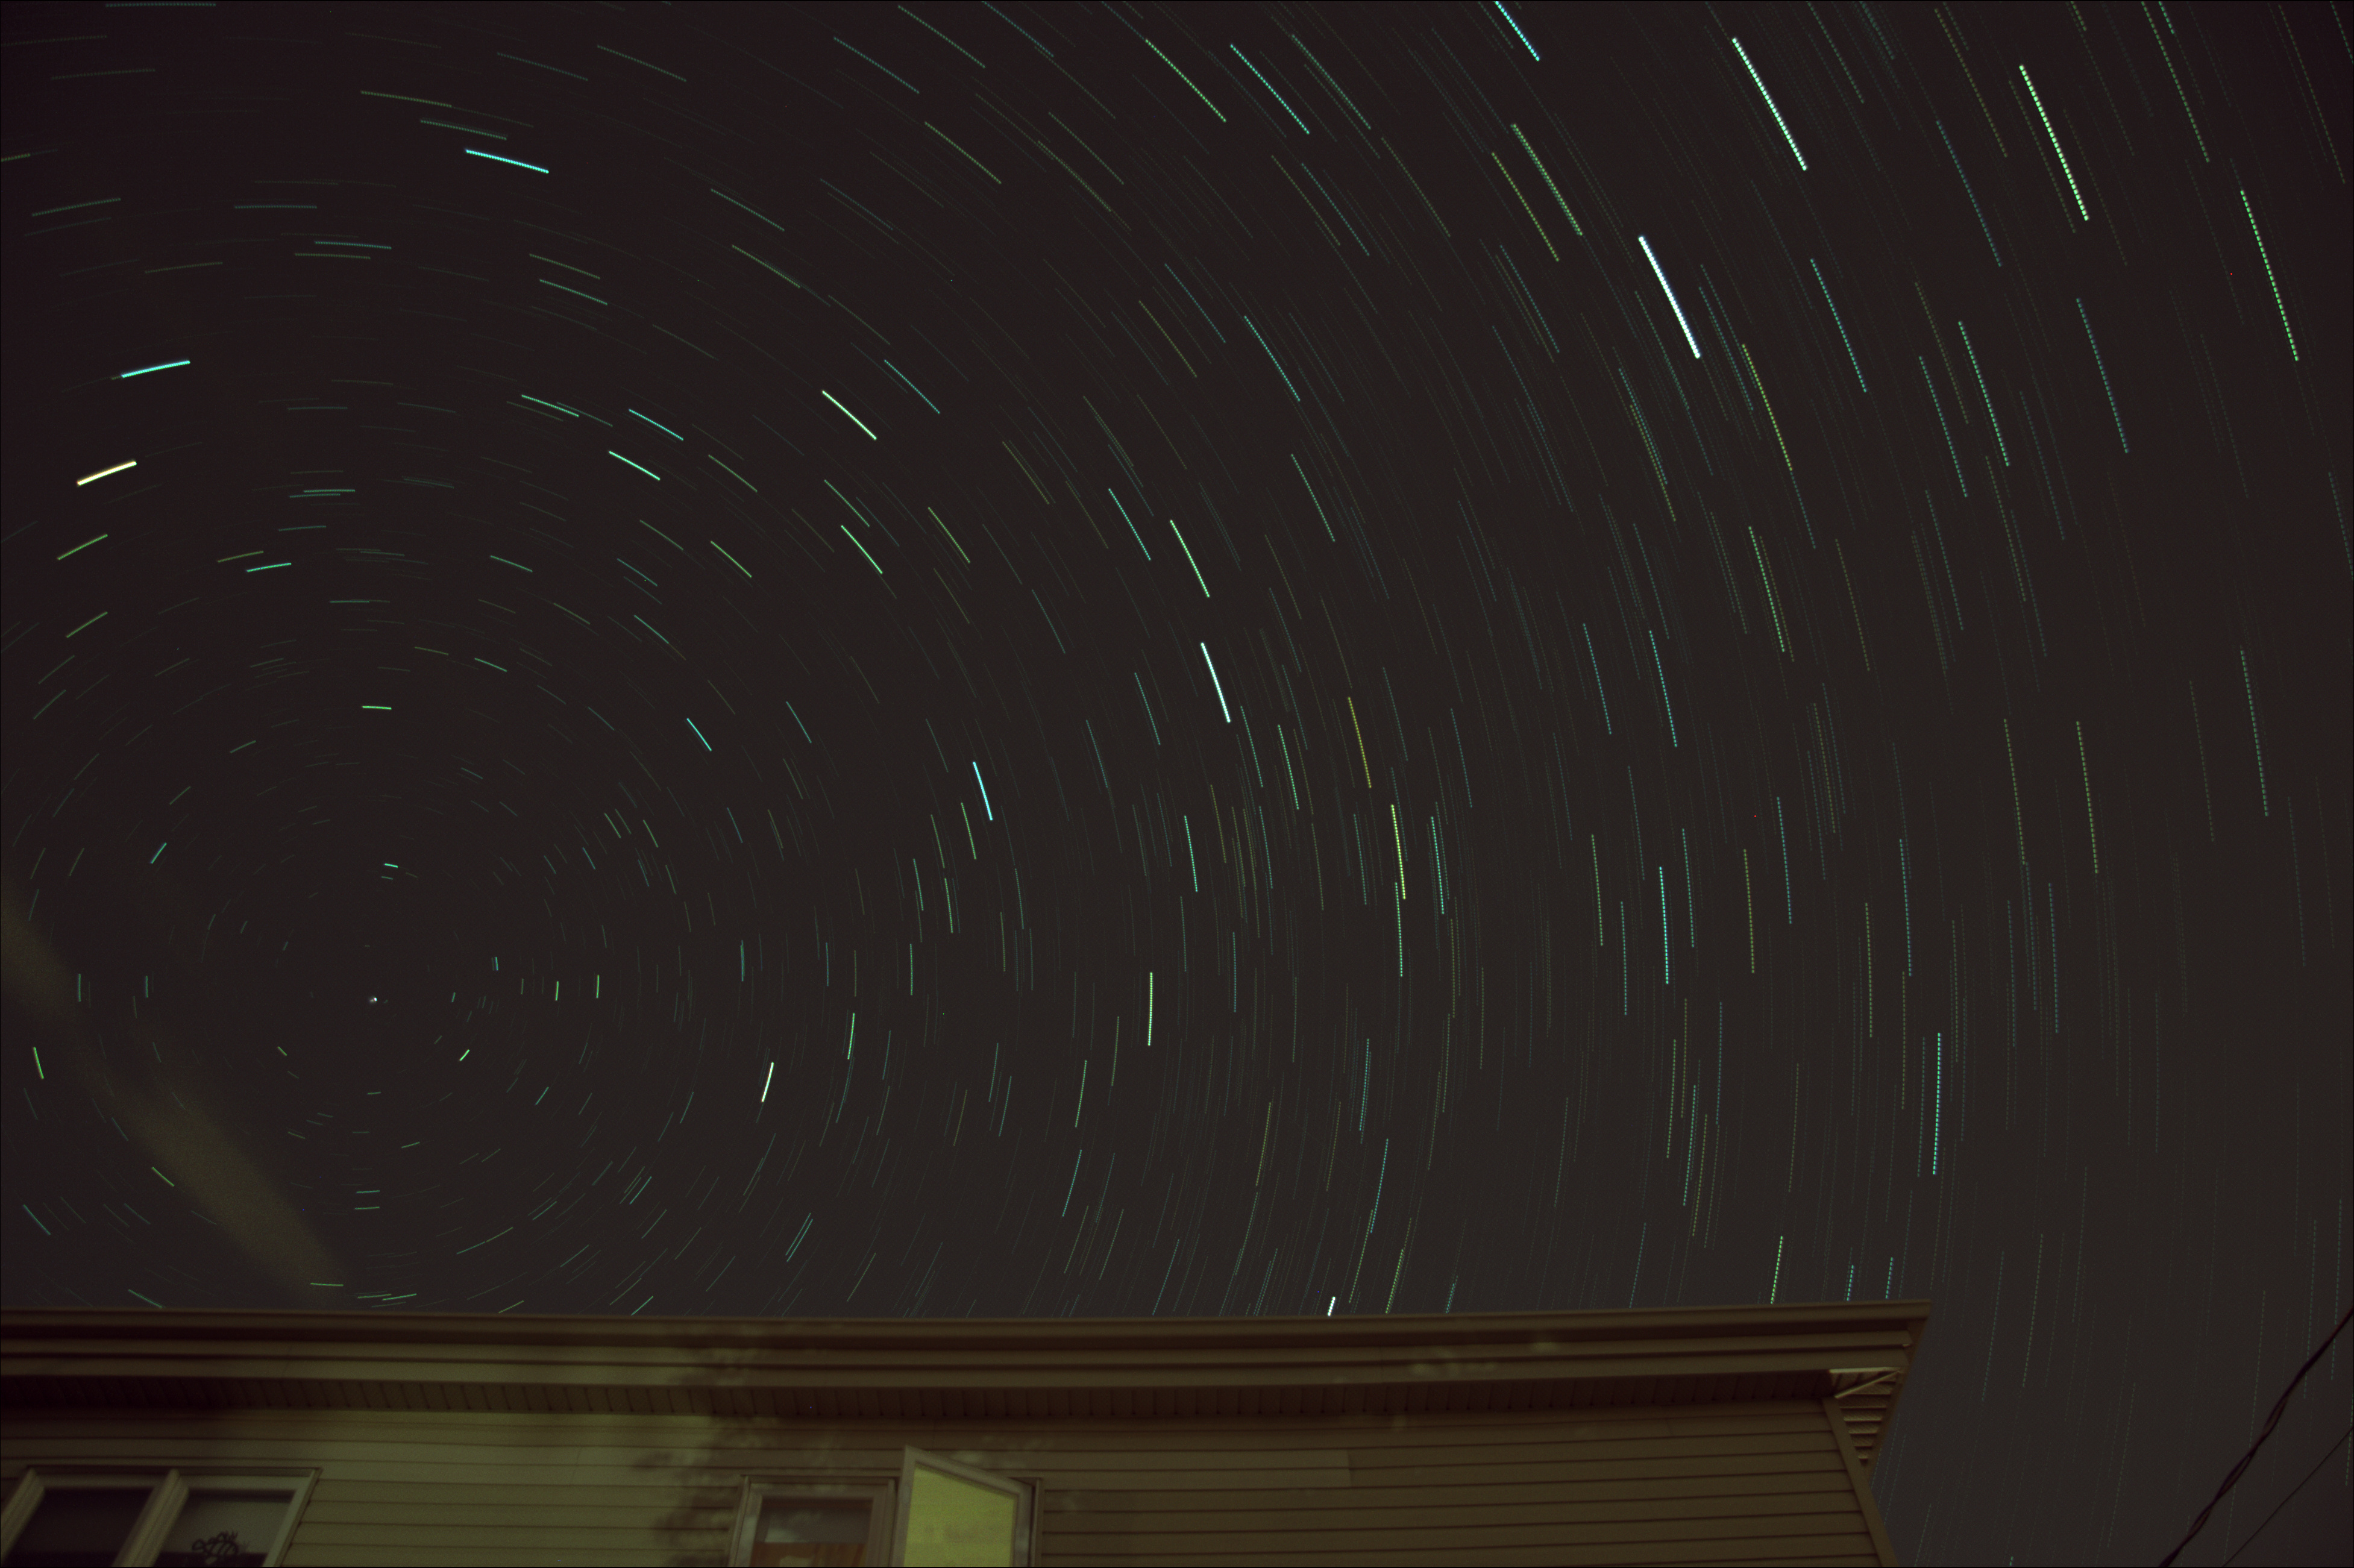
Celestial Pole on August 13, 2015
30 x 30sec
Canon XTi
17mm F4.0 ISO800
30 x 30sec
The 2015 Perseids were predicted to be great, largely thanks to Mother Nature turning off its night-light (aka our Moon). Unfortunately the weather wasn’t as cooperative… With clouds over the horizon I knew my window to try to capture some Perseids was quickly vanishing. Nevertheless I setup my camera on a tripod and hoped for the best.
The best I got was 13 shots without clouds. A quick scan of them did not reveal any notable meteor streak. But it wasn’t all a waste. I was able to process, align and stack them to provide a good 60deg field of view around the zenith.
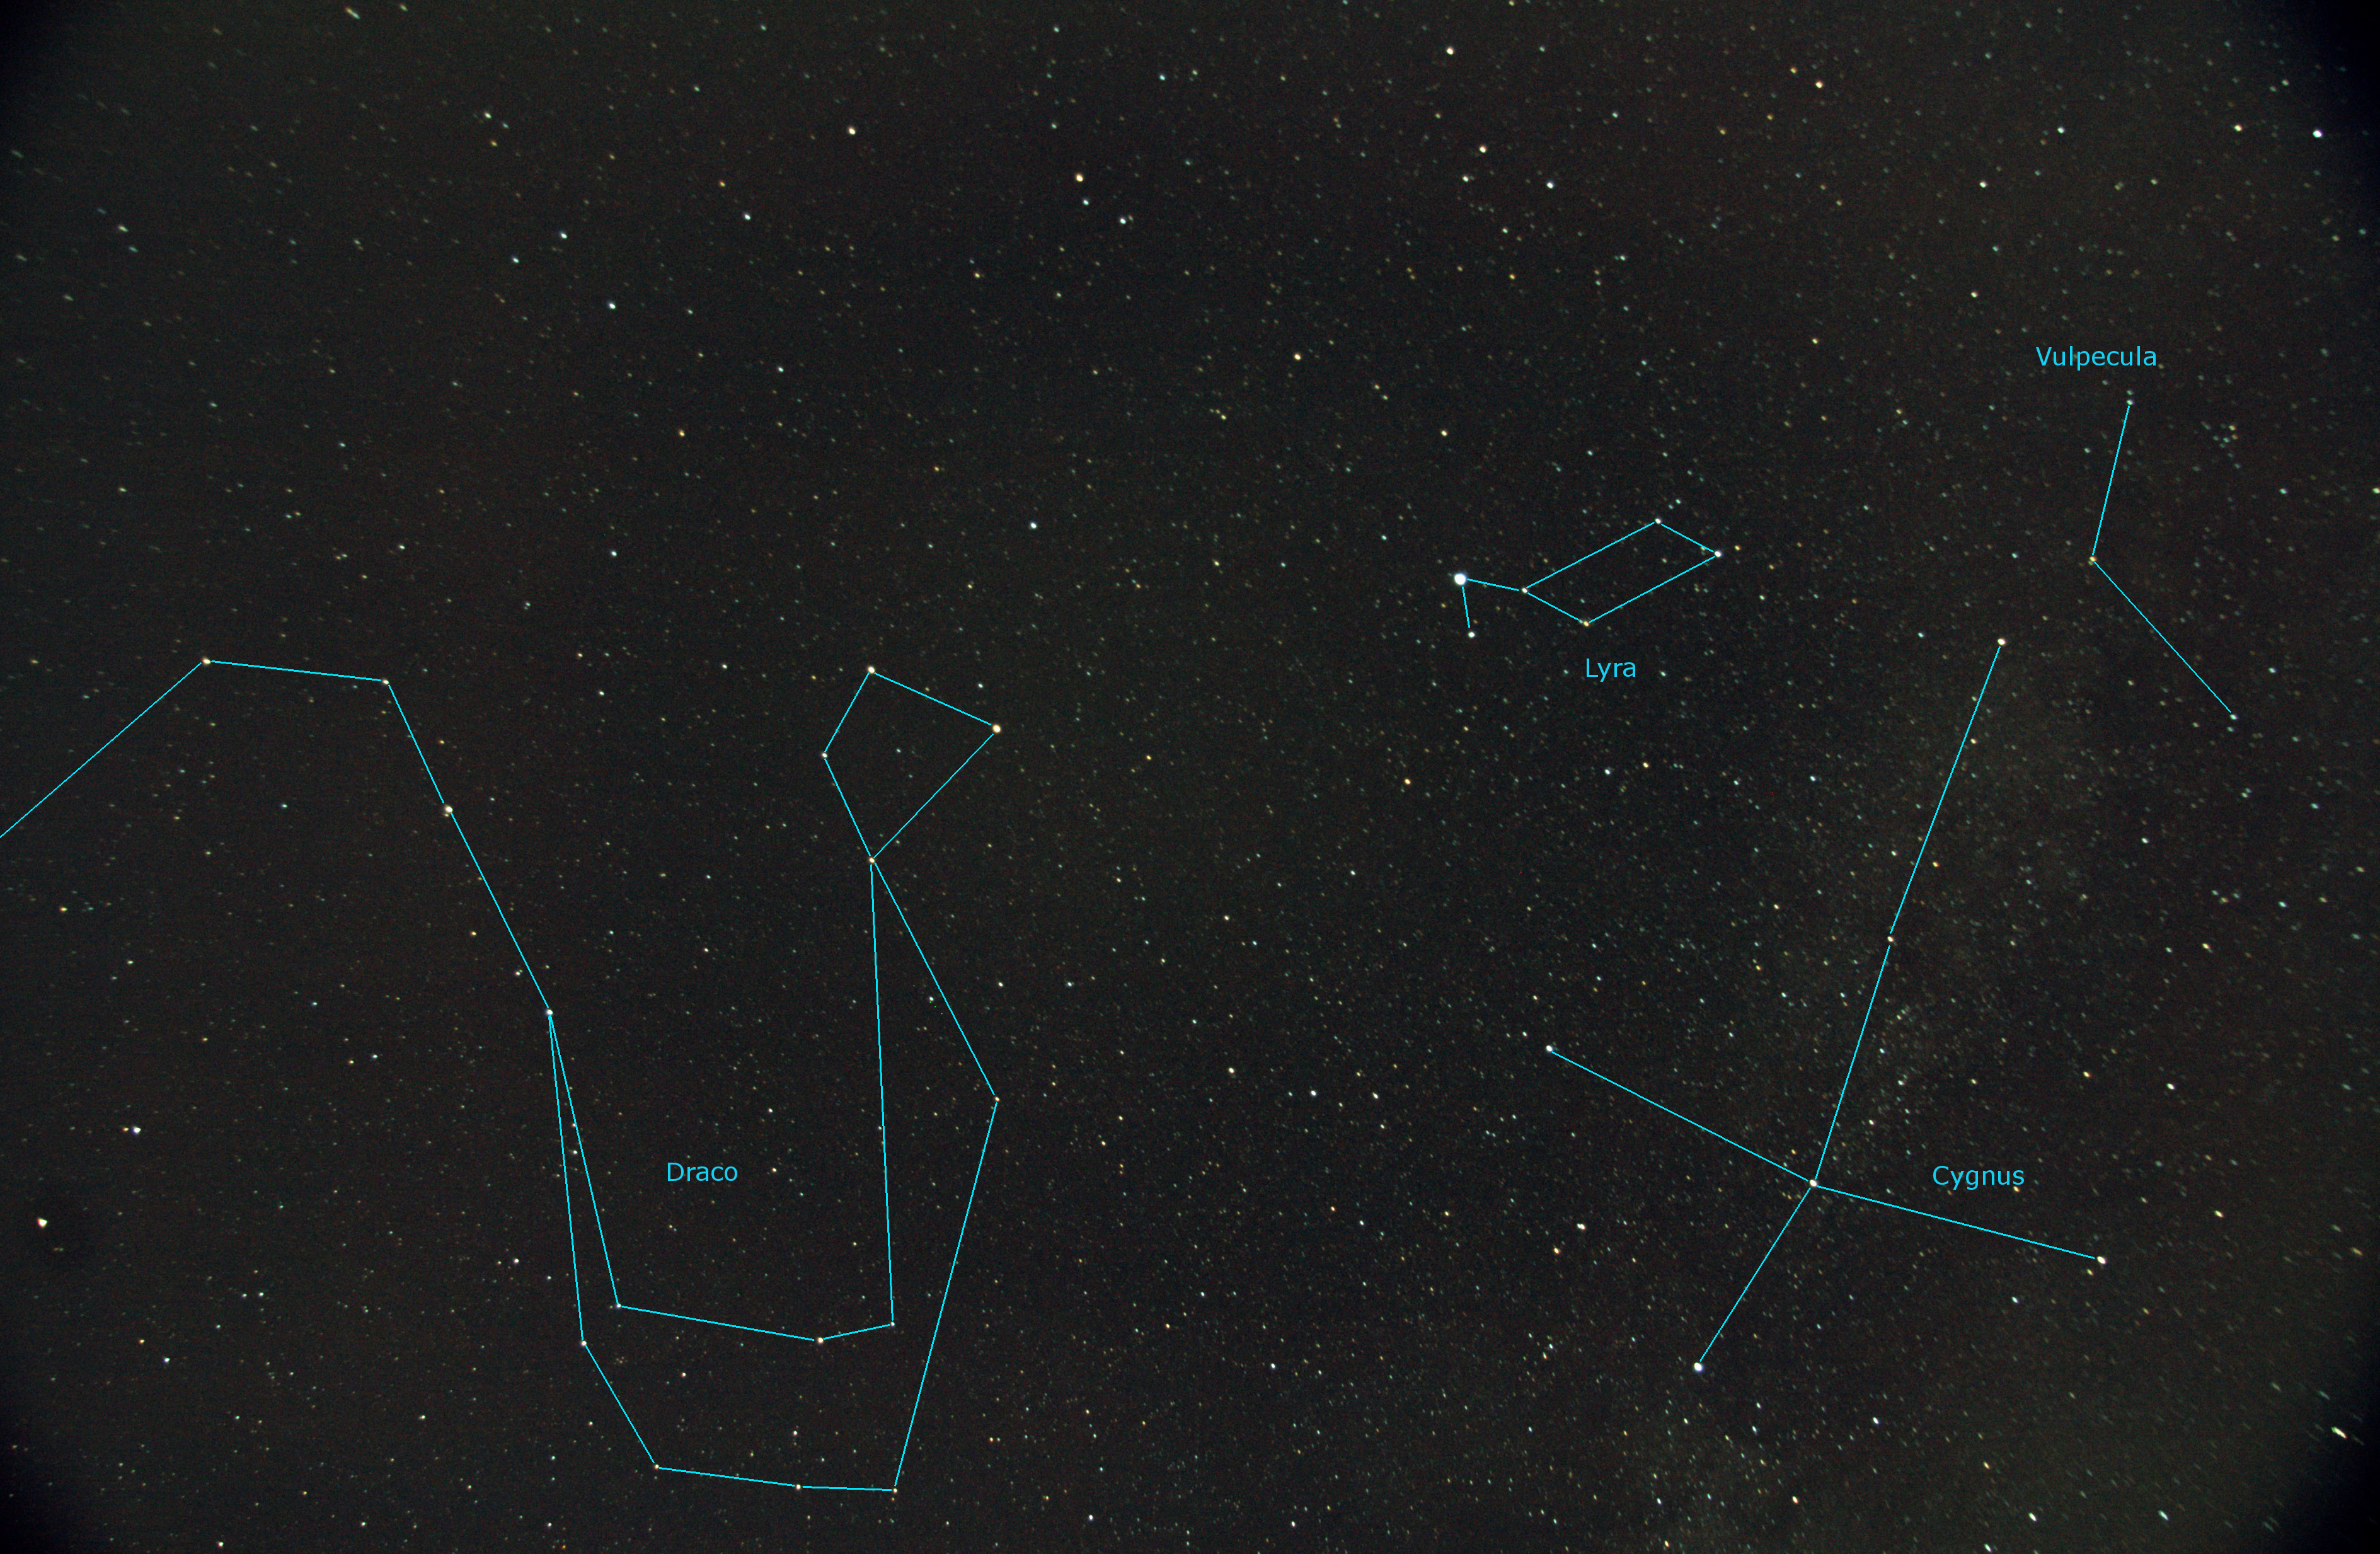
Constellations Draco, Lyra, Cygnus and Vulpecula
13 x 30sec (17mm F4.0 ISO400)
Benoit Guertin
Canon XTi
17mm F4.0 ISO400
13 x 30sec
Fixed mount, no tracking
Mark Bailey
Electronics plus software tips and tricks
Astronomy, and Computer Technology
A site dedicated to learning Astronomy One Step at a Time
Charles Bracken
one post at a time
Astronomy, space and space travel for the non scientist
My adventures with amateur astronomy
Discoveries, Journeys & Milestones in Space Exploration
Welcome to a journey into our Universe with Dr Dave, amateur astronomer and astrophotographer for over 40 years. Astro-imaging, image processing, space science, solar astronomy and public outreach are some of the stops in this journey!
Observations, mostly astronomical from Limavady, UK (55N, 6.9W).
Photography Blog of James Silvester
Astronomy and Amateur Radio
The latest news on WordPress.com and the WordPress community.
