Signal and Noise

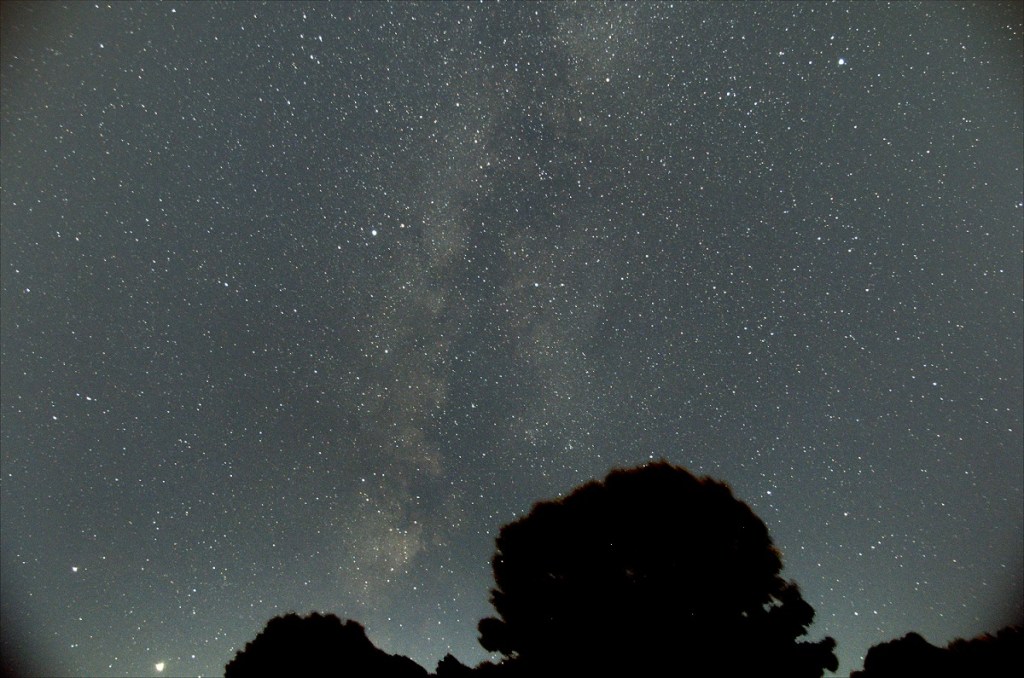
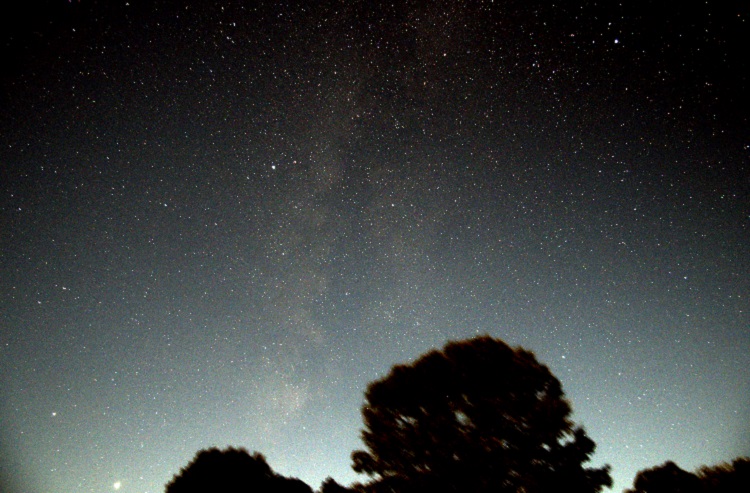
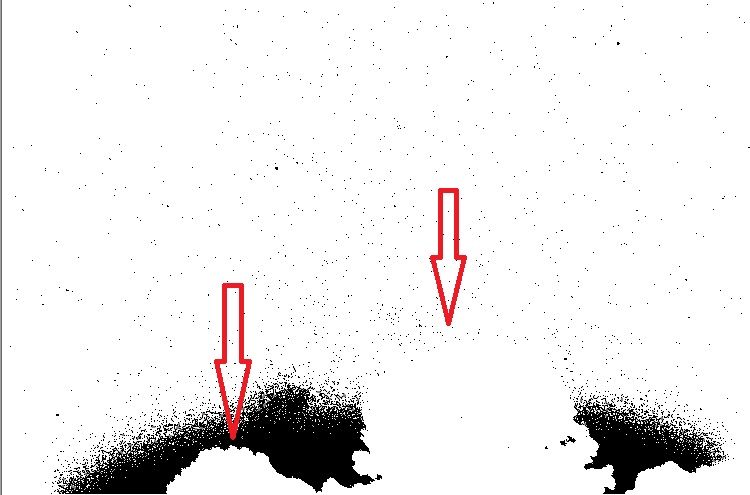
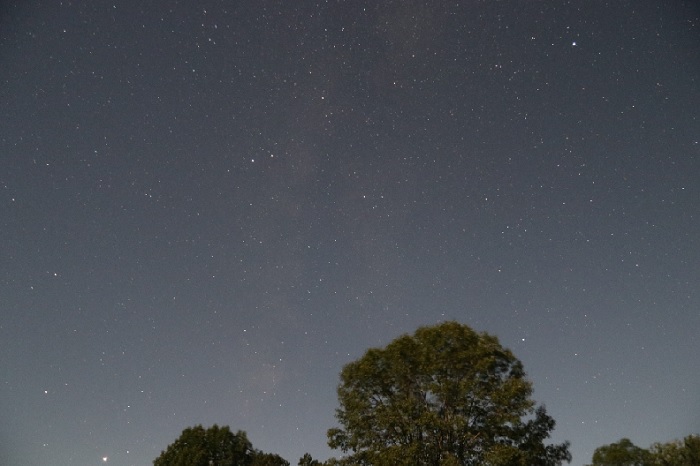
What makes it possible to be able to generate a photo of the Milkyway from what appears to be just a faint trace in the original shot?

The final image (left) and a single frame as obtained from the camera (right)

It all comes down to the signal vs noise. Whenever we record something, sound, motion, photons, etc… there is always the information you WANT to record (the signal) and various sources of noise.

Noise can have many sources:

  • background noise (light polution, a bright moon, sky glow, etc…)
  • electronic noise (sensor readout, amp glow, hot pixels)
  • sampling noise (quantization, randomized errors)

This noise can be random or steady/periodic in nature. A steady or periodic noise is easy to filter out as it can be identified and isolated because it will be the same in all the photos. However a random noise is more difficult to eliminate due to the random nature. This is where he signal to noise ratio becomes important.

In astrophotography we take not only the photos of the sky, but also bias, darks and flat frames: this is to isolate the various sources of noise. A bias shot is a short exposure to capture the electronic read-out noise of the sensor and electronics. The darks is a long exposure at the same setting as the astronomy photo to capture noise that appears during long exposures due to the sensor characteristics such as hot pixels and amplifier glow. Cooling the sensor is one way to reduce this noise, but that is not always possible. Finally the flat photo is taken to identify the optical noise caused by the characteristics of the lens or mirror as well as any dust that happens to be in the way.

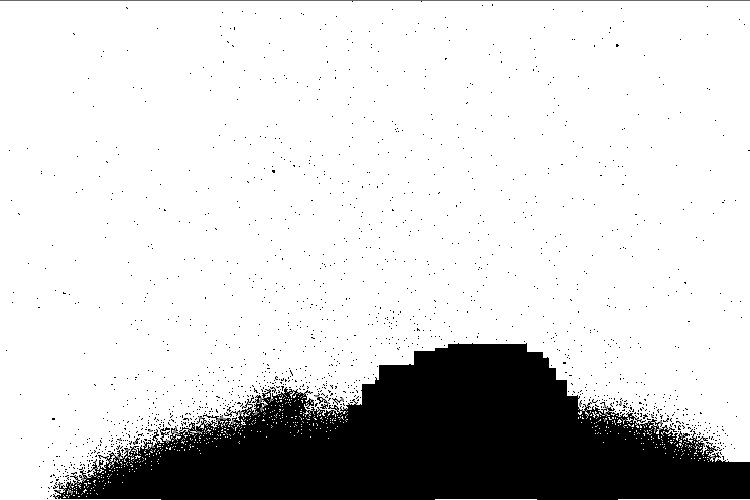
But what can be done about random noise? That is where increasing the number of samples has a large impact. For a random noise, increasing the number of sample points improves the signal to noise ratio by the square root of the number of samples. Hence averaging 4 images will be 2 times improvement than a single photo. Going to 9 will be 3 times better. Etc…

You might be thinking: “Yeah but you are averaging, so the signal is still the same strength.” That is correct, however because my signal to noise ratio is improved I can be much more aggressive on how the image is processed. I can boost the levels that much more before the noise becomes a distraction.

But can’t I just simply duplicate my image and add them together? No that won’t work because we want the noise to be random, and if you duplicate your image, the noise is identical in both.

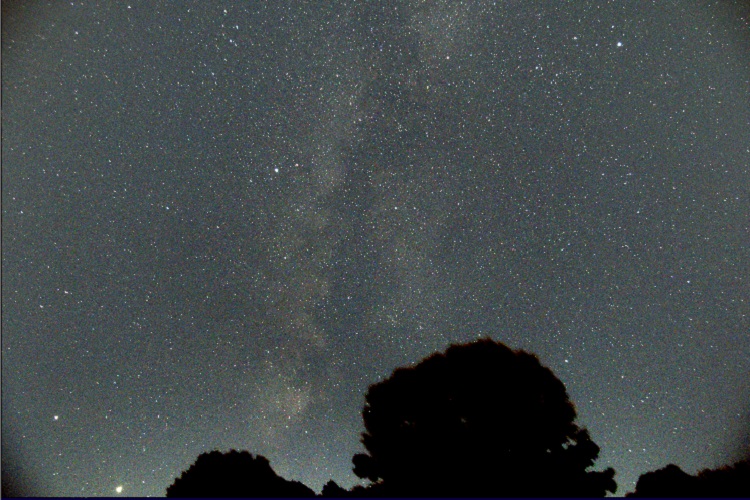
So even if you are limited to just taking 30-second, even 5-second shots of the night sky and can barely make out what you want to photogram, don’t despair, just take LOTS of them and you’ll be surprised what can come out of your photos.

Milkyway from a stacking of 8 x 20 second photos.

Removing Sky Gradient in Astrophoto

The simplest form of astrophotography is nothing more than a camera on a tripod shooting long exposures. However by the time you get around to stacking and stretching the levels of your photos to accentuate various elements, such as the Milky Way, the sky gradient will become more apparent. That gradient can come from city lights, the Moon up above and the thicker atmosphere causing light to disperse at low angles to horizon. Normally the wider the field of view, the greater the gradient.

Below is a RAW 20-second exposure of the Milky Way near the horizon taken with a Canon 80D equipped with a 17mm F4.0 lens. The background has a slight gradient; brighter at the bottom. No all that bad.

But once you stack multiple exposures and stretch the levels to get the Milky Way to pop out, the gradient only gets worse.

There are various astrophoto software that can remove the sky gradient. The one that I’m familiar with and have been using is IRIS. I know the software is old, but it does a great job. So after I’ve completed my registration and stacking of images with DeepSkyStacker (see my Astrophotography in the City article), the next step is to open the resulting image with IRIS.

Once the stacked image is loaded in IRIS, head over to the Processing menu and select Remove gradient (polynomial fit) … Actually to get the best results you need to have the background and color corrected as well as trimming the edge of your photo. Got that covered here.

The following menu will appear.

Normally the default settings (as above) will work well. But this image has some foreground content (trees) and that will cause the result to look a little odd. The algorithm is designed to avoid sampling stars, but not so good when there is foreground content like the trees at the bottom of the image.

To correct this you must use the gradient removal function with a mask. The quickest way to create a mask is using the bin_down <value> command. This will change to white all pixels with intensities below <value>, and make black all pixels above it. Areas in black will not be used for sampling, while those in the white areas will. A little trial-and-error is sometimes necessary to select the right value.

In this case, even with the right bin_down value, the trees that I want to mask are not black, hence I will use the fill2 0 command to create black boxes and roughly block out the trees.

Below is the result after using multiple fill rectangles to mask the trees. This does not need to be precise as the mask is simply used to exclude areas from sampling. It is not like a photo-editing mask.

The resulting mask is saved (I called it mask), and I load back the original image, this time using the gradient removal with the mask option selected.

The program generates a synthetic background sky gradient, based on thousands of sample points and an order 3 polynomial. The image below lets you see the synthetic sky gradient the algorithm generated. This is what will be subtracted from the image.

Image and the synthetic sky gradient that will be subtracted

The final image below is much better and more uniform. There are no strange dark and bright zones like the attempt without the mask.

If we compare the original raw images with the new stacked, stretched and sky gradient removed photo the results are pretty impressive.

The Great Rift

At one point in time we’ve heard the saying that we are all made of star dust. Therefore, our home , the Milky Way, filled with 250 billion stars should be rather dusty. Right? Well it is, and one famous dust lane that we often see even has a name: The Great Rift.

Say that you are out camping this summer, and you spot the MilkyWay as you are amazed how many stars you can see when away from the city. You remember you have your camera and decide to setup for some long exposure shots to capture all this beauty (lets go for 20 seconds at ISO 3200 17mm F4.0) pointing to the constellation Cygnus. A bit of processing and you should get something like this.

The Milky Way centered on the constellation Cygnus.

Not bad! Lots of stars… a brighter band where the Milky Way arm of the galaxy is located and some darker spots at various places. Those darker areas are gigantic dusk clouds between Earth and the arms of our spiral galaxy that obscure the background stars. If only there was a way to remove all those stars, you could better see these dark areas.

And there is a way to remove stars! It’s called StarNet++, takes a load of CPU power and works like magic to remove stars from photos. Abracadabra!

Above image after processing with the StarNet++ algorithm

Behold! The Great Rift! Well actually just a portion of it. With the camera setup I get at most a 70deg field of view of the sky. Nevertheless, the finer details of these “dark nebula” can be appreciated.

Stripping the stars from an photo does have some advantages: it allows the manipulation of the background “glow” and dusk lanes without concern to what happens to the foreground stars. The resulting image (a blend of both the starless and original image) had improved definition of the Milky Way, higher contrast and softer stars that improve the visual appeal.

While there are plenty of stars above us, what defines a nice Milky Way shots is the delicate dance of light and darkness between the billions of stars and the obscuring dust clouds.

Photo Info:
Canon 80D
13 x 20 sec (4min 20sec integration time)
17mm F4.0 ISO3200
Deep Sky Stacker
IRIS for background gradient removal and color adjustment
StarNet++
GIMP for final processing