Easily Locate Neptune on December 31st

December 31st will be your opportunity to easily locate and observe Neptune with a telescope as it will be within 1/3 degree of Mars low in the western part of the Sky.  Mars will present a reddish magnitude 1 disk while Neptune will be much smaller, essentially a dimmer magnitude 7.8 dot.  Large telescopes should reveal the blueish hue of Neptune when placed slightly out of focus.

Neptune and Mars 1/3 degree - December 31

Neptune and Mars 1/3 degree – December 31 (1 degree circle)

In the image above I’ve marked magnitude 7.9 star just outside the 1 degree circle to assist in the orientation.

However don’t wait too late in the evening, best may be shortly after 7pm once the Moon is below the horizon.  Starting from the horizon you’ll able to easily locate bright Venus and about 10 degrees above will be Mars and Neptune.  Bright stars Fomalhaut and Altair will be located east and west along the horizon.

Neptune Mars and Venus setting in the West - December 31

Neptune Mars and Venus setting in the West – December 31 (7pm)

Comets for 2017 [updated 16-APR-2017]

Below are some of the comets to keep a watch for in 2017 as they should be observable with small scopes and even binoculars.

45P/Honda-Mrkos-Pajdusakova
Currently observable low in the evening at around magnitude 8 and will continue to brighten to magnitude 7 in January and then fade rapidly, including a approach to within 0.08AU of Earth on February 11th, as well as passing within a few degrees of globular cluster M3 shortly after.
  Photo from January 6th.

C/2016 U1 ( NEOWISE )
Currently observable at magnitude 9 and predicted to brighten to magnitude 7 in mid January.  Discovered on October 21, 2016.  Not visible in the southern hemisphere.

C/2015 V2 ( Johnson )
Faint at magnitude 12, and will continue to brighten until mid 2017, with good chances of observation.

C/2015 ER61 ( PanSTARRS )
Should brighten to magnitude 7 spring of 2017, unfortunately not very visible to the northern latitudes.  However it will cross many NGC and Messier objects throughout the first half of the year.

2P/Encke
Expected to brighten to magnitude 6-7 around at the start of March, overall visible for about 45 days.  For those in the northern hemisphere, best observations will be the end of February.

41P/Tuttle-Giacobini-Kresak
Expected to brighten to better than magnitude 6 in early April.  A good opportunity for wide-field photo as it passes 5° of M92 at the end of April.
Photo from April 13th.

References:
Comet Chasing
Seiichi Yoshida’s Bright Comet Listing (and future listing)
Paper by the British Astronomical Association

December 25th – No Sunspots

The sun has been without sunspots for two days, but that is expected as we are heading to a minimum in the 11-year cycle.

Cycle 24 Sunspot Number

Cycle 24 Sunspot Number (NASA)

Nevertheless as it was a nice afternoon grabbed the scope and did some observation of the sun.  A little of a challenge to focus when there is no contrasting details to base yourself on.

December 25th 2016 - No Sunspots

December 25th 2016 – No Sunspots

Skywatcher 80ED
Canon XTi (450D) ISO 100 – 1/800sec
Thousand Oaks R-G Solar Film

JunoCam – Revealing Jupiter from New Angles

JunoCam onboard the Juno spacecraft is providing us with some great pictures of the Jupiter cloud top, but from the rarely seen polar angle.  Pretty much all spacecrafts that have visited Jupiter did so with a fly by along the equatorial plane, which is also the same plane we observe Jupiter here on Earth.  However with the Juno spacecraft, we now have a chance to enter into a polar orbit and take pictures of the polar regions.

Part of the reason behind JunoCam is to get the amateur astronomer community participating in selecting what parts of Jupiter the camera should be snapping pictures, and of processing the raw images.  The image below was captured by JunoCam during Juno’s 3rd swing around Jupiter at a distance of about 37,000km.  The south polar region is on the left.

Jupiter - December 11, 2016 JunoCam - Juno Spacecraft

NASA, JPL-Caltech, SwRI, MSSS; Processing: Damian Peach

The above was the PeriJove3 encounter (3rd pass), and voting on the next PeriJove4 will take place between January 19th and 23rd 2017.  This is where the community can propose and vote for Points of Interest to photograph with JunoCam during the rather quick (2 hours) close pass with Juno.  You can even submit images of Jupiter taken with your equipment to help plan the Points of Interest.

Ref: JunoMission

Link

TIME  magazine has released what their editors consider the best space photos of 2016.

P Crowther, University of Sheffield/NASA/ESA

http://time.com/4510266/best-space-photos-2016
Ref: TIME

DeepSkyStacker – Faster and Better Results (updated)

Tried DeepSkyStacker and I think I’ve found a better and faster way of processing my images.

I had been using IRIS for the better part of the last 6 years, and I remember how impress I was at the results compared to the early versions of Registax for deep sky images.  While  IRIS is quite manual and command-line based, it nevertheless got the job done and allowed me to experiment with different methods.  But now, I decided it was time to move on to something a little modern.  I looked at what others were using, and came across DeepSkyStacker.

DeepSkyStacker

While IRIS offers a complete package, from image acquisition, pre/post-processing, and analysis tools; DeepSkyStacker only performs the registration and stacking.  But it does so in a faster and more efficient way.  DeepSkyStacker can fully utilise RAM and multi-core processing; hence what took 30 minutes in IRIS is now down to 5 minutes in DeepSkyStacker.

It also automates many steps, and you can even save the process and create batches.  So it’s down to load all your files, and then one click to register and stack.

DeepSkyStacker - Processing Files

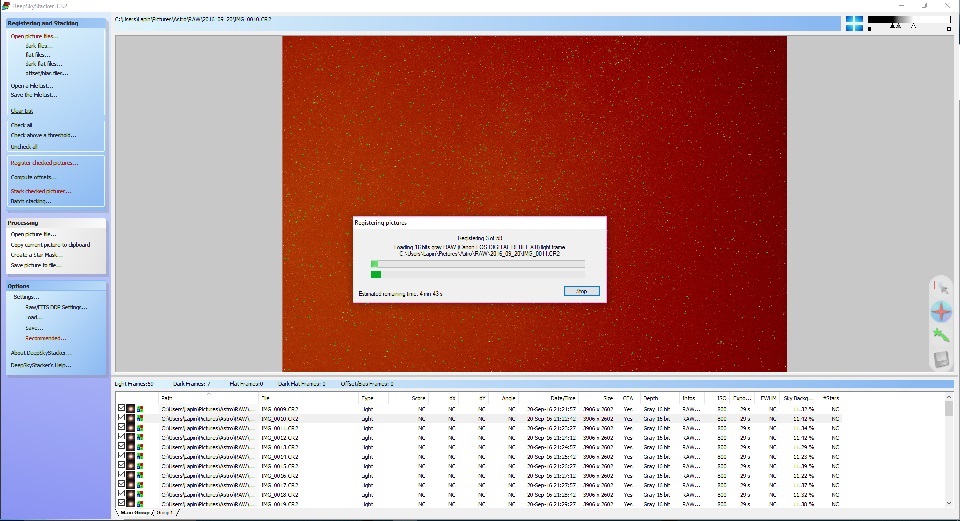
DeepSkyStacker – Processing Files

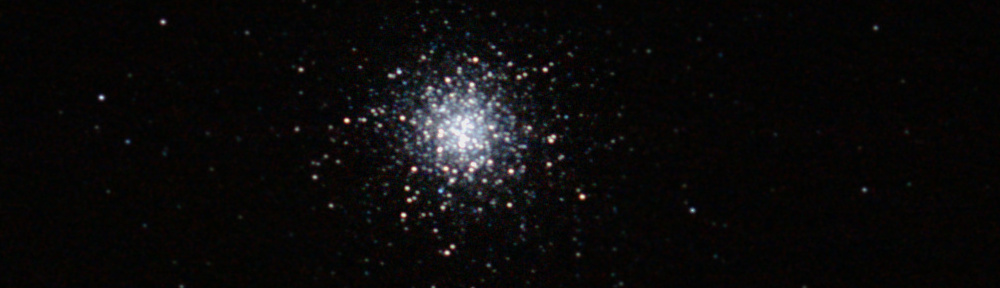
I tried the with some wide field of views I had taken back in September.  And the resulting image appeared to be better.  Now I still have to use IRIS as I like how it can remove the sky background gradient and adjust the colors.  And GIMP is still required for the final adjustments.  So here are the main steps that gave me good results:

  1. Load the light, dark, offsets and flat frames (I had no flats or bias/offsets in my trial run, but that didn’t appear to cause an issue)
  2. Ensure that all pictures are checked and select to Register the checked pictures
  3. For the stacking, I found that selecting RGB Channels Background Calibration provided good color, and used the Kappa-Sigma clipping to remove noise.
  4. After stacking DSS will create an Autosave.tif (32-bit TIFF file).  I need to convert this into another format, but without loose the dynamic range.  My current solution is to use Microsoft Photo Gallery to open and save another copy as JPEG.  Finally did a quick stretching of the RGB levels to ensure better dynamic range when saving to 16-bit TIFF.  16-bit TIFF appears to be the only one that will open correctly in IRIS.
  5. Once in the image loaded in IRIS to remove the background sky gradient.  And then save it in BMP format for import into GIMP.  Yes I know I another file format, so far it’s what I find works best.  GIMP converts FITS and TIFF to 8-bit, causing incorrect color depth.
  6. Final adjustments with levels, light curves, saturation, noise filtering, etc.. is done in GIMP.

Now for a little more playing around, and trying it on some on my older pictures.

UPDATE:
DeepSkyStacker saves files in 32-bit TIFF by default.  After stacking many images the dynamic range is quite large, and this is not data we want to loose.  But the problem was finding a program that was able to correctly handle the 32-bit file format.  The next release of GIMP (version 2.10) will handle 32-bit files, but GIMP 2.8 was limited to 16-bit and even there it would convert the image to 8-bit for manipulation (GIMP 2.9.2 and up might work, but needs to be compiles on your computer – development package).  Not good…  Before downloading yet another photo imaging software I tried some of my current programs and found that the  Microsoft Photo Gallery software for Windows 10 does a great job of handling the 32-bit TIFF files.  Once the image opened, under File – Make a Copy I save a version in JPEG.  Yes I know not ideal, but I avoid a lot of the quantization conversion error and I’m able to continue my processing in IRIS and GIMP.