Star Trails – Quick and Easy

Creating night-time images with star trails is the easiest and should be your first project when getting into astro photography.

Back in the day of film, you had to stomp down the diaphragm and use a shutter actuator to take one VERY long exposure. And if something happened during that long exposure (bird, plane, clouds, etc…) your photo was ruined. With digital, you can instead take LOTS of short exposures and digitally stitch them together, leaving out the ones that got ruined.

Setup your camera to take a series of short exposure photos, 10 seconds is good. For some tips on how to setup your camera, head over to my Astrophotography Cookbook page.

If you are starting out, or want to simply do this quickly, skip taking Bias, Dark and Flat photos. These are used to improve the final image processing and make more sense when you wish to do some deep sky stacking.

For this exercise I configured the intervalometer of the camera to take 10 second exposures with a 1 second pause between (i.e. the shutter is pressed every 11 seconds and each click is a 10 second exposure). I left the camera operating for a little more than one hour, with the result over 400 photos captured.

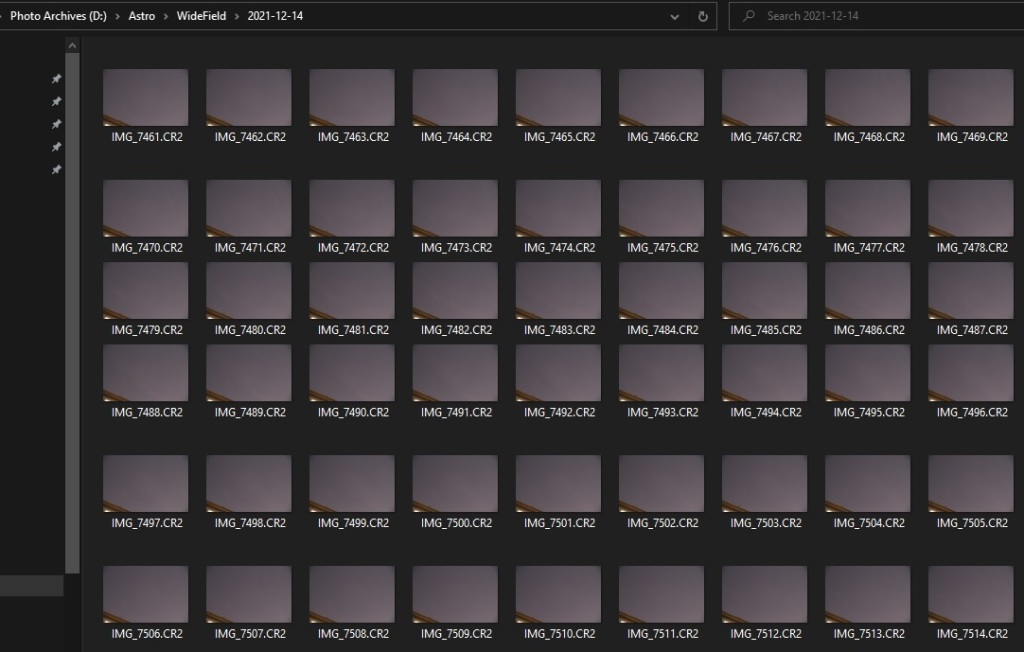
It’s important to review all the photos and note down the ones to exclude from the final image, things like camera movement because you knocked the tripod, a plane, clouds, etc. It’s possible that from the 438 photos taken, only the range 5 to 352 will be good to build the star trail image as clouds decided to roll into view on the 353rd photo.

The next step is to import the photos into Deep Sky Stacker. This is done by using the Open picture files… command. As I mentioned earlier, the dark, flat and bias can be skipped, these are not required. But if you have them, they will improve the quality of the final image. Don’t forget to select Check all before moving to the next step, and to uncheck any photos you want to exclude if you did a bulk import.

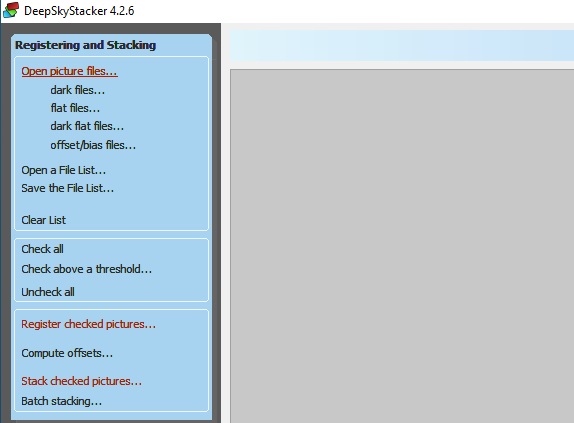
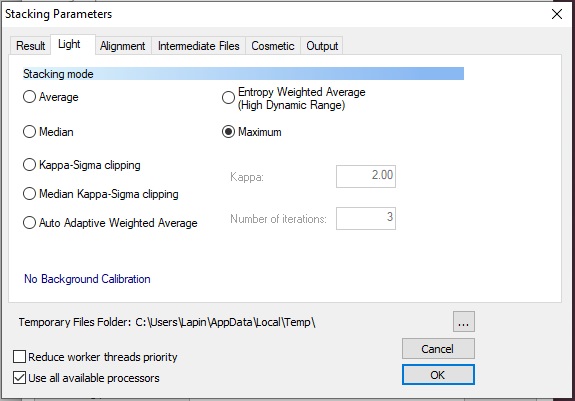
Once the photos are selected, go straight to Stack checked pictures… In the window that pops-up, hit the Stacking parameters… button and select the following:

  • Result – Standard Mode
  • Light – Maximum
  • Alignment – No Alignment

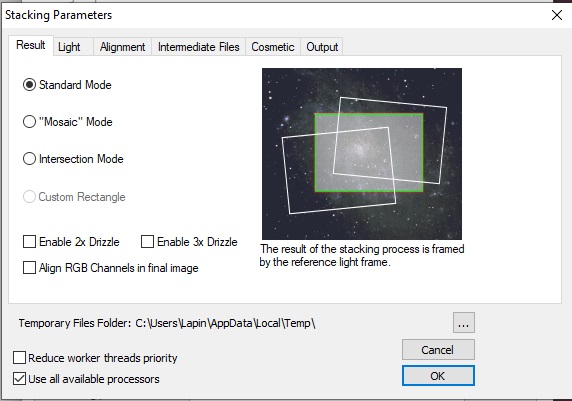
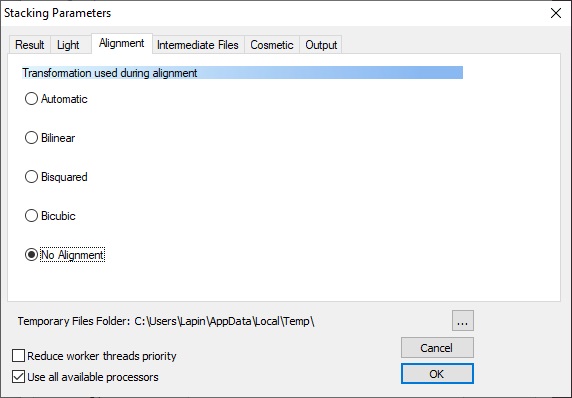
The remaining tabs can remain with the default setting. Hit OK and the program will now start processing all the photos. Note that DSS will still register each image even if you selected No Alignment. If you know how to prevent this waste of time, please tell me in the comment below.

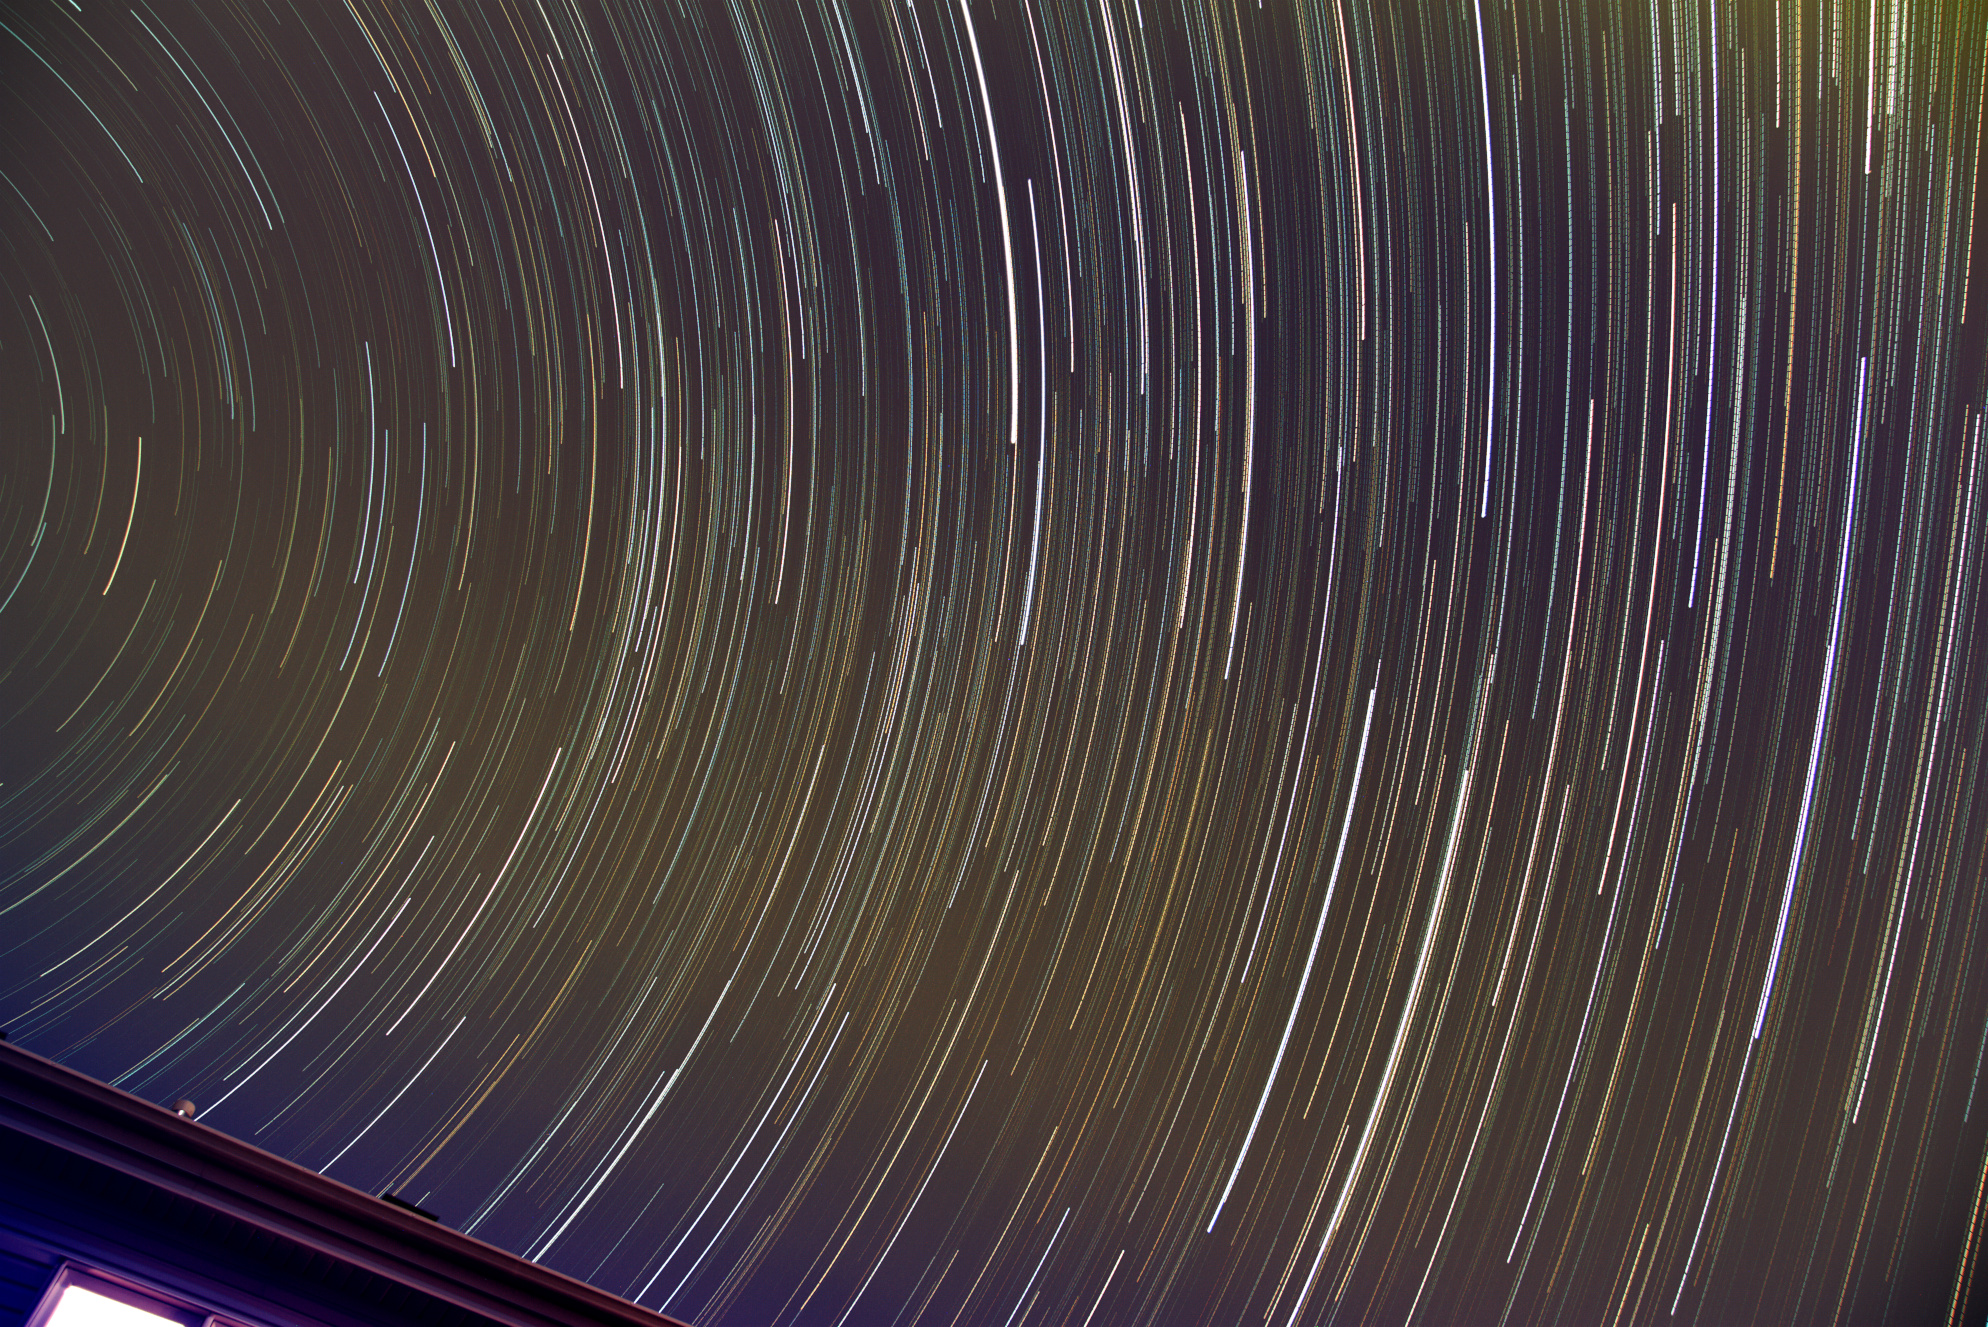
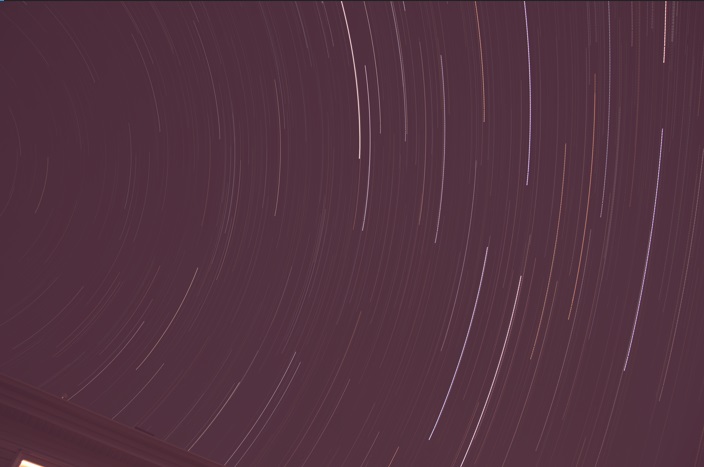
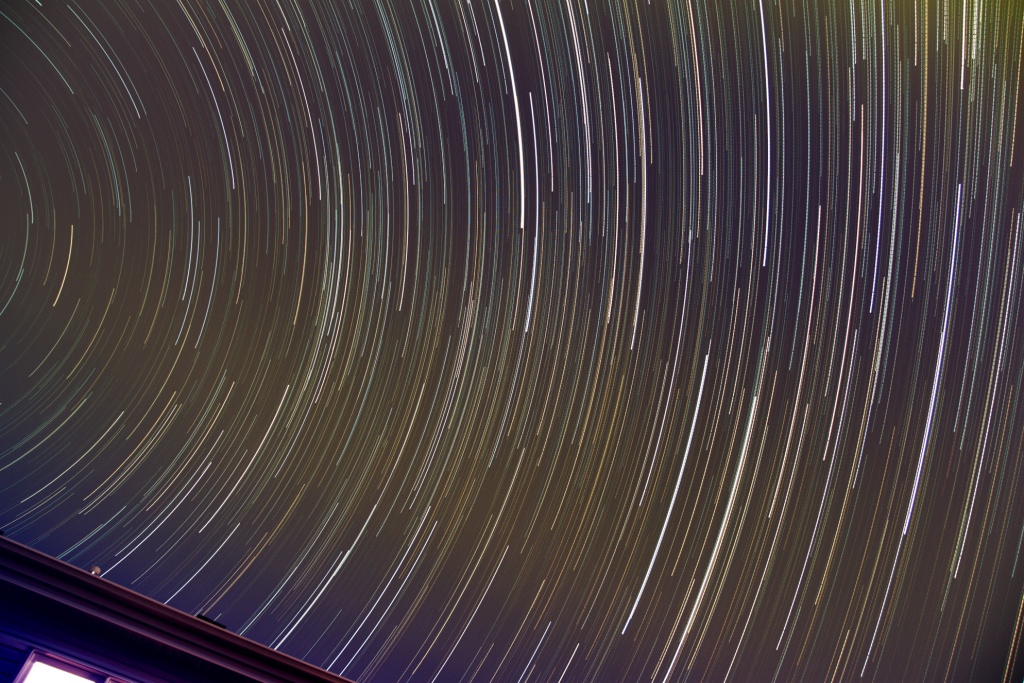
The end result is something like the image below. Base on your the quality of your sky, the camera setting, color balance, etc… various level of work will be required to make it look nice, but you now have something to import into your photo editor and correct all that.

In my Post-processing section of the Astrophotography Cookbook, I provide some tips on how to correct for things like sky gradient.

Clear dark skies!

December 13 – Trying to catch the Geminids

About a week ago I crossed on my news feed that the Geminid meteor shower was peaking on the 13th and 14th and it should be a good year. At the same time I saw some pretty impressive photos of photographers catching spectacular fireballs as these tiny dust and grains of rock plunge into the atmosphere.

Braving the below freezing weather I setup the Canon 80D on a tripod in the back yard to see what I could catch. I read that the best time for the Geminids is 2am, I wasn’t going to stay up that late on a weeknight, so 10pm would have to do.

Wanting to capture as much of the sky as possible, the zoom lens is set to 17mm and wide open at F4. Note that I live in the city with considerable light pollution (I guess that’s what happens when electricity is cheap) which meant only the brightest meteors would be visible. Playing around with the settings I quickly concluded that at ISO1600 10-seconds of exposure would be the longest I should use to avoid having an over exposed sky. Normally it’s best to have the image intensity peak on the left half of the histogram. This can be quickly checked by viewing a captured image and selecting the Info option.

The camera operated for over an hour and managed to take 304 images before the memory card was full. The camera could have kept going much longer had I wiped the card clean before setting up as the battery still had over 25% charge.

Once the photos transferred on computer I reviewed all the images and identified those that had what appeared to be a meteor, plane or clouds such that I could do the necessary processing later on.

I know the chance of catching a spectacular fireball is slim, but it’s still interesting to review the images for any surprised and explore the various types of processing that can be done.

The easiest and quickest thing to do with all these images is a time-lapse movie. This is essentially a no-brainer. I used Canon Digital Photo Professional 4 to perform some color and brightness corrections on the photos prior to creating the movie. The benefit of this software is that you can save the “recipe” you used on one photo and apply it to all. I also did a batch processing to generate individual JPEG with 1080p of resolution to limit the quantity of GB of intermediate files required for this time-lapse movie.

The clouds that showed halfway through the sequence limited what I could do next with regards to “processing”. My next plan was for star trails!

I selected the longest stretch of images without clouds and then stacked them without alignment, using the ADD MAX operation in DSS. The result will be star trails as well as light trails from any passing plane. The image below is 122 individual 10 second exposures for just over 20 minutes total exposure time.

Tracks from two planes are clearly visible over the arc motion of the stars. A third plane much higher and on a different flight path also crossed the image if you pay close attention.

The timelapse and the star trails are two quick and interesting results from the photo session, but that was not my initial plan. Next I created a “starless” version of my night sky to serve as a background. This was achieved by selecting 8 images 1 minute apart and stacking them using the SIGMA MEDIAN operation. DSS will compare the pixels of all 8 images and if it falls outside a defined sigma distribution, the pixel will be replaced with the median value. As the images are once again not registered or star-aligned, the foreground will remain fix while the stars will move. As the stars move between each image, they will fall outside the sigma distribution and will be replaced by the median value instead.

With my starless image completed, the next step is to use GIMP to blend together the individual meteor trails with the starless nigh sky image. I use a MASK to select just the meteor trail of each photo that I previously identified contained a meteor. Each photo was manually added as a layer to the starless background.

Picture saved with settings applied.

There’s a total of four faint meteor trails as well as one very bright but short lived meteor in the middle. That short bright one ended up being special. Most meteor trails appear only on one frame, but this one left a smoke/dust trail that lingered for a few frames (40 seconds) and can be seen drifting in the high-altitude winds. To best see this, I selected some photos, cropped, enhanced the individual frames and generated an animated GIF.

The last processing I did was select a large sequence of photos that had no clouds or planes but this time register them such that the stars would be aligned between each frame. I simply did an ADD AVERAGE to stack the 62 individual photos, creating the equivalent of a 10 minute exposure of the night sky.

Because the field of view is wide, and I wasn’t in a particularly dark sky area the resulting photo isn’t that interesting, not like some of the other ones of the Milky Way taken while camping away from cities. However I was able to crop the image down to an area that had multiple Open Star Clusters showing up. Swipe to see the photo with the Open Star Clusters identified by their Messier Catalog number.

Click here to enlarge the above photo.

There you have it, a camera outside on a tripod for 1 hour and plenty of interesting results.